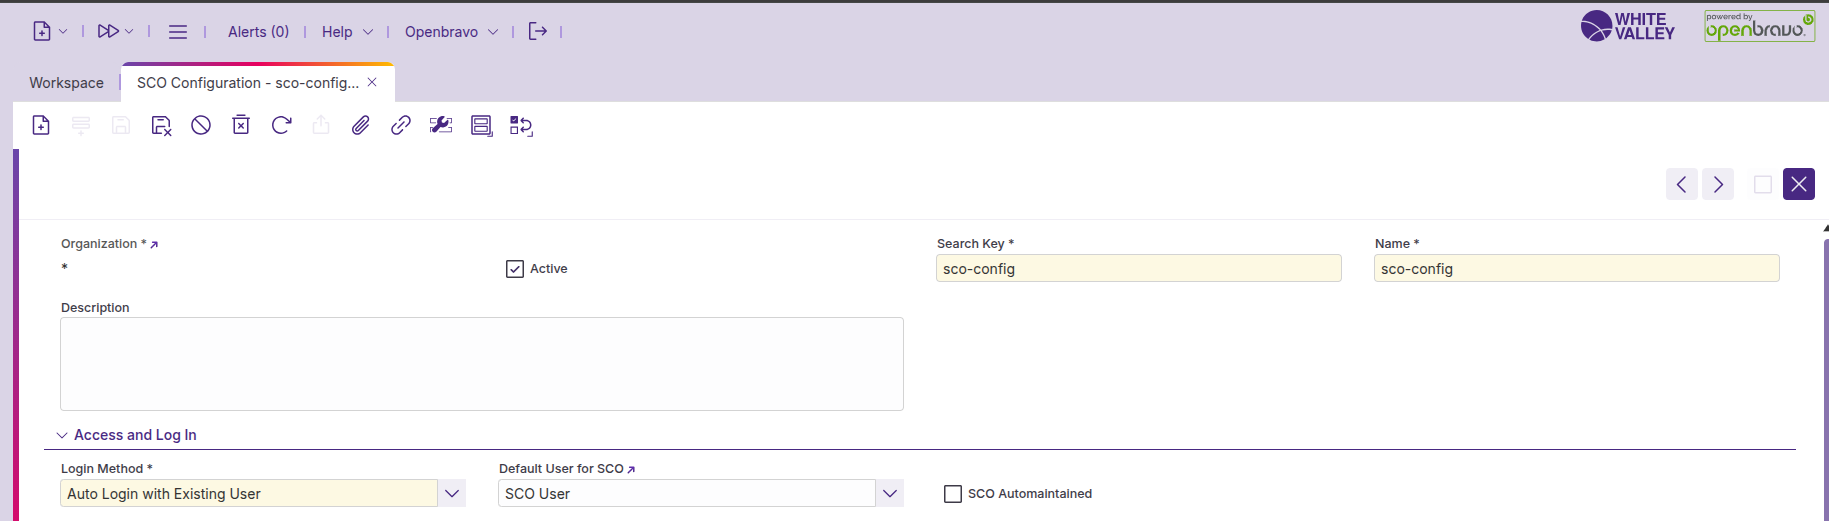
This guide explains how to configure the ‘SCO Configuration’ window in the back office. ‘SCO Configuration’ is a window in the back office dedicated to SCO specifics (under ‘Point of Sale’). It allows for defining records that will then be applied in the ‘Channel - Touchpoint Type’, to define the expected behavior of this terminal when using the SCO.
Create SCO configuration
To create a new SCO configuration:
-
Navigate to the 'SCO configuration' window in the back office
-
Click 'Create' to generate a new configuration record
-
Configure the settings in each section according to your store’s requirements
-
Save the configuration to make it available for terminal assignment
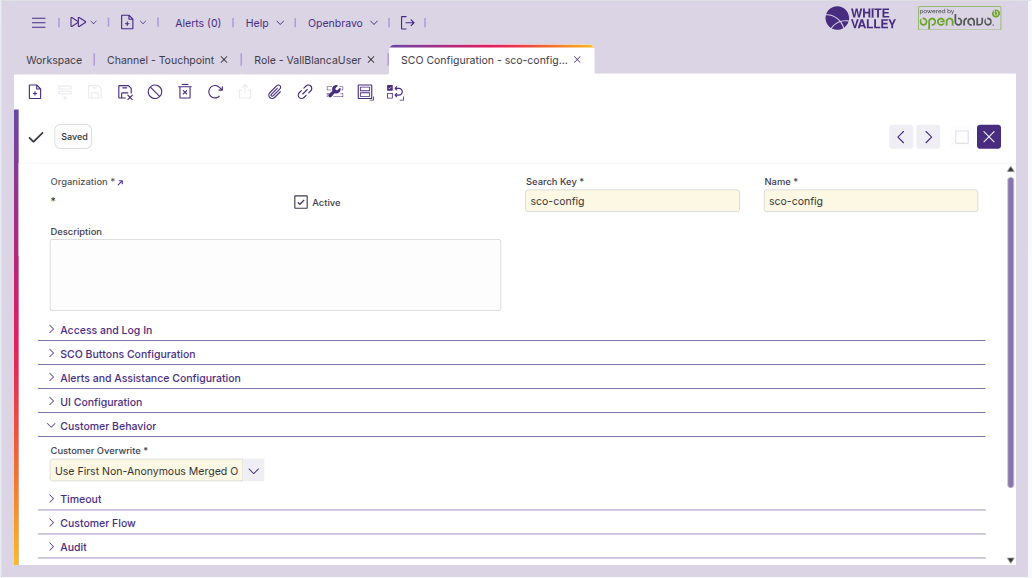
Header settings
The header section contains basic information about the configuration record:
-
Organization: Organization linked to this record
-
Active: Define if the record is active or not. Inactive records can’t be used in touchpoints
-
Search Key: Unique registration code to recognize the SCO
-
Name: Descriptive name of the configuration
-
Description: Additional information about this configuration
Access and log in
Configure how users access SCO mode:
-
Ask for Credentials: The application always requests user credentials before switching the application mode.
-
User POS user: If the current POS user has SCO access, the application switches modes without requesting credentials again.
-
Autologin with Existing User: Define a default user who automatically logs in when entering SCO mode or switching from POS to SCO.
-
SCO Automaintained: Automatic cash up is performed when logging in a new business date, and cash up was not done manually the day before. This field will be shown only when the login method is ‘Autologin with Existing User’. When this field is checked SCO terminal must have this configuration
In the ‘Organization’ window:
-
Business Date: Set it to ‘Automatic’.
-
Force Store Opening: Set it to ‘True’.
In the ‘Payment Method’ window, all payment methods must have:
-
Count Payment in Cash Up: Set it to ‘False’.
-
Initial Count Cash: Set it to ‘False’.
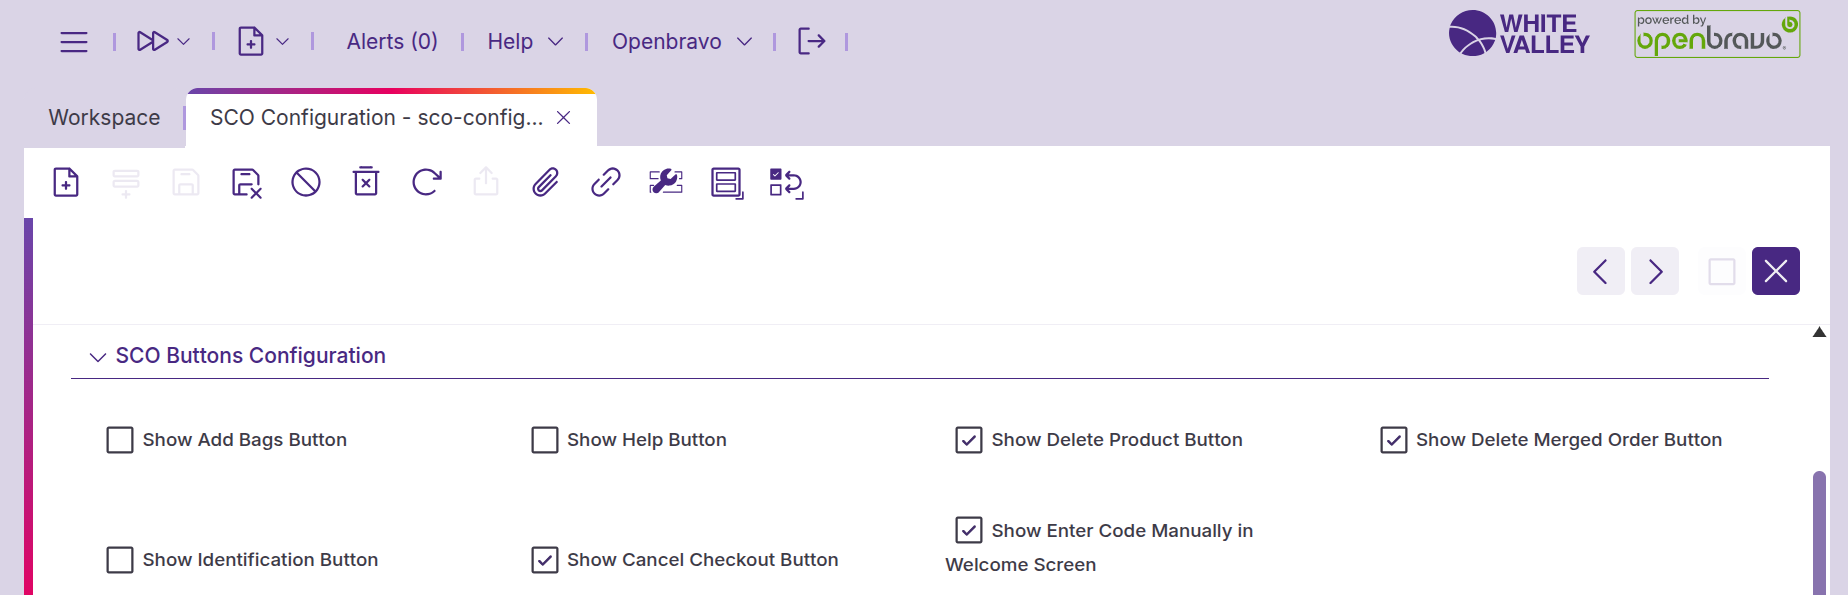
SCO buttons configurations
Control which buttons appear in the SCO interface:
-
Show add bags button: Currently has no effect
-
Show help button: Display a help button in the footer and customer warning popups for assistance requests.
-
Show Delete Product Button: Display a red trash icon next to each product line, allowing customers to remove items themselves.
-
Show Delete Merged Order Button: Display a red trash icon next to merged orders, allowing customers to delete them directly from the SCO.
-
Show Identification Button: Display a customer identification button in the top right corner for customer login before payment.
-
Show Cancel Checkout Button: Display a button in the footer to cancel the entire order and restart the SCO flow.

-
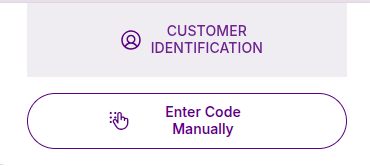
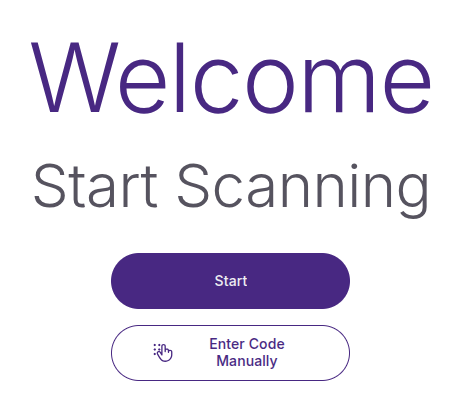
Show Enter Code Manually in Welcome Screen: Display the manual code entry button on the welcome screen.
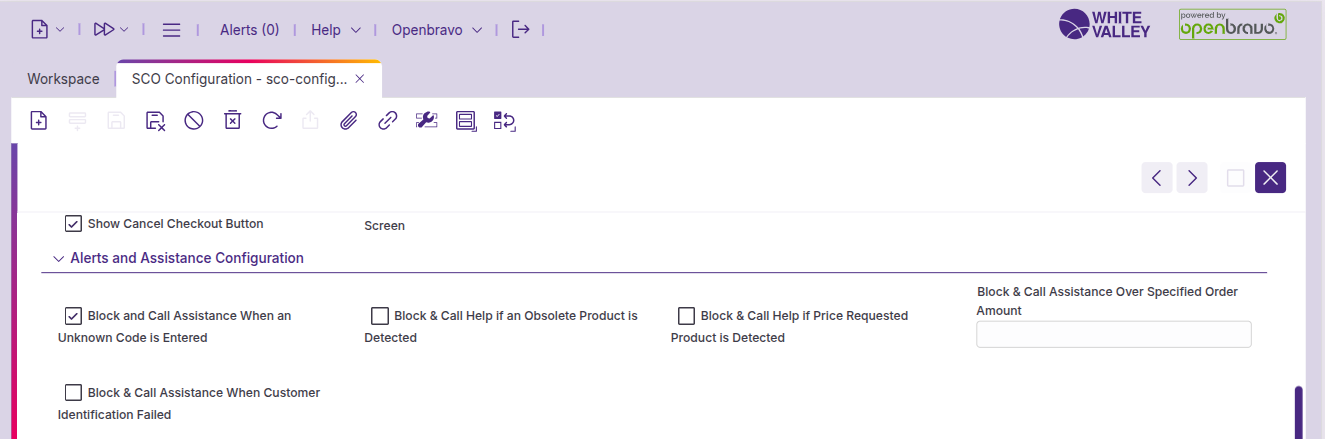
Alerts and assistance configuration
Configure warning and blocking behaviors:
-
Block and Call Assistance When an Unknown Code is Entered: Automatically call for help when customers scan unknown products.
-
Block & Call Help if an Obsolete Product is Detected: Block the terminal and display a pop-up requesting employee assistance when obsolete or dummy products are detected.
-
Block & Call Help if Price Requested Product is Detected: Block the terminal when products requiring price verification are scanned.
-
Block & Call Assistance Over Specified Order Amount: Set a monetary threshold that triggers approval requirements before payment. Leave empty to disable this feature.
-
Block & Call Assistance When Customer Identification Failed: Call for help when customer identification attempts fail.
-
Block & Call Assistance After How Many Identification Tries: Define the number of failed identification attempts before calling for help. Only available when the previous option is enabled.
-
Block & call assistance when payment failed X times: Set the number of payment failures before requiring employee intervention. Setting this to 0 displays the dialog immediately when entering the payment screen.
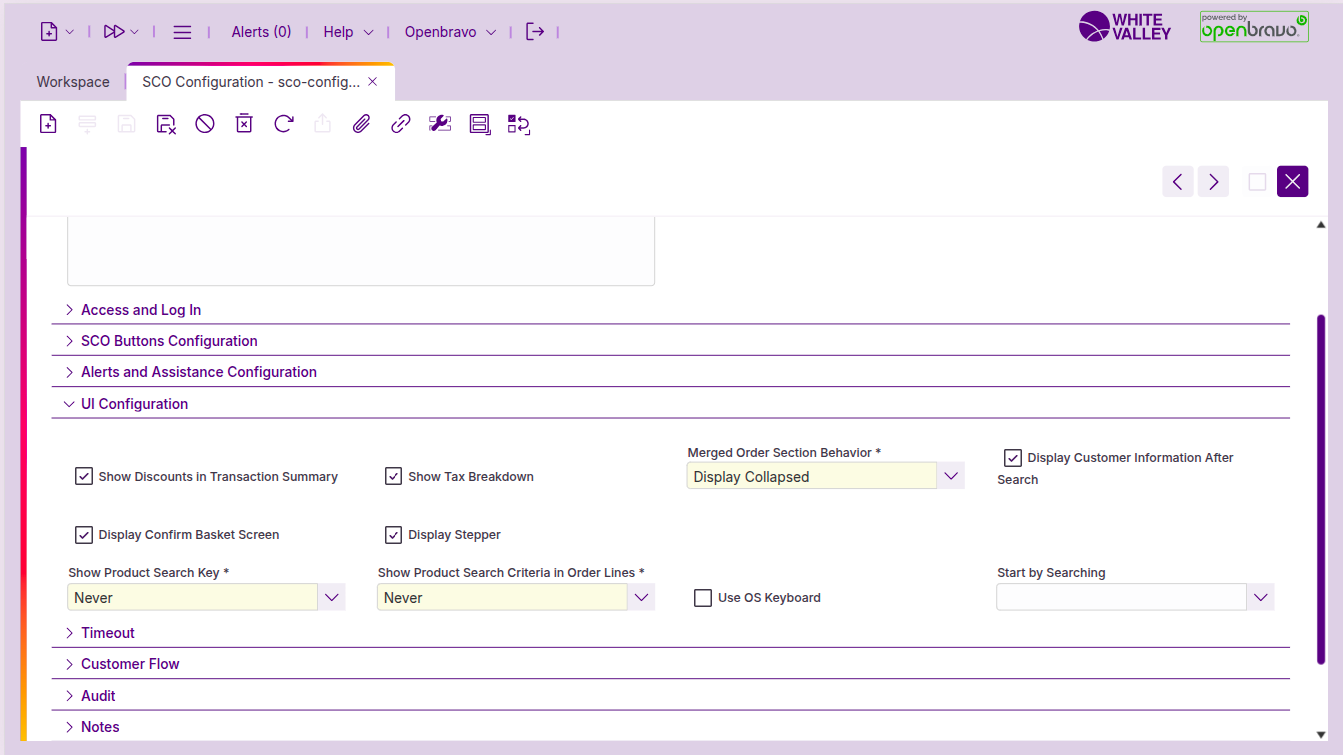
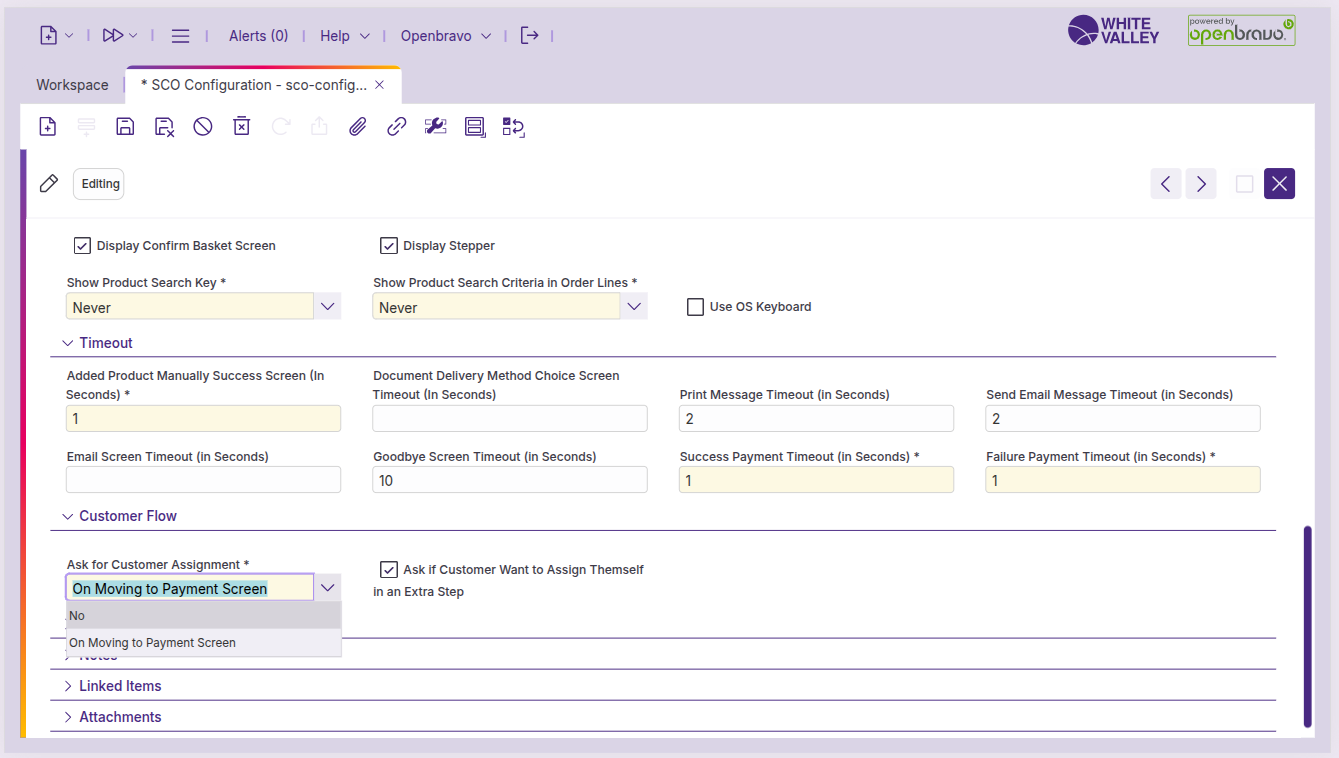
UI configuration
Customize interface elements and display options:
-
Show discounts in transaction summary: Display or hide the 'Product discounts' line in the transaction summary.
-
Show tax breakdown: Display or hide tax breakdown information in the transaction summary.
-
Merged order section behavior: Choose whether merged orders appear collapsed or uncollapsed in the interface.
-
Display customer information after search: Show customer information after successful identification.
-
Display confirm basket screen: Enable or disable the basket confirmation screen.
-
Show product search key: Display the product search key in ticket lines.
-
Show product search criteria in order lines: Display the product UPC/EAN in ticket lines.
-
Use OS keyboard: Hide Openbravo keymaps to use the operating system keyboard instead.
-
Start by searching: Change the welcome screen to an order search interface. Depending on the option chosen, either a numeric or alphanumeric keyboard appears.
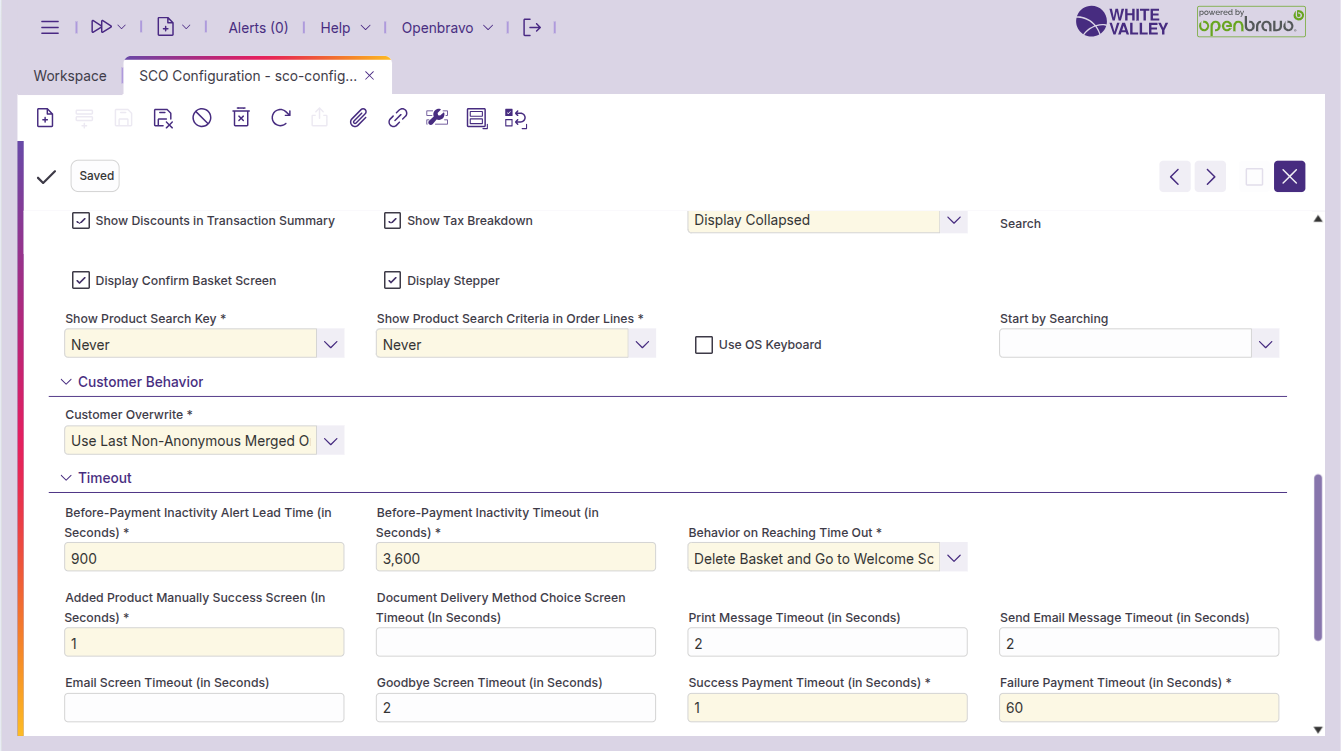
Customer behavior
Allows the customization of the customer behavior when merging orders:
-
Customer overwrite. This field indicates how the customer is assigned in SCO when handling existing or merged orders. The possible values are the following:
-
Do Not Overwrite. The customer assigned through search or from the first merged order (if it was anonymous before adding it) will remain unchanged, even if additional orders are merged.
-
Use First Non-Anonymous Merged Order Customer. The system will use the customer from the first merged order that is not anonymous and will keep it for the entire session.
-
Use Last Non-Anonymous Merged Order Customer. The customer from the most recently merged order (as long as it is not anonymous) will override any previous assignment.
-
Do Not Allow Orders From Different Customers. The system prevents merging orders that have different non-anonymous customers assigned. Only orders with the same customer or anonymous orders can be merged together.
-
Timeout
Configure display timeouts for various screens:
-
Before-Payment Inactivity Alert Lead Time (in Seconds): Seconds before the ‘Before-Payment Inactivity Timeout’ when the alert appears. If 0, the alert never appears. This value must be positive.
-
Before-Payment Inactivity Timeout (in Seconds): Seconds of inactivity before triggering the configured behavior for pre-payment screens. This value must be positive and greater than the ‘Before-Payment Inactivity Alert’ value.
-
Behavior on Reaching Time Out: Behavior triggered when the timer ends without activity. Shown if ‘Before-Payment Inactivity Alert (in Seconds)’ is set. Two options:
-
Delete Basket and Go to Welcome Screen (default): Clears the basket and returns the SCO to the welcome page.
-
Block the Terminal if Products were Added: Locks the terminal and requires approval.
-
-
Added product manually success screen (in seconds): Duration to show the success dialog when products are manually added.
-
Document delivery method choice screen timeout (in seconds): Time to display the document delivery window. Setting to 0 skips the window and applies the default method.
-
Print message timeout (in seconds): Duration to show the printing animation.
-
Send email message timeout (in seconds): Duration to show the email sending animation.
-
Email screen timeout (in seconds): Time to display the email receipt window. Setting to 0 or leaving empty disables the timeout.
-
Goodbye screen timeout (in seconds): Duration to show the goodbye screen. If not set, this screen will not appear.
-
Success payment timeout (in seconds): Duration to show the successful payment screen.
-
Failure payment timeout (in seconds): Time to display the payment failure screen before automatically returning to the previous screen. Minimum value is 1 second.
Customer flow
Configure customer identification prompts:
-
Ask for customer assignment: Define when the system prompts customers to identify themselves. Setting to 'On moving to payment screen' displays an identification prompt after basket confirmation if using an anonymous customer.
-
Ask if customer want to assign themself in an extra step: Only available when the previous field is set to 'On moving to payment screen'. Provides customers with a choice: selecting 'Yes' leads to the customer assignment screen, while selecting 'No' continues with anonymous customer processing.
Language configuration
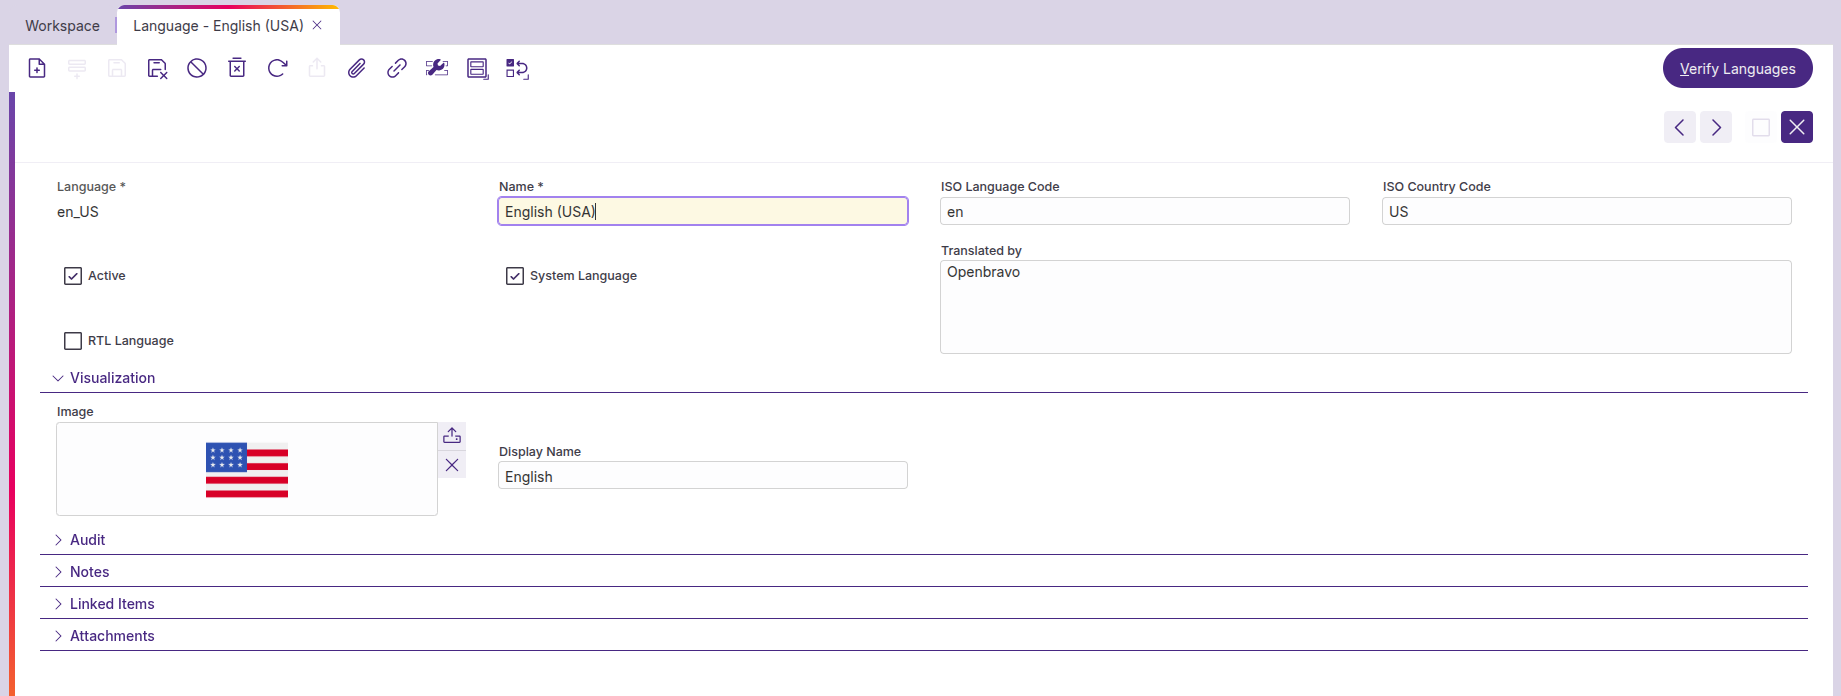
The terminal languages used in the language choice pop-up are defined in the back office in the ‘Organization’ window, under the ‘Terminal Languages’ tab. There is a selector with the system languages. If no terminal language is defined, the system languages will be shown or added to the ‘Languages terminal’ property.
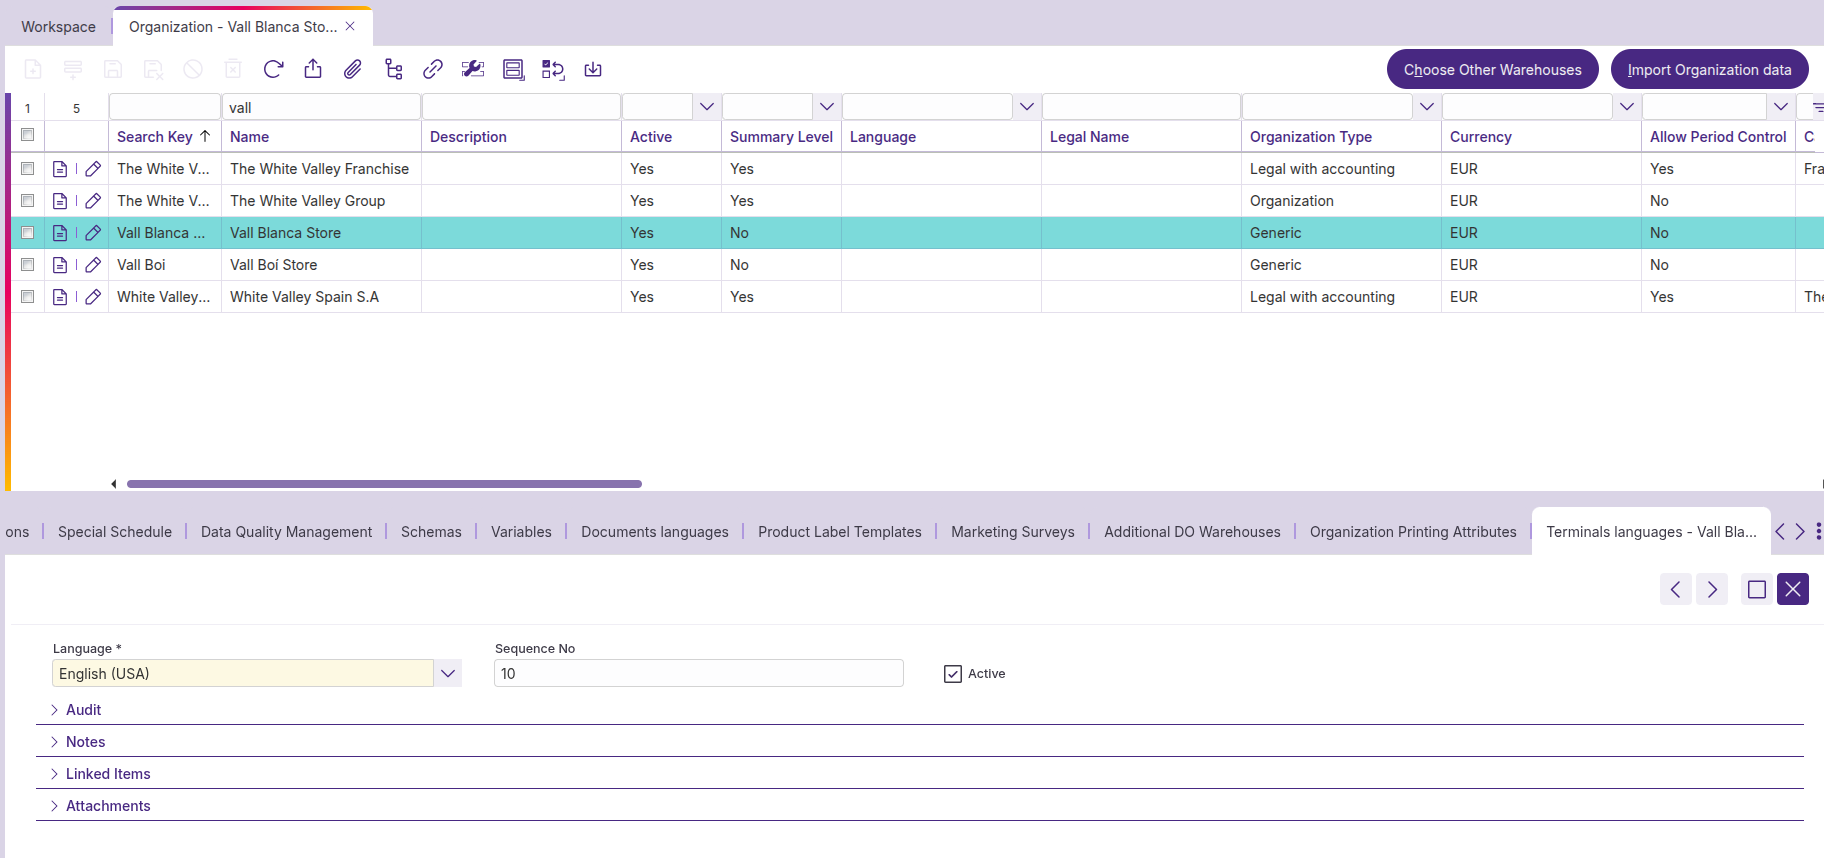
The languages are displayed with an icon if they’re provided in the ‘Language’ window. If not, they will be displayed with a default world icon, and with their displayed names if not provided there names.