
SSMS enables you to register and manage internal warehouse movements efficiently. This system helps you move products and packages between different warehouse locations, assign tasks to warehouse staff, and track all movement activities. You can create immediate moves or assign tasks to be completed later, ensuring optimal warehouse organization and accurate inventory tracking.
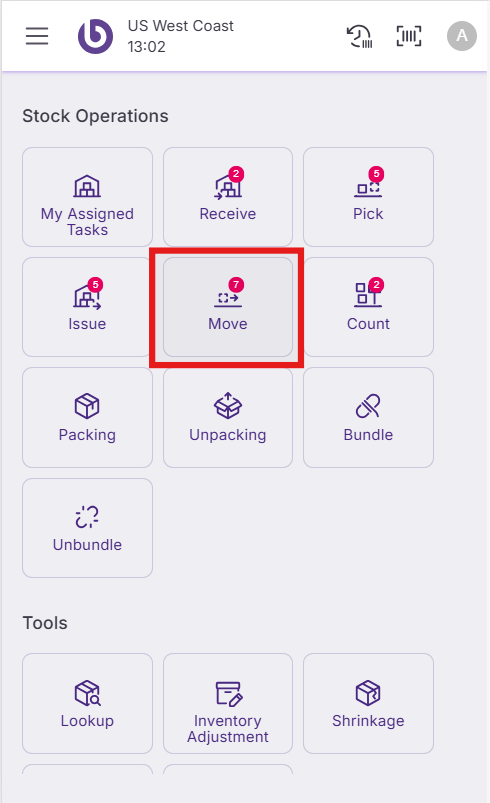
Access the ‘Move’ functionality
Navigate to the SSMS application and log in with your credentials. Select the 'Move' section from the main menu to access the movement management screen.
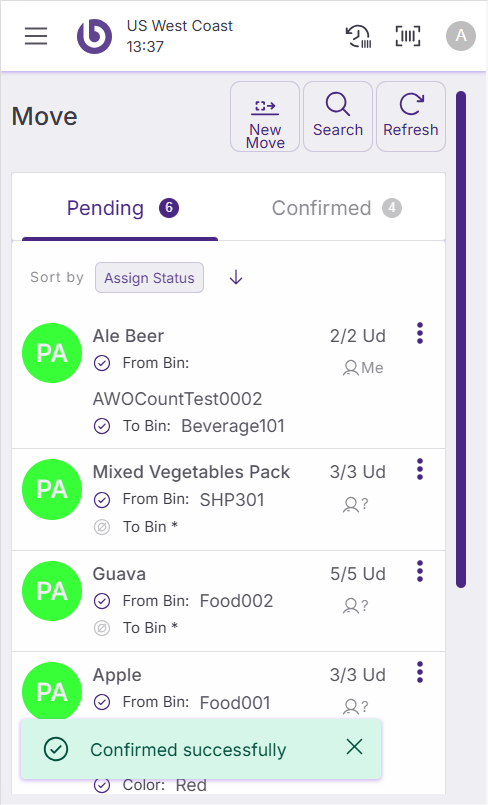
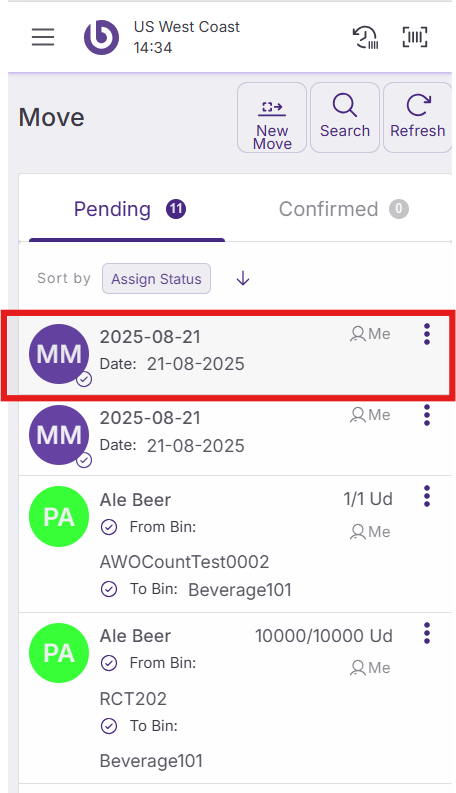
The SSMS 'Move' screen displays pending movements that need confirmation and completed movements from the current session.
The 'Move' screen contains two main sections:
-
Pending: Displays moves awaiting confirmation.
-
Confirmed: Shows moves completed during the current session.
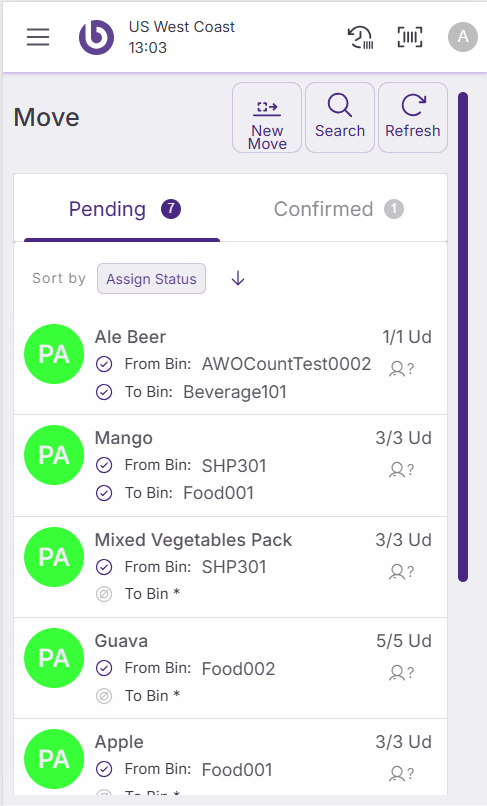
There are some available tools to manage your move tasks effectively:
-
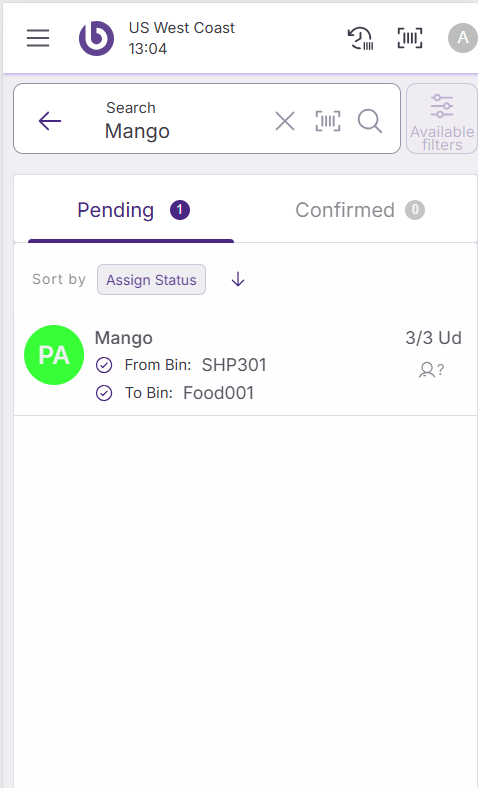
Search button: Filter pending moves by item, box, or location to identify specific warehouse areas that need attention.
-
Refresh button: Update the list to view newly assigned move tasks in real-time.
Move operation types
The button ‘New Move’ allows the user to create new move tasks directly in the SSMS device.
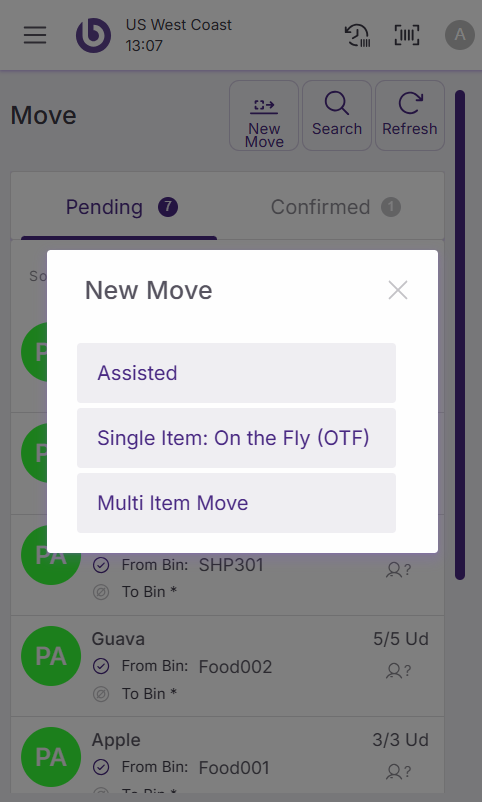
Three types of move operations are available:
-
Assisted: This mode allows users to generate move tasks and assign them to other users directly from the front end. The destination bin can either be specified by the user or automatically provided by the system, offering flexibility and ease of use.
-
Single Item On the Fly: This mode enables users to create and execute a move task immediately for a single item, streamlining the process for quick, ad-hoc movements.
-
Multi Items: Similar to the Single Item On The Fly mode, this mode allows users to generate and execute a move task for a list of items on the spot, making it ideal for handling multiple items efficiently.
When stock discrepancies occur at the point of sale, warehouse staff will use these functions to correct product locations and update inventory records accordingly.
Assisted moves
Select 'New Move' and choose the option 'Assisted' to create a new move tasks for you or for other users.
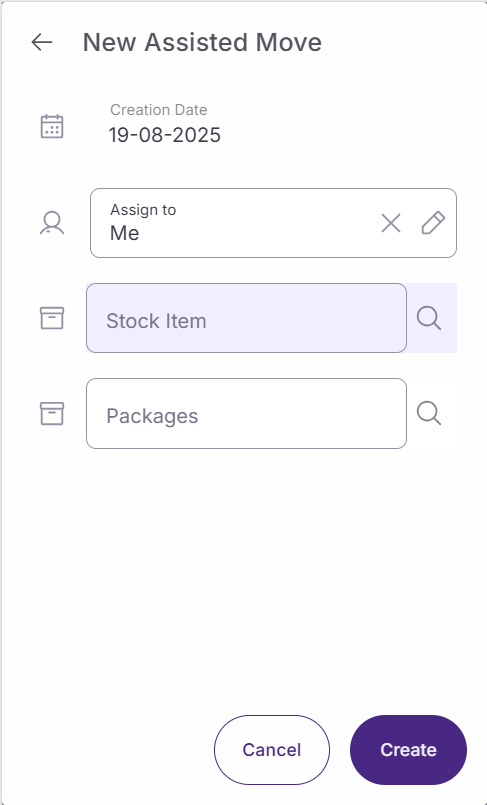
In the 'New Assisted Move' screen, configure these fields:
-
Creation date: Automatically populated with today's date
-
Assign to: Choose who will complete the move task
-
Me: Assign the task to yourself (default option)
-
Different user: Select another user from the dropdown
-
Not assigned: Leave unassigned for later assignment. The task will be available in the ‘Move’ screen.
-
-
Stock item: Use this multiselector to choose items, quantities, and stock locations.
-
Packages: Select packages in closed status using this multiselector.
After configuring the move details:
-
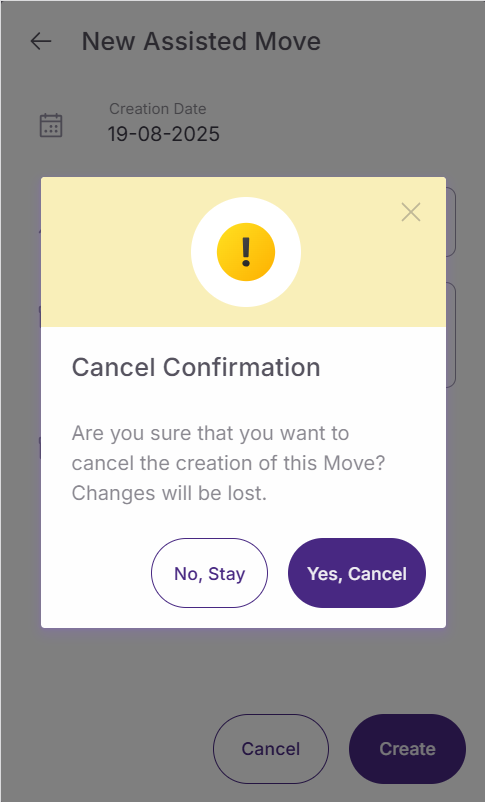
Click ‘Cancel' to close without creating anything. Confirmation message appears with two options: ‘NO, STAY’ to keep in the ‘New Assisted Move’ screen and 'YES, CANCEL’ to close it.
-
Click 'Create' to generate the move tasks and add them to the 'Pending' list.
The system automatically suggests destination bins based on warehouse algorithms, though you can modify these suggestions.
When you open the created move task, you can:
-
Close the panel by clicking the row.
-
Click 'Unassign' to remove the current assignee.
-
Select or change the 'To bin' destination.
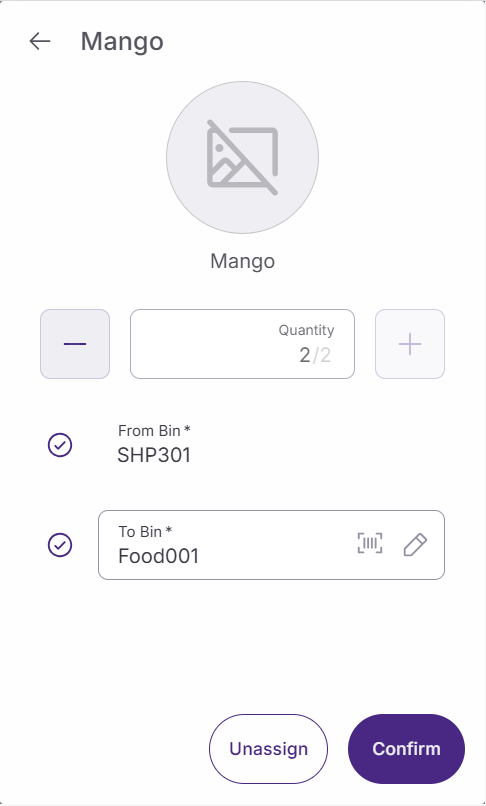
Once confirmed, a successful message appears in the screen and the move task is transferred to the 'Confirmed' section.
Single-item OTF moves
‘Single-Item On The Fly’ is a different flow compared to the previous ‘New Assisted Move’. In this case, in real-time, the user can scan or select the source stock, the product, its quantity, and the destination bin.
Choose 'Single Item: On The Fly (OTF)' for immediate single-item movements. This on-the-fly (OTF) process requires real-time scanning or selection.
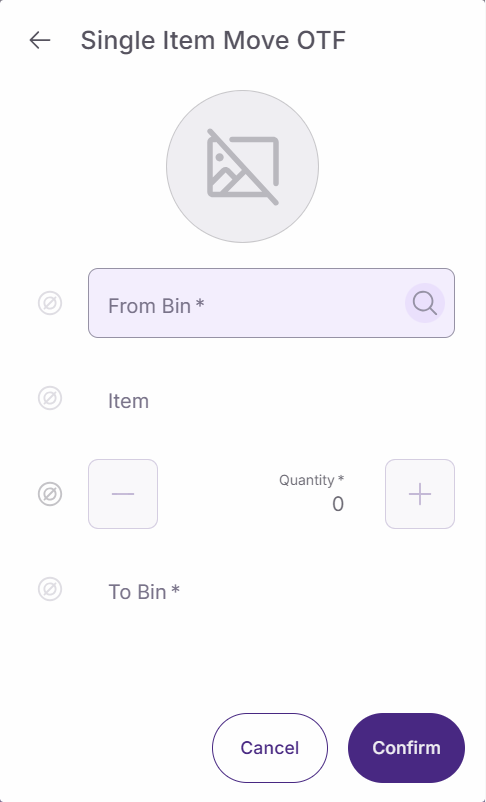
In the ‘Single Item Move OTF’ Configure these fields in sequence:
-
From bin: Scan or select the source location
-
Item: Scan or select the product to move. Upon selecting this option, the image of the selected product will automatically appear, and the counter will be set to 1.
-
Counter: Adjust quantity using the '+' and '-' buttons or by scanning
-
To bin: Scan or select the destination location
The move can be:
-
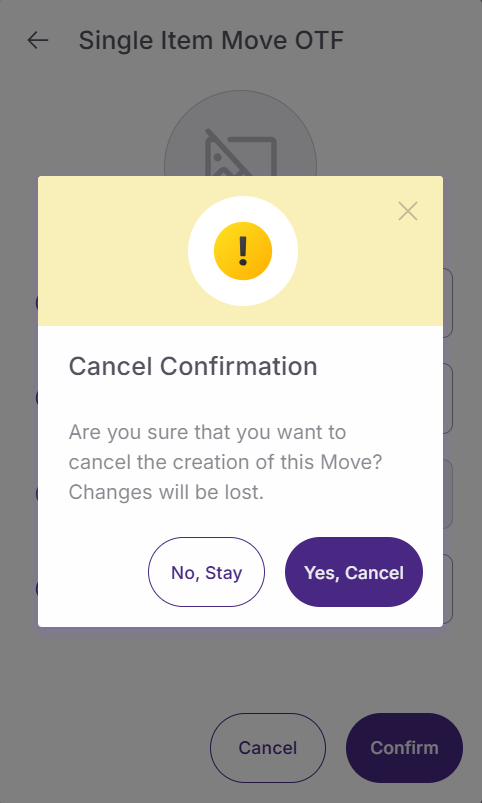
Canceled clicking 'Cancel'. Confirmation message appears with two options: ‘No, Stay’ to keep in the ‘Single Item Move OTF’ screen and 'Yes, Cancel’ to close it.
-
Confirmed clicking 'Confirm' to execute immediately.
Usually, Moves OTF are configured to be automatically confirmed from the screen ‘Single Item Move OTF’. In this case, the move task is automatically confirmed and it is not displayed in the ‘Pending’ list like the previous example of ‘New Assisted Move’.
Multi-move OTF
After clicking on ‘New Move’, select 'Multi Item Move' to move multiple items simultaneously.

The ‘New Multi Move OTF’ screen includes:
-
Creation date: Automatically populated with today's date.
-
Assign to: Automatically assigned to you (cannot be modified).
-
To bin: Select or scan the destination location.
The multi-move can be:
-
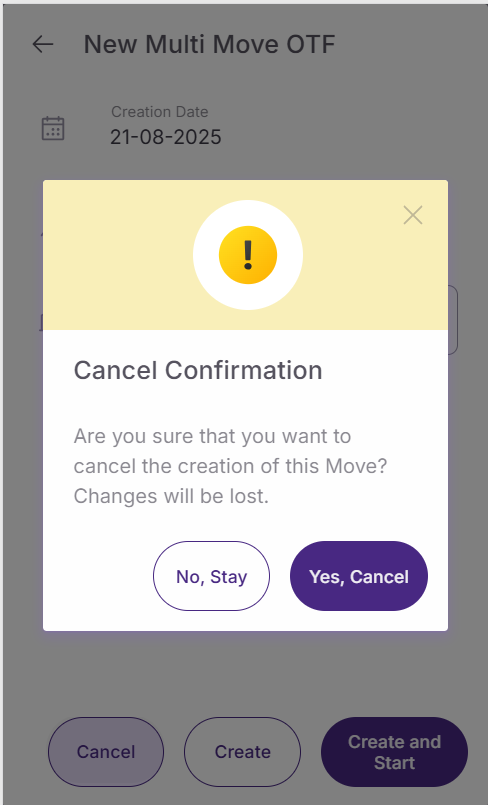
Canceled using the ‘Cancel’ button. A confirmation message is displayed with two options: ‘No, Stay’ to keep in the ‘New Multi Move OTF’ screen and 'Yes, Cancel’ to close it.
-
Creating the ‘Move’ task, using the button ‘Create’. The new ‘Multi Move’ is displayed in the ‘Pending’ section.
-
Starting, using the button ‘Create and Start'. The new 'Multi Move’ is
open and the warehouse operator can select the items or packages for be moved to the previously selected bin.
For that, items can be scanned or searched using the ‘+’ button.
If the user wants to use the scanners, firstly, they must select or scan the ‘Bin From’ using the input field ‘Scanning Bin’ to select the source bin for the items or packages that he plans to scan.
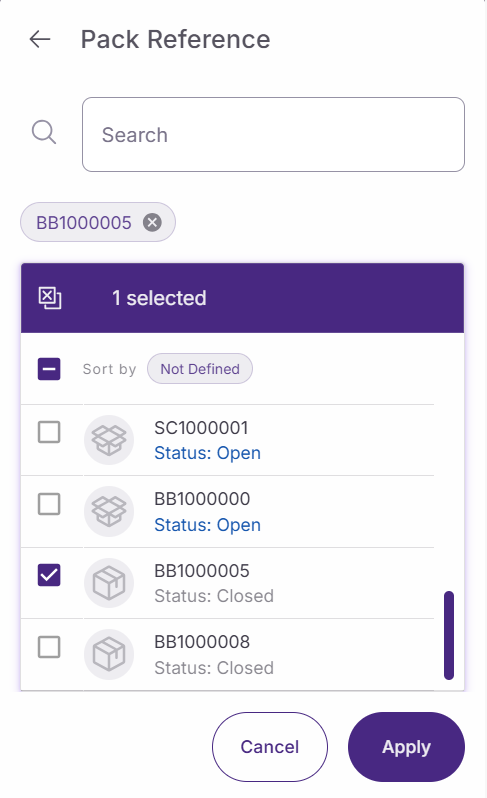
If the user wants to search items to add them manually, they must click on the button ‘+’ to open the item or package selector.
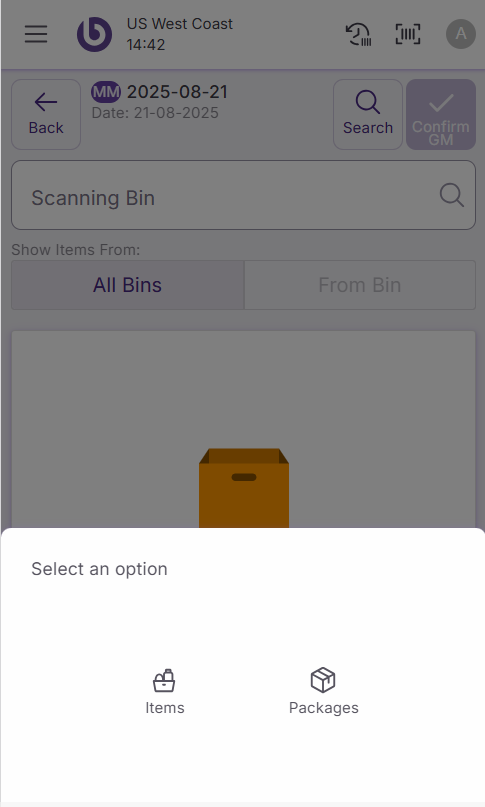
Items can be searched by name, search key, or bin.
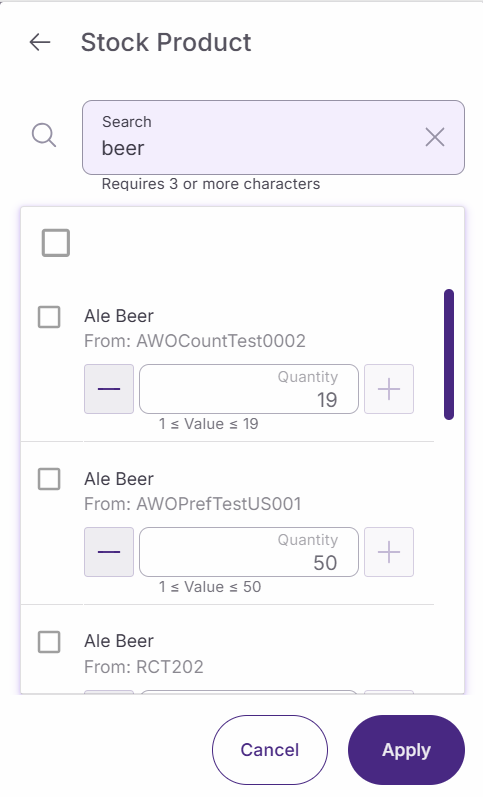
Packages can be searched by number. Only closed packages can be moved.
Once all the items to move have been selected, the multi-move task can be confirmed using the button ‘ConfirmGM'. The multi-move task is moved to the ‘Confirmed’ section.
All the move tasks registered in SSMS can be consulted in the backend, in the ‘Goods Movements’ window.
Action availability and access control
The actions and options shown in the ‘New Move’ dialog are role-dependent. By default, if a user does not have permission for a specific action, it will not appear in the interface.
This behavior can be overridden per warehouse by defining a custom UI configuration in the ‘Warehouse Definition’ window.
For more details on how access is configured, see the Role and User Action Setup in SSMS section.
|
Option |
User action |
|---|---|
|
Assisted |
OpenNewAssistedMoveDialog |
|
Single Item: On the Fly (OTF) |
OpenNewSingleMoveDialog |
|
Multi Item Move |
OpenNewMultiMoveDialog |