
Receiving delivery notes is a warehouse operation that allows your store to process incoming goods from suppliers or distribution centers. This functionality helps track inventory as it arrives at your location and ensures accurate stock levels. The SSMS handles both planned deliveries and unexpected receipts through a systematic receive process.
Introduction
A delivery note is a non-formal document that facilitates goods reception. Delivery notes allow you to make good receipts without using dedicated purchase or distribution orders, though delivery note lines can also be linked to purchase orders or distribution orders to offer the possibility to pack shipment and reception.
Delivery notes can be:
-
Pushed by API when the content is known.
-
Created on the fly when a reception is not expected in the store, that is, a blind receipt.
-
Registered directly in the back office of the system.
There are two main types of delivery notes:
-
From supplier: Standard deliveries from external suppliers
-
Linked to distribution orders: Internal transfers between locations
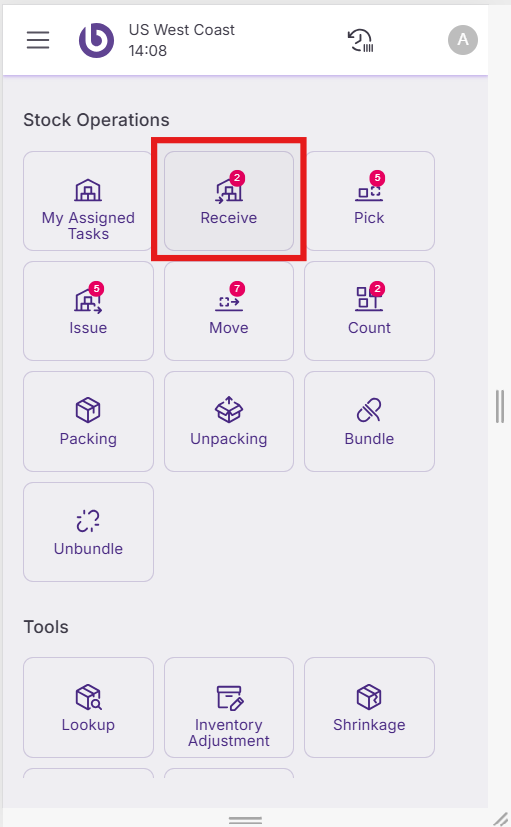
Access to the receive stock operation
The stock operation 'Receive' must be used to process delivery notes. Click on the 'Receive' button in SSMS to access this functionality.
The receive flow allows warehouse operators to check the quantity of items delivered by the carrier, store them in different bins, and add them to the stock. While other documents such as distribution orders and purchase orders can also create receive tasks, delivery notes provide flexibility for various receipt scenarios.
Generate goods receipt tasks from a delivery note
To receive a delivery note, the first step is to generate the goods receipt tasks. In the 'Receive' screen, click the 'New Receive' button.
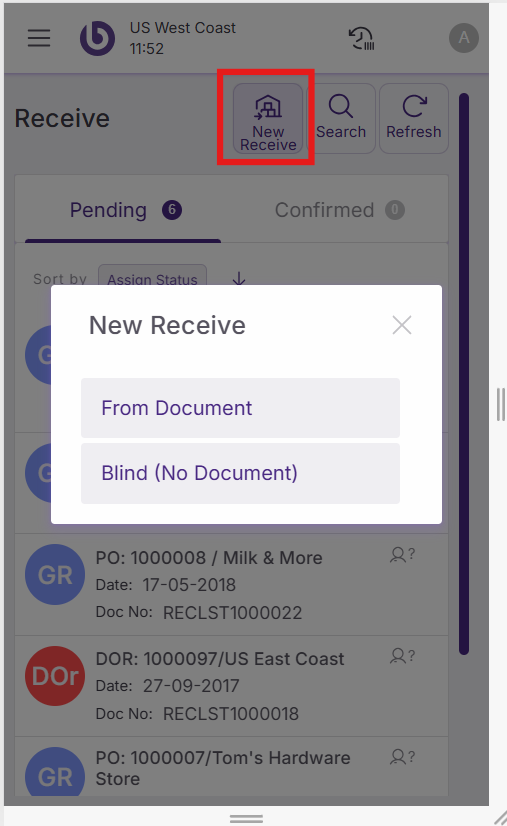
The 'New Receive' dialog displays with two buttons: 'From Document' and 'Blind (No Document)'. To search for a delivery note, use the 'From Document' button.
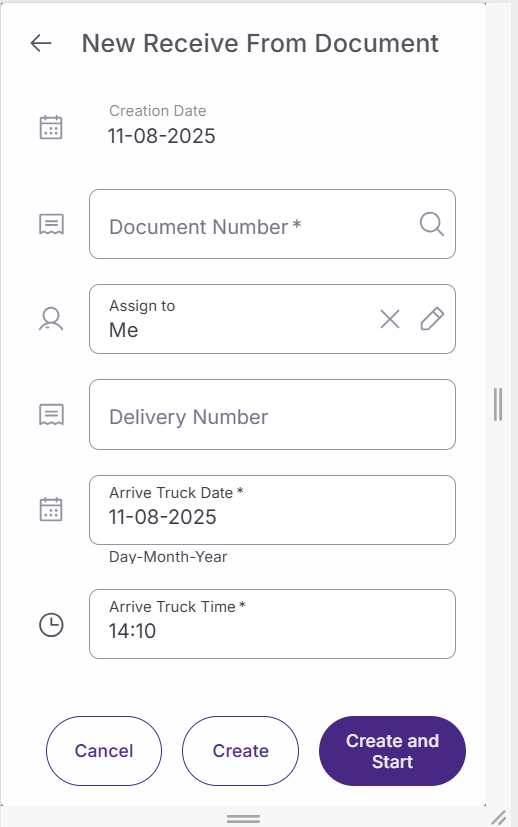
When clicking the 'From Document' button, a screen displays with the following fields:
Creation Date: This field will be automatically populated.
Document Number: In this selector, documents like purchase orders, distribution orders, and delivery notes can be selected. The delivery note can be searched by the system document number or by the reference number provided by the supplier.
Assign To: Choose from three options:
-
Me: To assign the task to the user who is creating it
-
Different User: To assign it to a different user
-
Not Assigned: To postpone the assignment. The task will be available in the 'Receive' section to be assigned later
Arrive Truck Date and Arrive Truck Time: Date and time of arrival of the carrier.
Click the 'Create Receive' button to create the task. The 'Create Receive and Start' button will only be available if the user assigns the task to themselves. This creates the tasks and initializes them immediately.
Process goods receipt tasks from a delivery note
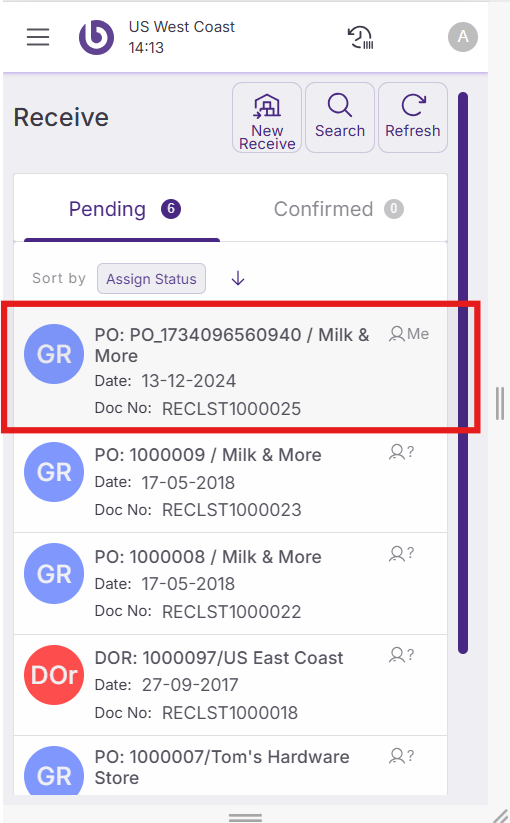
Once goods receipt tasks are created and assigned, they appear in both the 'Receive' screen and the 'My Assigned Tasks' screen.

Clicking on the goods receipt task displays all expected products. The expected quantity can be displayed or hidden by configuration. The counted quantity can also be configured to display as zero or equal to the expected quantity by default.

When the counted quantity displays as zero, users must start counting items using two different methods:
-
Scanning product barcodes
-
Clicking on the task and using the quantity buttons '+' and '-'
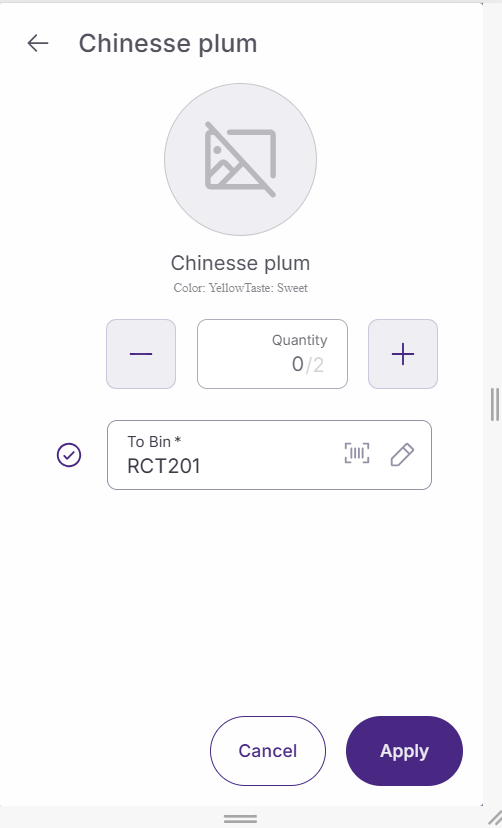
Below the quantity buttons, the 'To Bin' field indicates the bin where items will be stored. The bin can be modified by clicking the edit button or scanning a new bin.
When the quantity equals the expected amount, the item moves to the 'Counted' tab and displays a check icon.
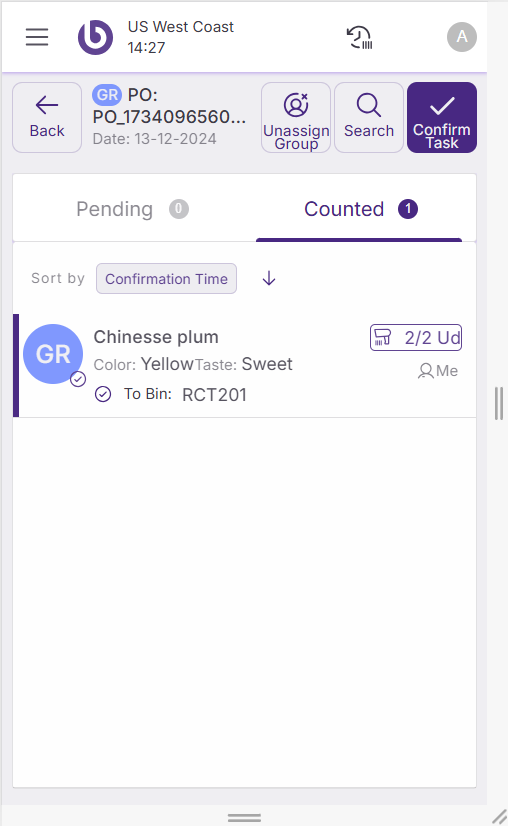
Confirm goods receipt tasks from a delivery note
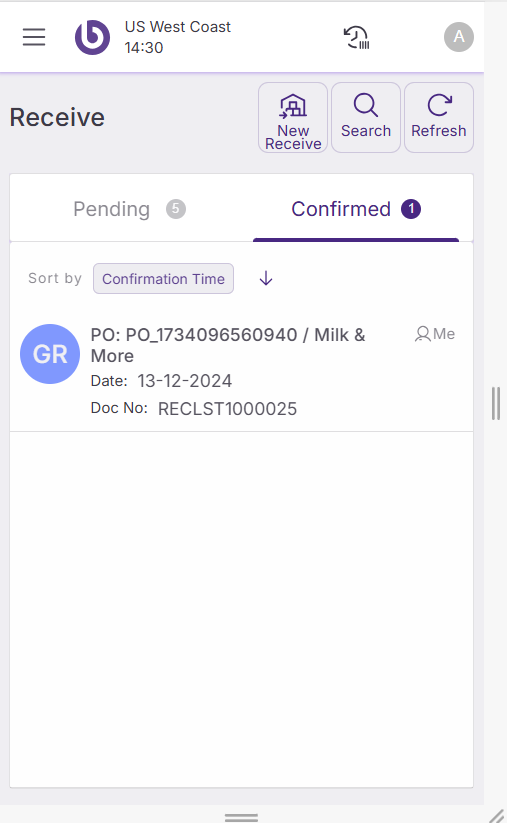
Click 'Confirm' to validate the reception and close the task. When the delivery note is confirmed, it moves to the 'Confirmed' tab in both the 'Receive' and 'My Assigned Task' screens.
Handle a blind receive
A blind receive is a reception not expected in the store and not linked to a document such as an already created delivery note, purchase order, or distribution order. Blind Receives are advanced functionalities and need to be used in exceptional scenarios.
When a blind receive is completed in SSMS, it creates a new delivery note on the fly in the back office that a manager must validate.
Generate a blind receive
To receive a reception without a document, access the stock operation ‘Receive’ first. In the 'Receive' screen, click the 'New Receive' button.
The 'New Receive' dialog displays with two buttons: 'From Document' and 'Blind (No Document)'. Use the 'Blind (No Document)' button for unexpected deliveries.
It is also possible to create a new blind receive from the blind receive transaction.
When clicking the 'Blind (No Document)' button, a screen displays with the following fields:
-
Creation Date: This field will be automatically populated.
-
Assign To: This field will be automatically populated.
-
Vendor: In this selector, select the supplier who sent the goods receipt.
-
Delivery Number: Enter the external delivery number (not mandatory).
-
Description: Set comments and description linked to the delivery.
-
Arrive Truck Date and Arrive Truck Time: Date and time of arrival of the carrier.
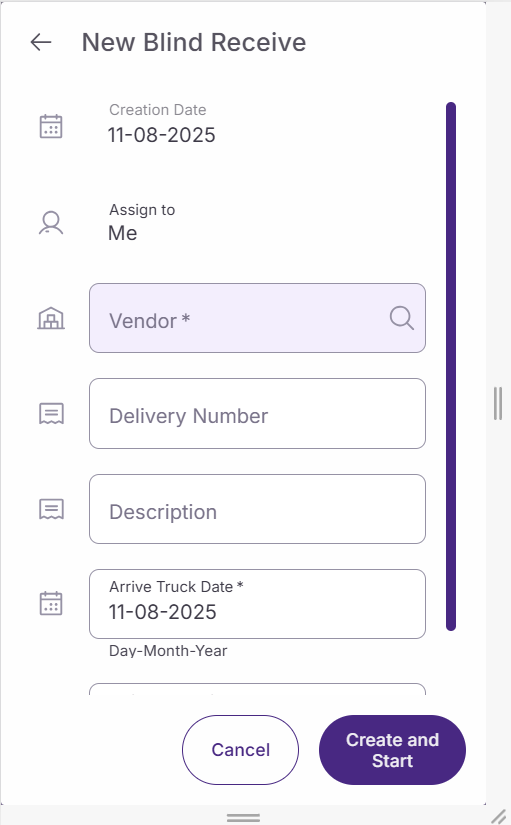
Click the ‘Create and Start' button to create the blind receive, and start adding the products. The newly created blind receive is displayed in the transaction 'Blind Receive’.
Tap the ‘Cancel’ button to go back to the previous screen.
Process a blind receive
A new empty window appears to manage the blind receive. At the top, it shows the internal number, which was created on the fly to permit the reception.
To Bin: Allows you to select the bin to use for the reception.
To add items to the reception, two methods are available:
-
By scanning
-
Manually by using the green '+' button
Upon clicking the '+' button, a new pop-up window displays. You have the option to add either items or packages.

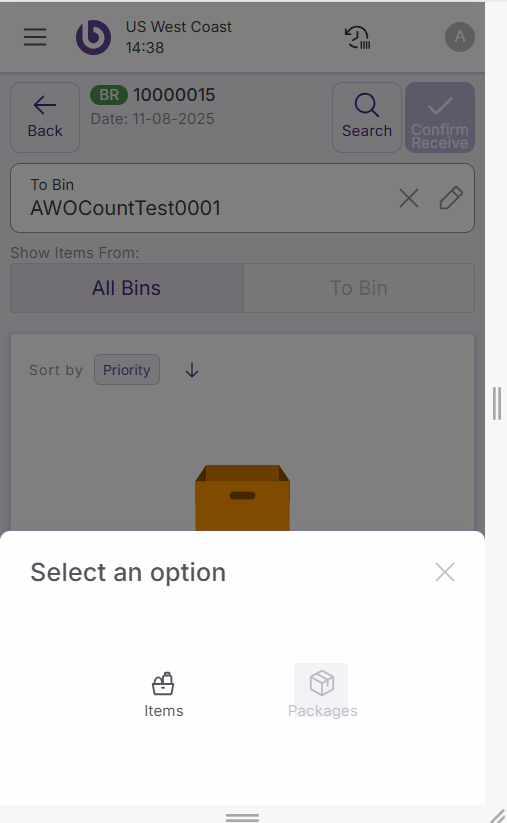
Add items manually
A search window appears where you can enter the item reference or name. During the search, you can select items by:
-
Clicking on the checkbox
-
Using the '-' and '+' buttons to modify the item quantity
Selected items display just under the search box. You can search and select several items simultaneously.
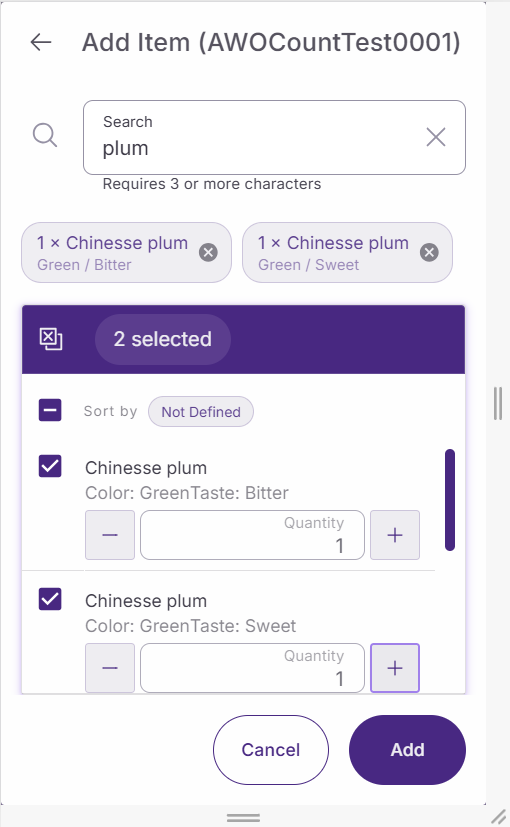
Use the 'Add' button to add selected items to the document and the 'Cancel' button to cancel your search.
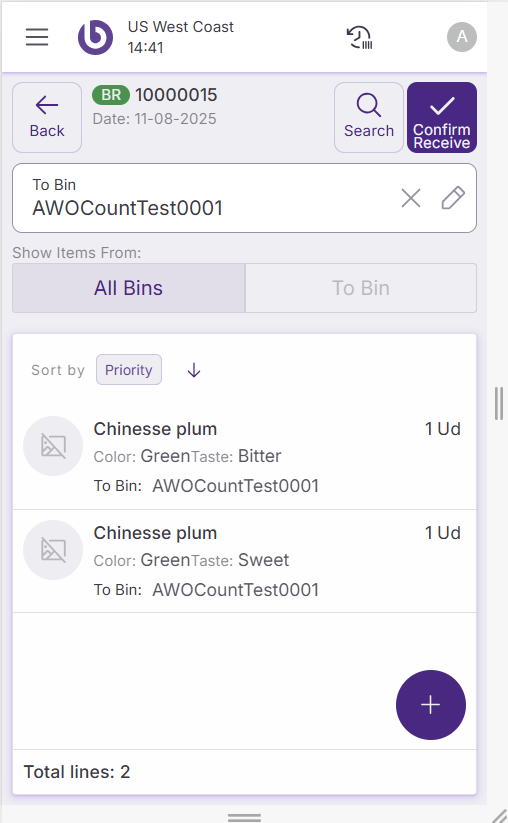
Once items display in the document, you can modify quantities by clicking on the line. Adjust the line quantity using the '+' and '-' buttons, remove the line with the 'Delete' button, and finalize changes with the 'Apply' button.
Complete a blind receive
Upon completion of document editing, click 'Confirm Receive' to register the receipt.
A prompt will inquire whether any discrepancies require reporting.
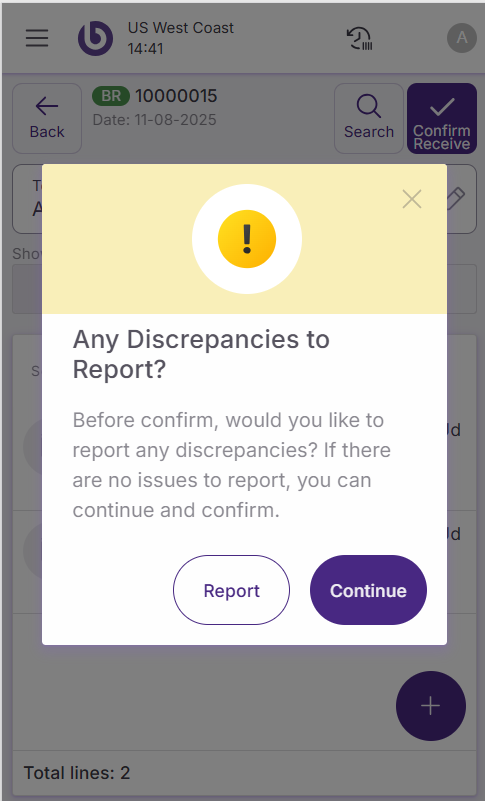
If there are no discrepancies, confirm by clicking the 'Continue' button. If discrepancies exist, select the 'Report' option.
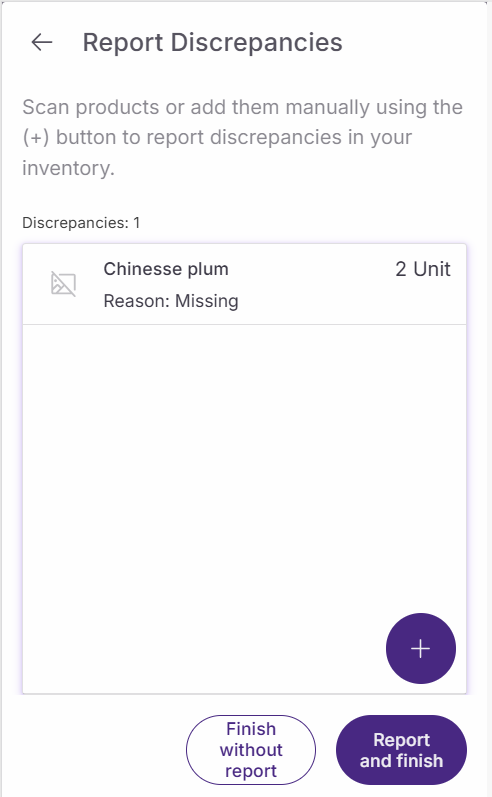
Report discrepancies
A new window opens to select items with discrepancies. You can add items by scanning or use the '+' button to add them manually.
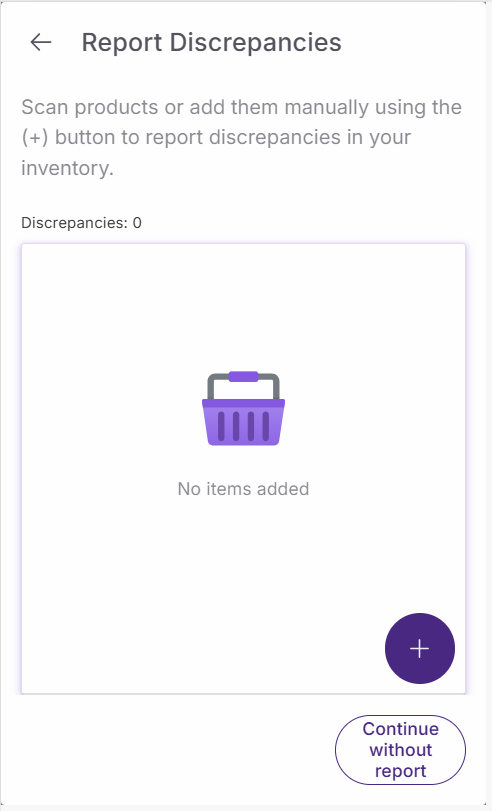
Clicking the '+' button opens a search window where you can search for the item.
Selecting an item opens a new popup where you can define:
-
Item quantity to report: Using '-' and '+' buttons
-
Reason: Of the discrepancy
-
Additional Comment: To add more detail
-
Select same reason for the following scanned items: Helps apply the same reason to the next scanned items
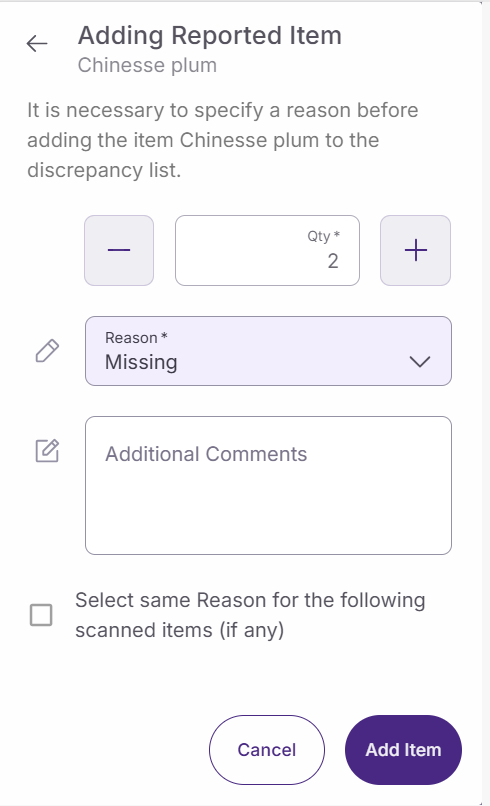
Use the 'Add Item' button to validate the entry and add the item to the report discrepancy list. Use the 'Cancel' button to avoid the process.
In the report discrepancies window, you can use:
-
Finish without report: Button to avoid the discrepancies declaration
-
Report and finish: Button to publish the report and finish the blind receipt
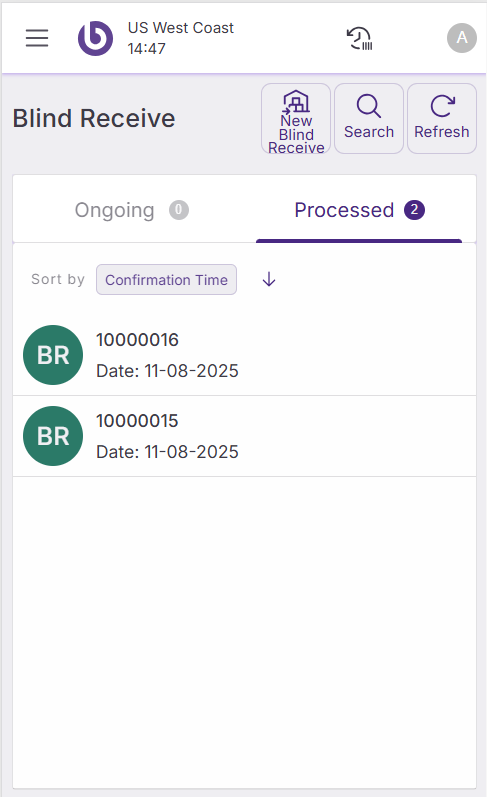
When the blind receive is confirmed, you return to the ‘Blind Receive’ menu. The blind receive moves from the 'Ongoing' to the 'Processed' tab.
Back office users can check receipt quantities on delivery note documents in the ‘Delivery Note’ window or linked documents, such as ‘Purchase Order’ or ‘Distribution Order Receipt’ windows. In the back office, managers need to validate blind receipts by booking the delivery note created for the receipt and updating expected quantities.