
Warehouse picking operations allow you to move, store, and manage items within your warehouse for various purposes. This guide explains how to use the SSMS mobile interface to perform picking tasks, including document-based picks, distribution orders, and returns processing.
Access the picking interface
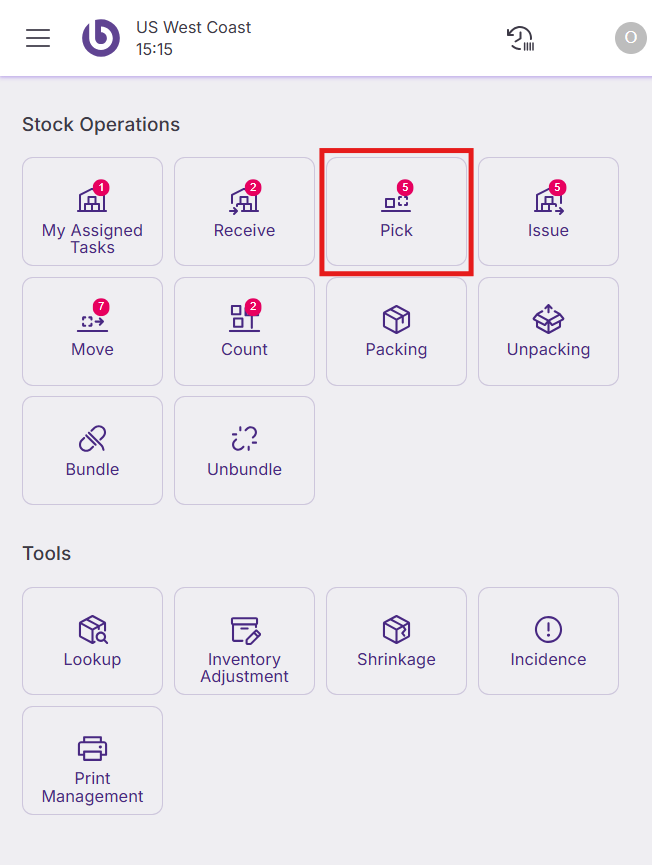
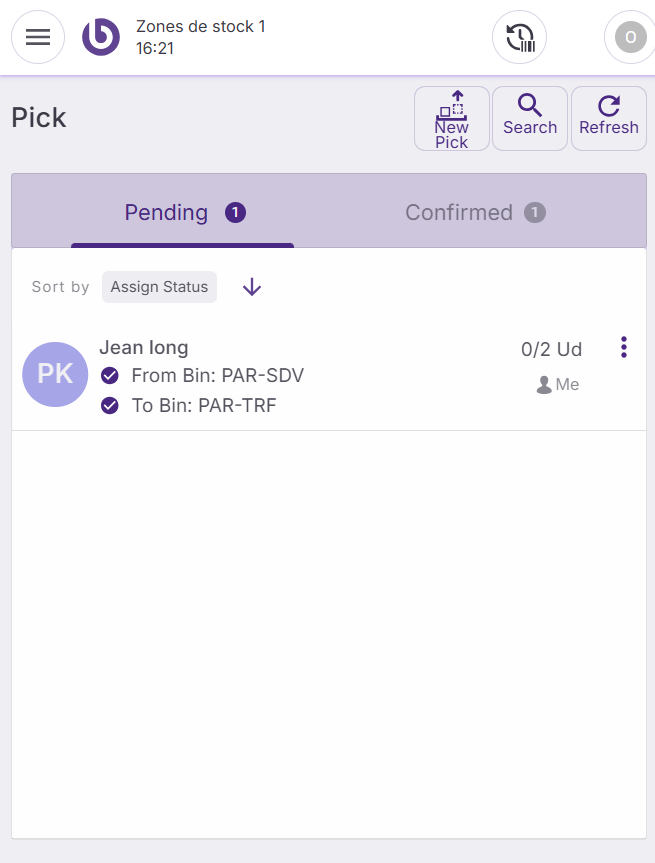
Navigate to the 'Pick' section from the main menu to access the picking functionality.
Understand the picking interface
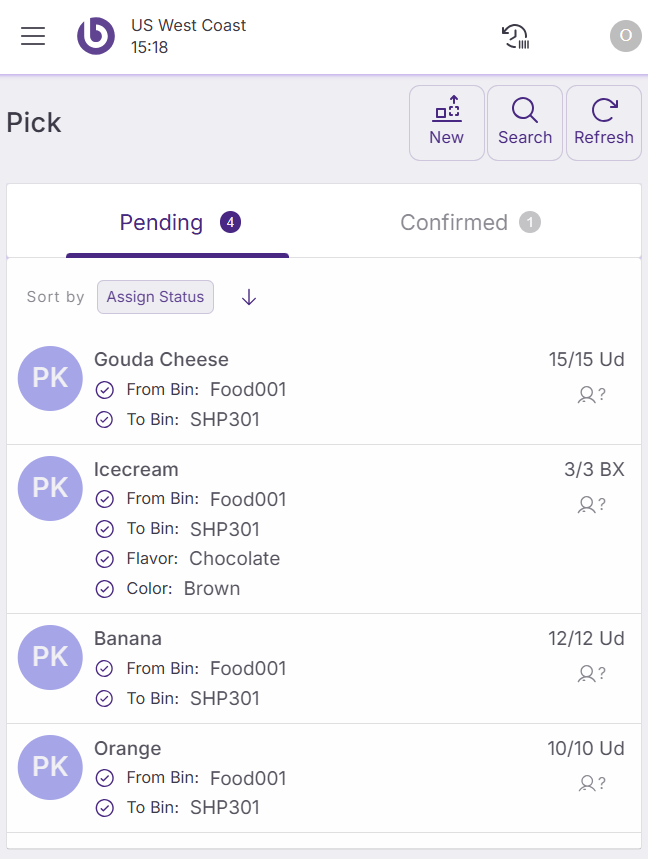
The 'Pick' screen contains two main sections:
-
Pending section: Displays tasks waiting for confirmation
-
Confirmed section: Shows tasks completed during the current session
Three action buttons are available:
-
Search: Filter pending tasks based on specific criteria
-
Refresh: Update the list to view newly assigned tasks in real-time
-
New pick: Create new picking tasks directly from the mobile device
When you need to pick products based on an already exisiting document or you direclty create the document, follow these steps:
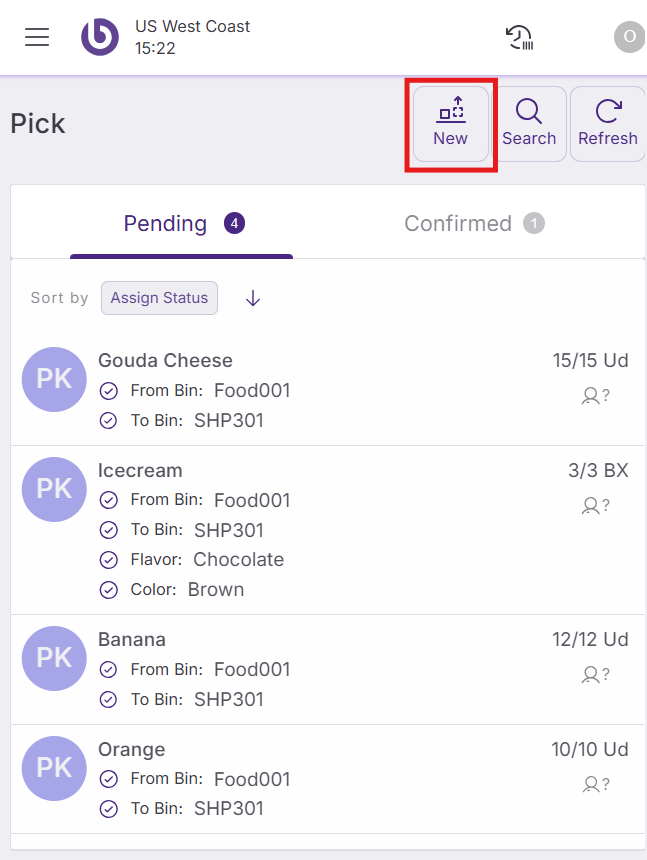
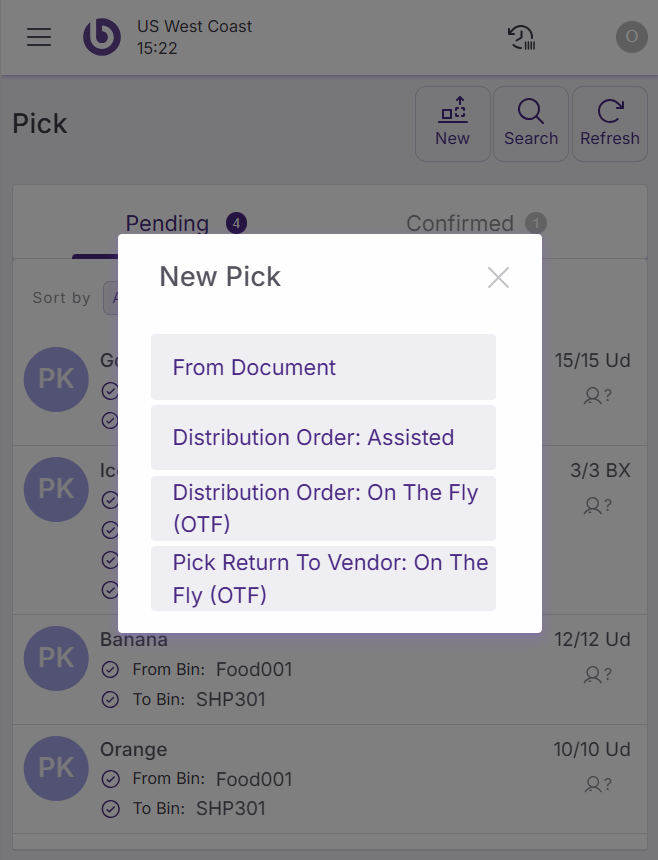
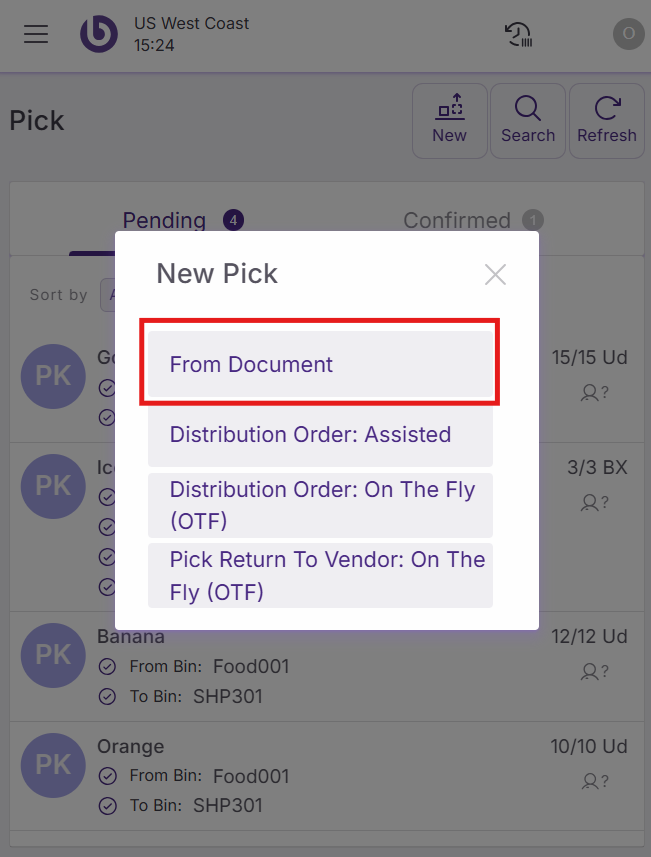
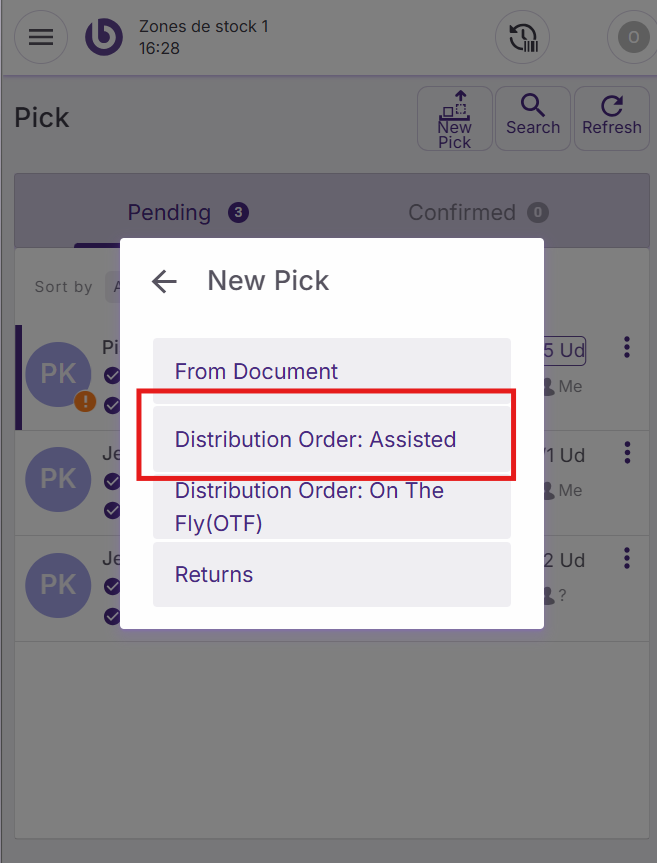
Tap the ‘New' button from the main 'Pick’ screen. Several options are proposed:
Create document-based picks
Use this method to generate picking tasks from existing documents, like distribution orders and sales orders. From the 'Pick' screen, tap 'New pick' and select 'From document'.
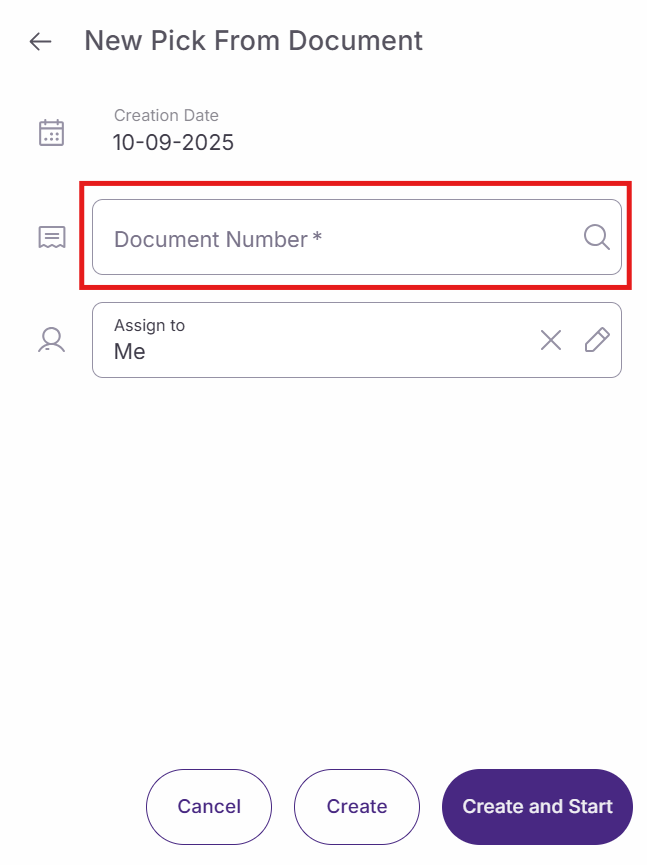
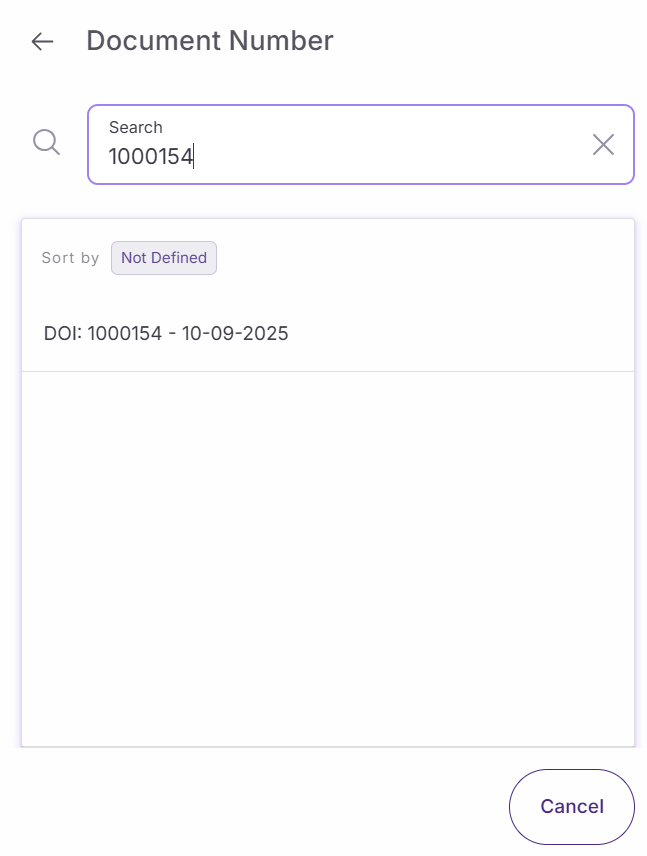
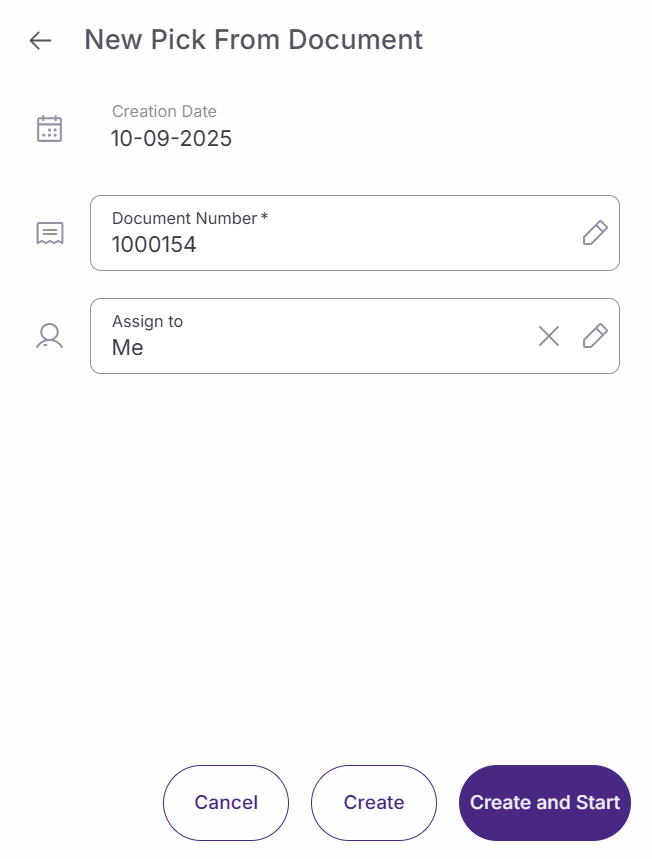
Choose your document by tapping 'Document number' and selecting the appropriate document from the list. Then, tap 'Create and start' to begin the picking process.
Process document lines
In the ‘Pick’ main menu, open the document juste created display in the ‘Pending’ section.
Select the specific line you want to process by tapping on it and tnter the correct number of units for the selected item.
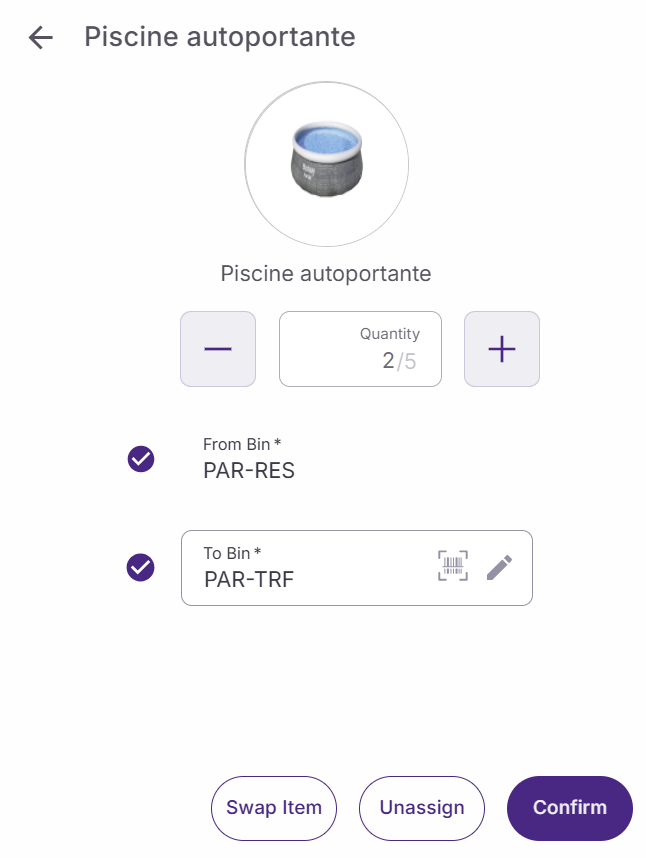
Tap on ‘Confirm’ to validate the quantity. The picked quantity will be moved from the picking zone to the issue zone.
Create assisted distribution orders
This mode requires you to select products before creating the distribution order. From the 'Pick' screen, tap 'New pick' and select 'Distribution order (assisted)'.
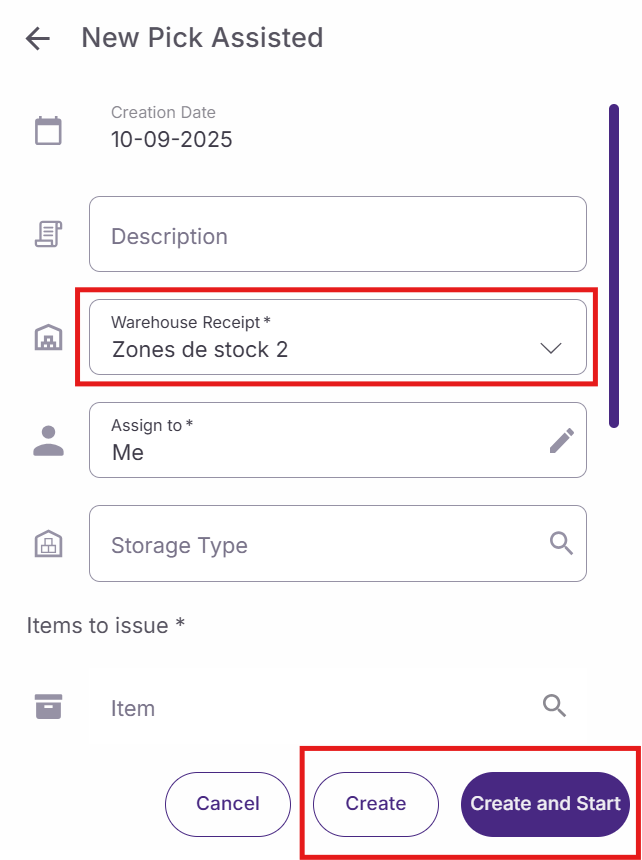
The 'New distribution order assisted' dialog will appear with the following fields:
-
Description: (Optional) Add a manual note to the distribution order for reference
-
Warehouse receipt: Select the destination warehouse that will receive the items
-
Items section: Use the ‘Items’ section to select the mandatory item
Tap 'Create and start' to proceed to the main picking screen.
Complete the assisted order
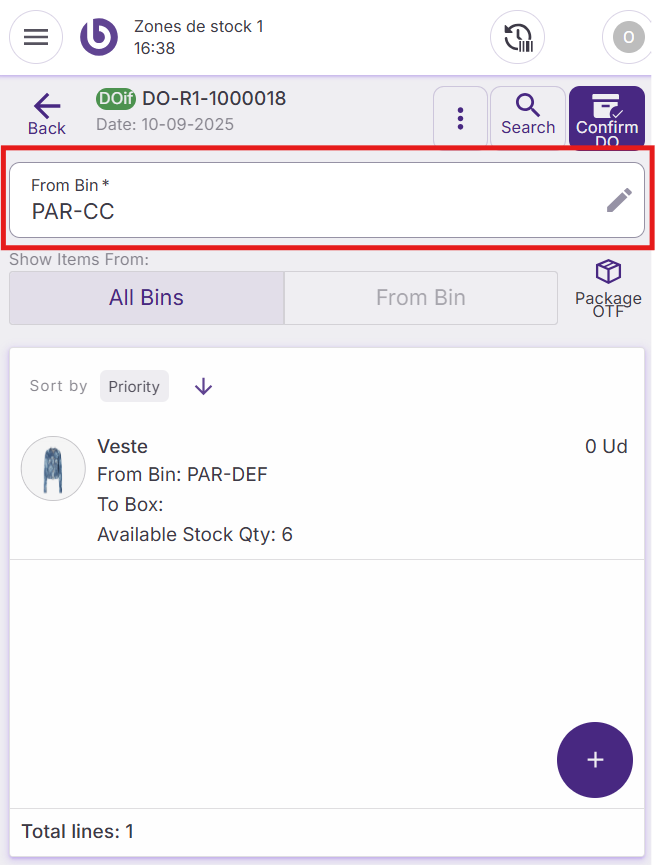
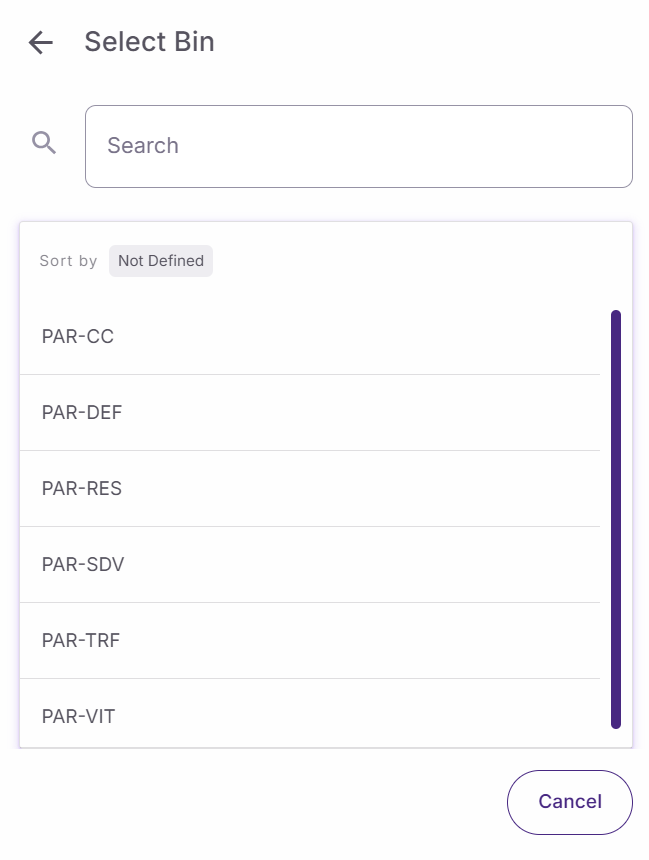
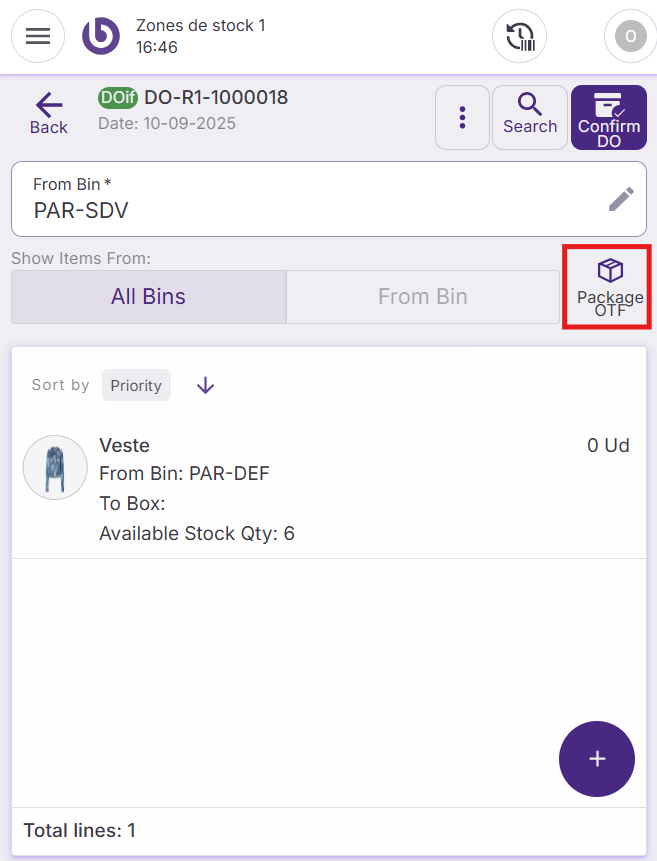
Select the task just created. On the main screen, select the specific bin from the 'From bin' section where items are located.
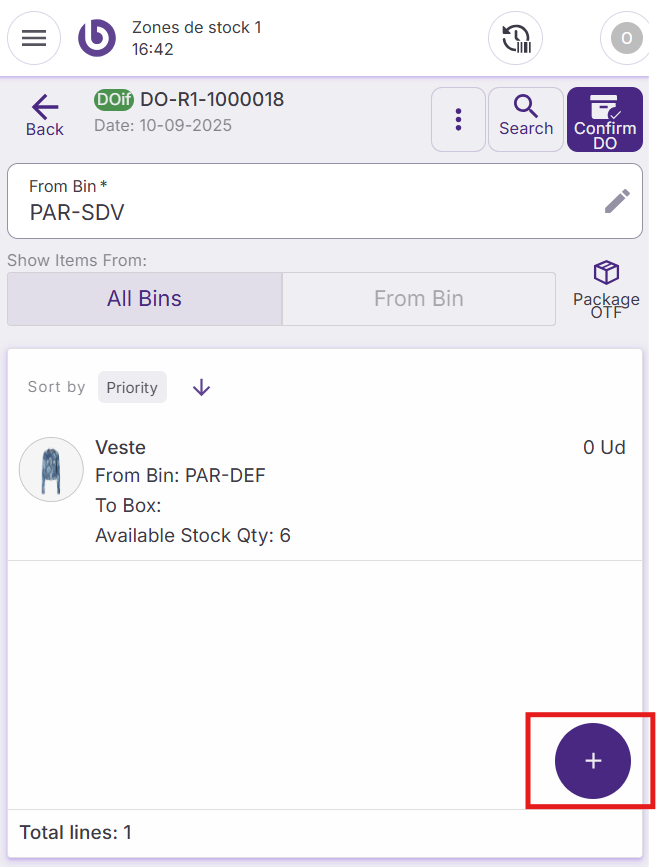
Several actions are available on this menu. With the + button, you can add new item or new package.

You can also create packages, if needed, by tapping 'Package OTF' although this step is optional. Click on the ‘Package OTF’ button. A dialog will be displayed.
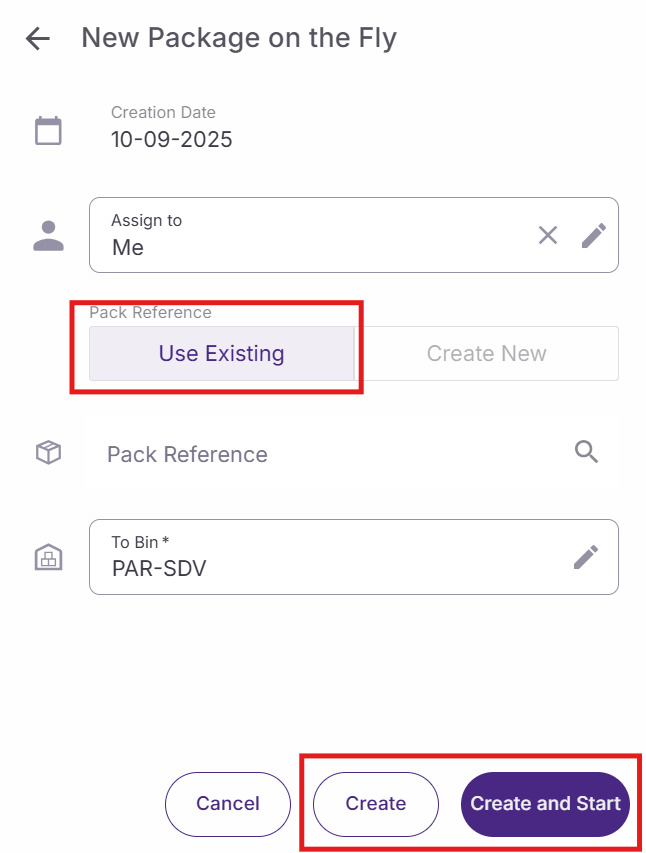
To create a package, you can use an existing one or create a new one
For the first option, select the ‘Use existing’ option, search the pack reference, and select it. To finish, choose the bin where the pack should be stocked
For the second option, select the ‘Create New’ option. The window will change to display new fields:
-
Select package type
-
Write the Pack reference
-
Chose the bin where the pack should be stocked
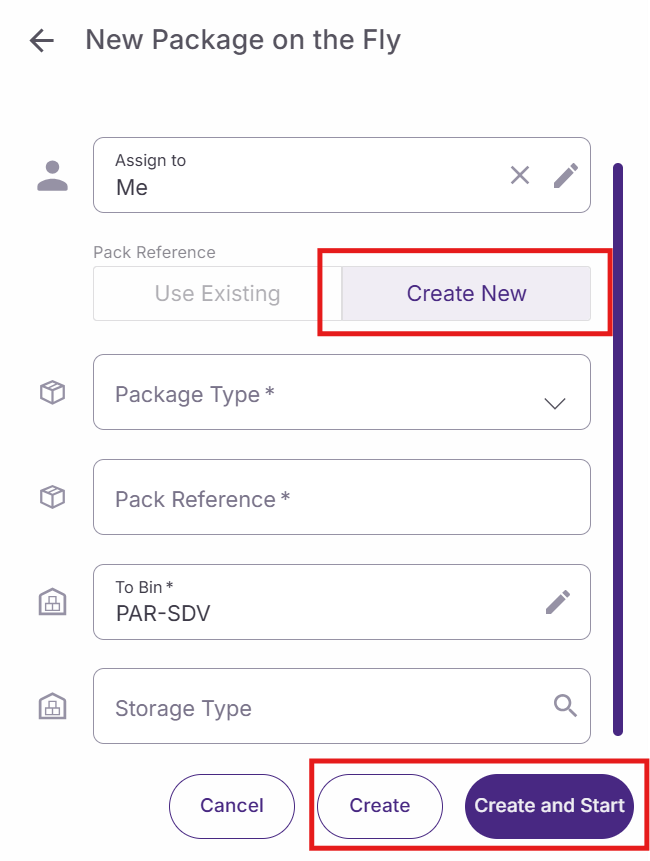
When the pack is configured, click on ‘Create’ or ‘Create and start’. When the document is ready, click on 'Confirm DO' to send the distribution order.

Create on-the-fly distribution orders
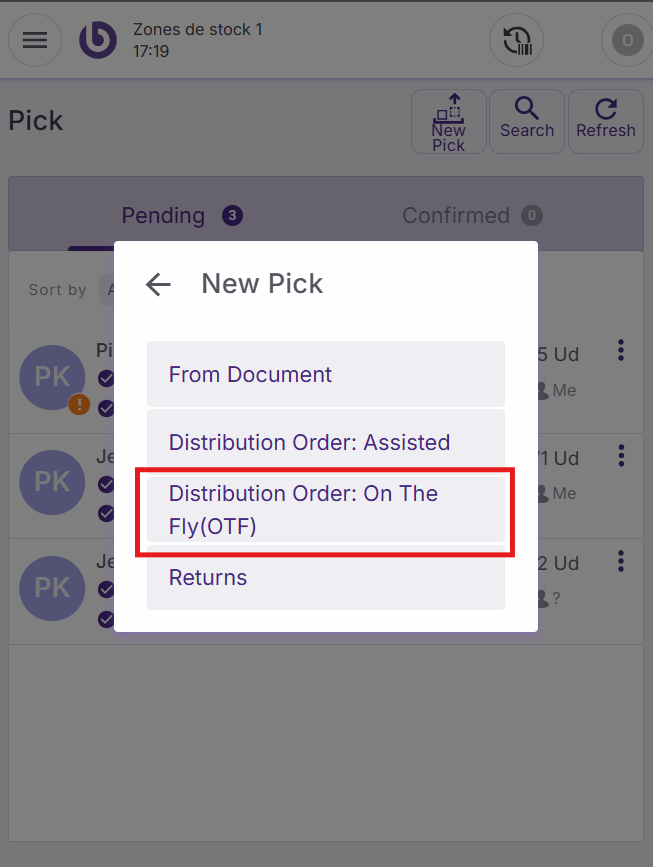
This mode allows complete flexibility in adding any products from any bin location. From the 'Pick' screen, tap 'New pick' and select 'Distribution order on the fly'.
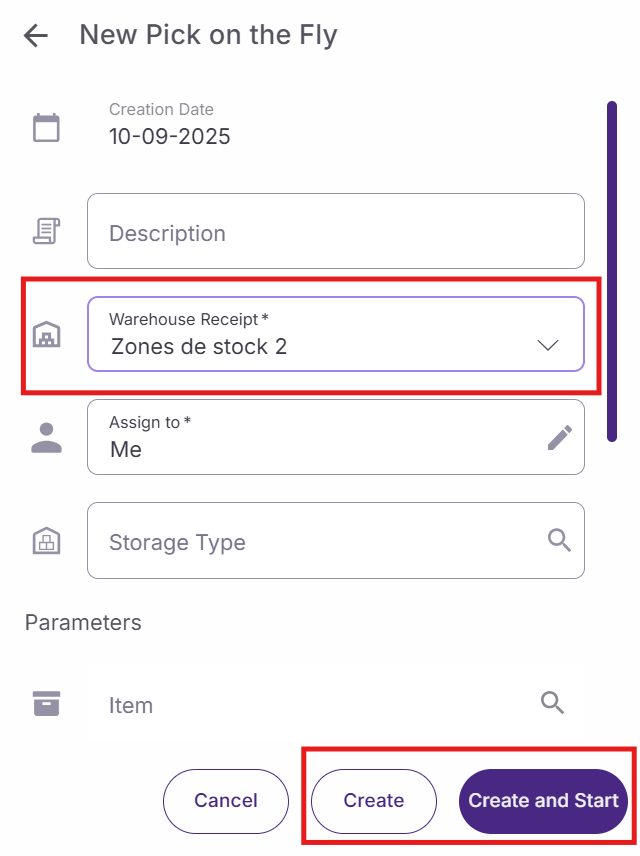
In the 'New distribution order on the fly' dialog, configure:
-
Description: Add a reference note for the order
-
Warehouse receipt: Select the receiving warehouse
-
Parameter filters: Leave empty for maximum flexibility, or use to narrow search results
Tap 'Create and start' to access the main interface.
Add items to the order
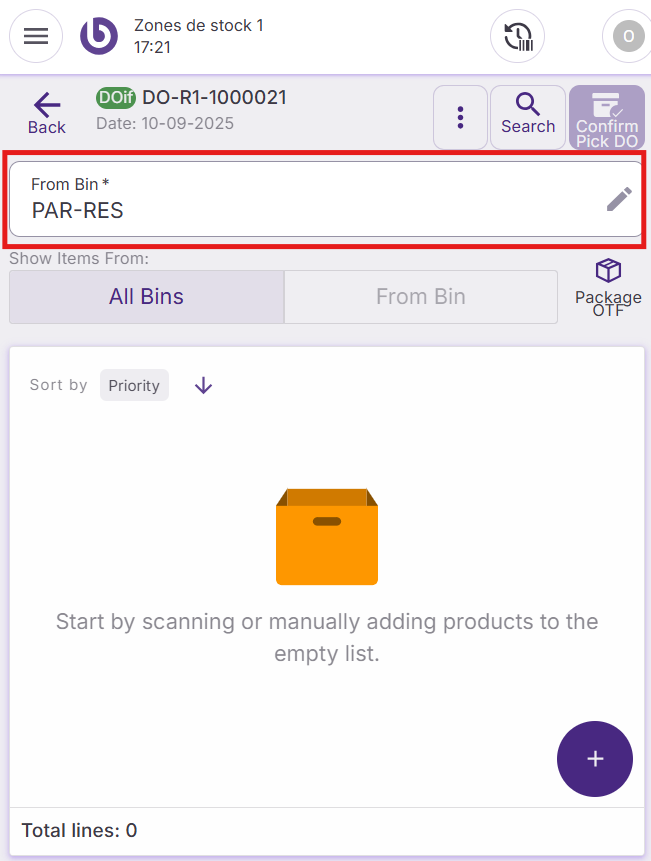
Select your source bin by tapping 'From bin' and choose the appropriate location.
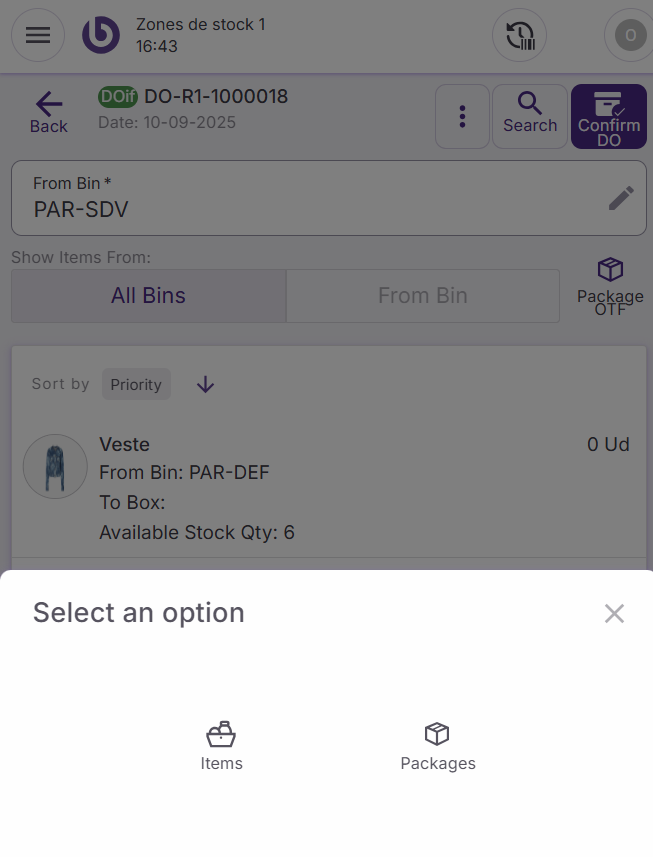
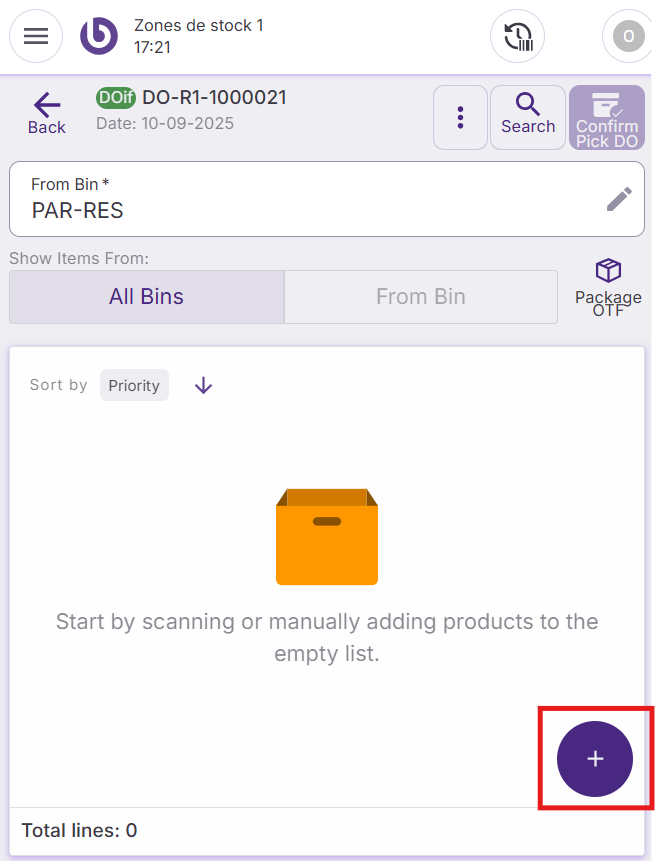
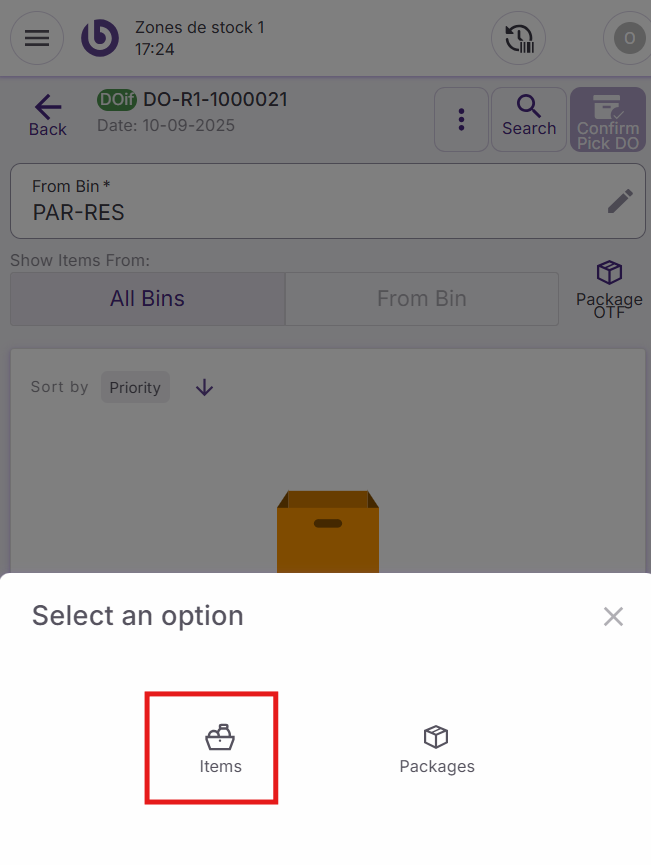
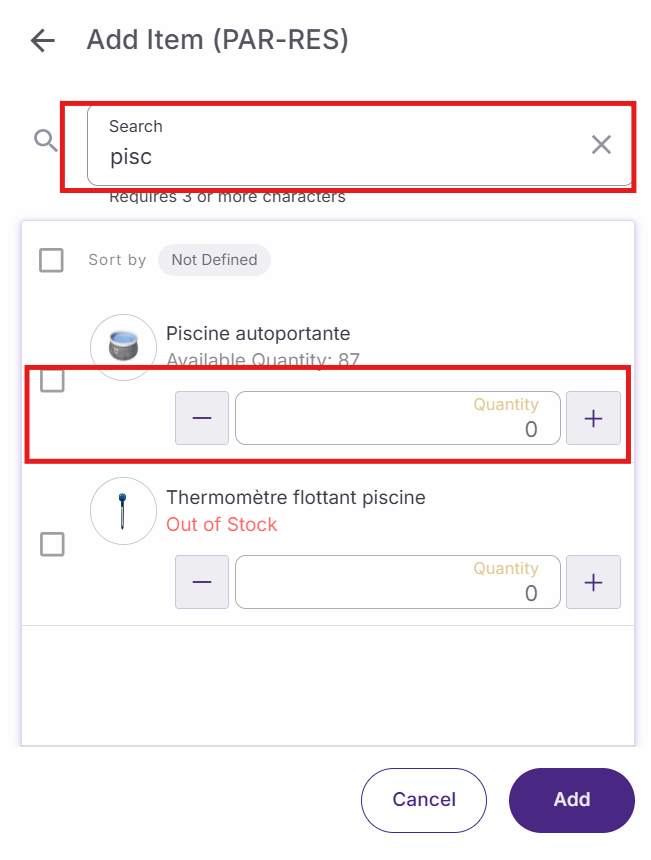
Tap the '+' button located in the bottom right corner to add items. In the dialog that appears, tap 'Items' to search for products. Note that only products from the selected bin can be added.
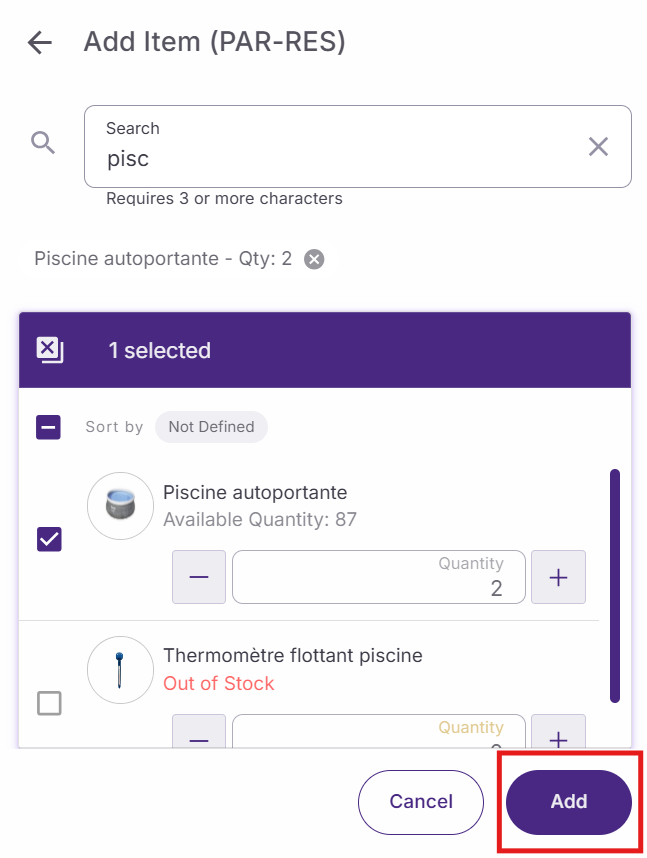
Search for the desired product, specify the quantity and tap 'Add'.
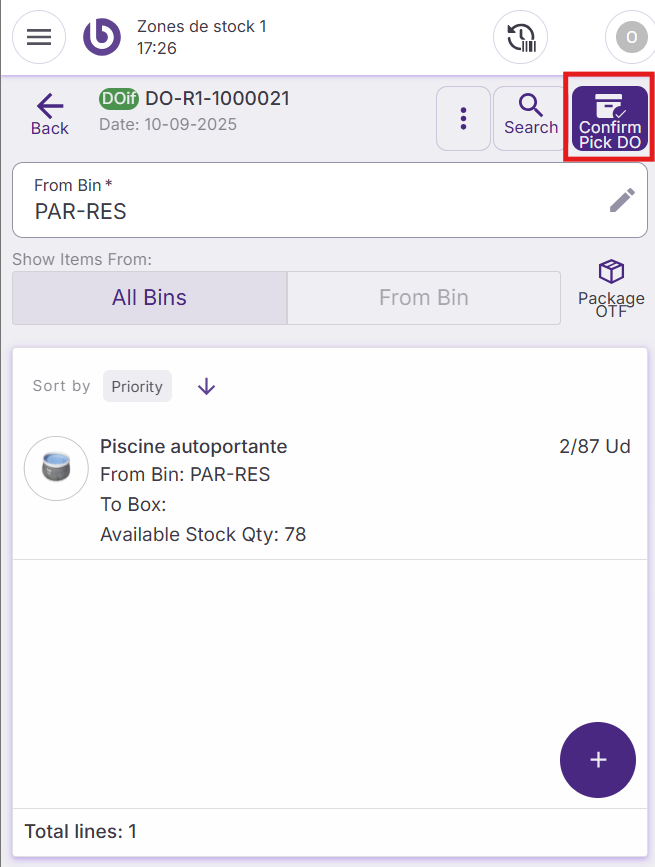
Wait for system synchronization, then tap 'Confirm DO' to send the order.
Process returns
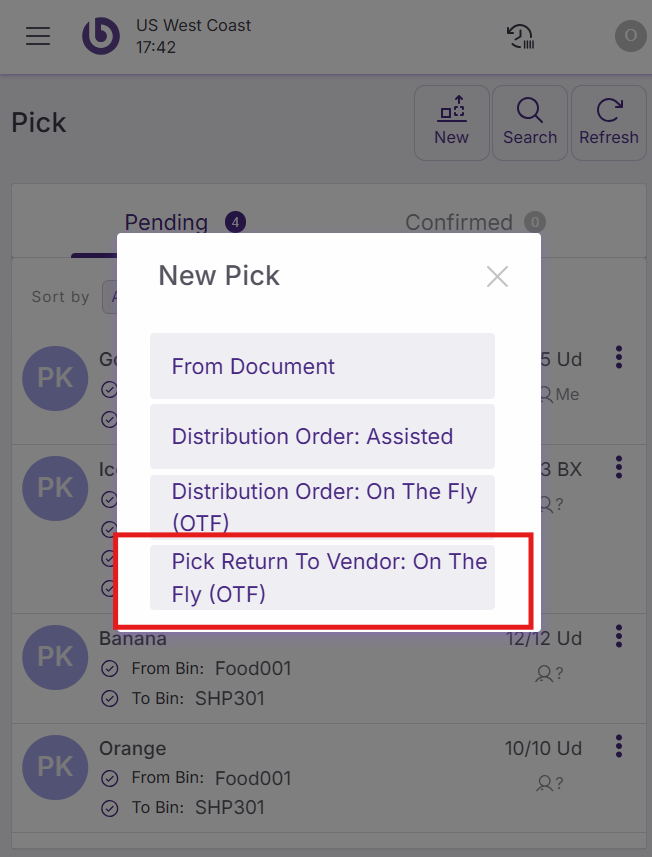
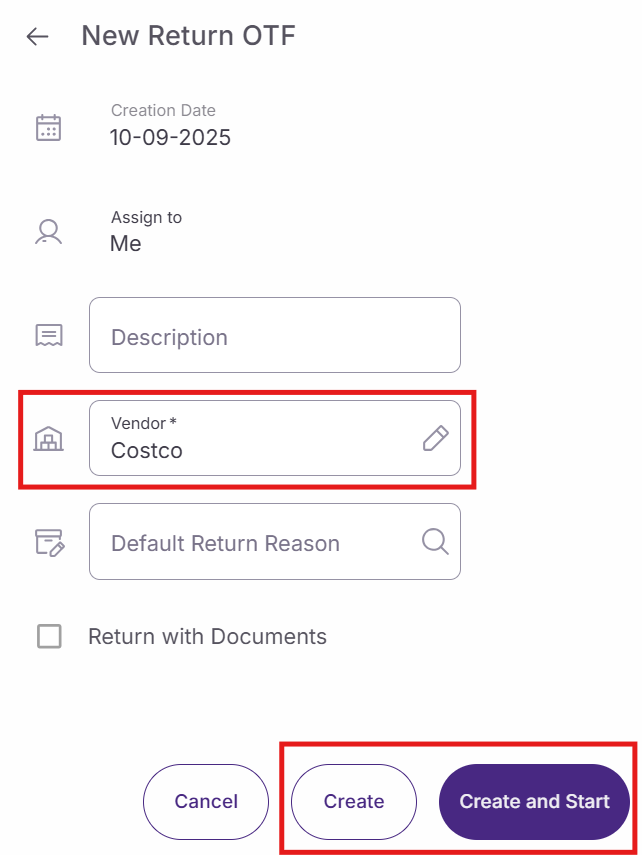
Use this function to handle items being returned to vendors. From the 'Pick' screen, tap 'New pick' and select 'Pick Returns To Vendor: On The Fly (OTF)'.
The 'New return OTF' dialog requires:
-
Description: Add a reference note for the return
-
Vendor: Select the vendor receiving the returned items (for example, "Be Soft Drinks INC")
Tap 'Create and start' to proceed.
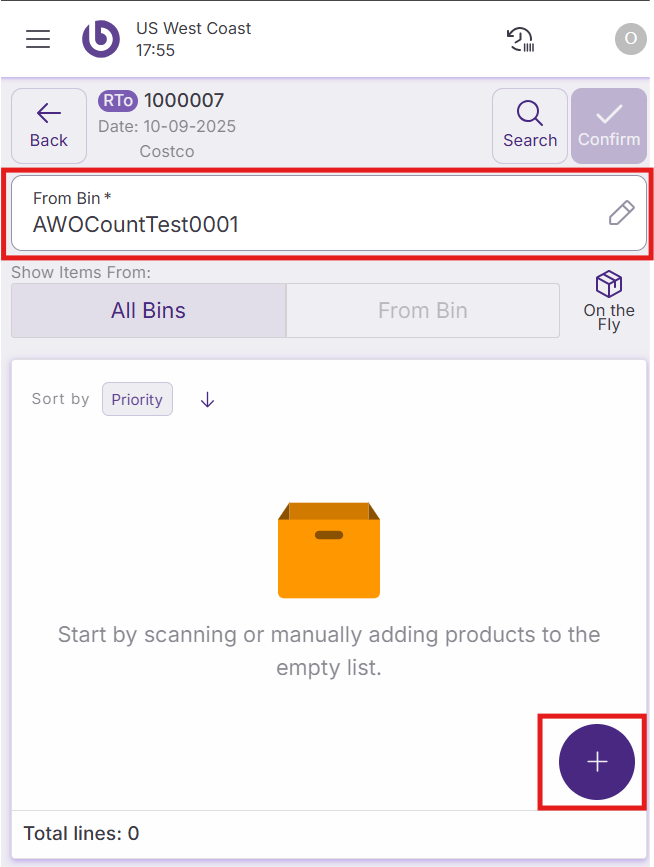
Complete the return process
Select the source bin containing the items to return. Tap the '+' button to add items to the return.
In the item selection dialog, search for the product being returned, specify the quantity, and tap 'Add'. After system synchronization completes, tap 'Confirm return' to process the return to the vendor.
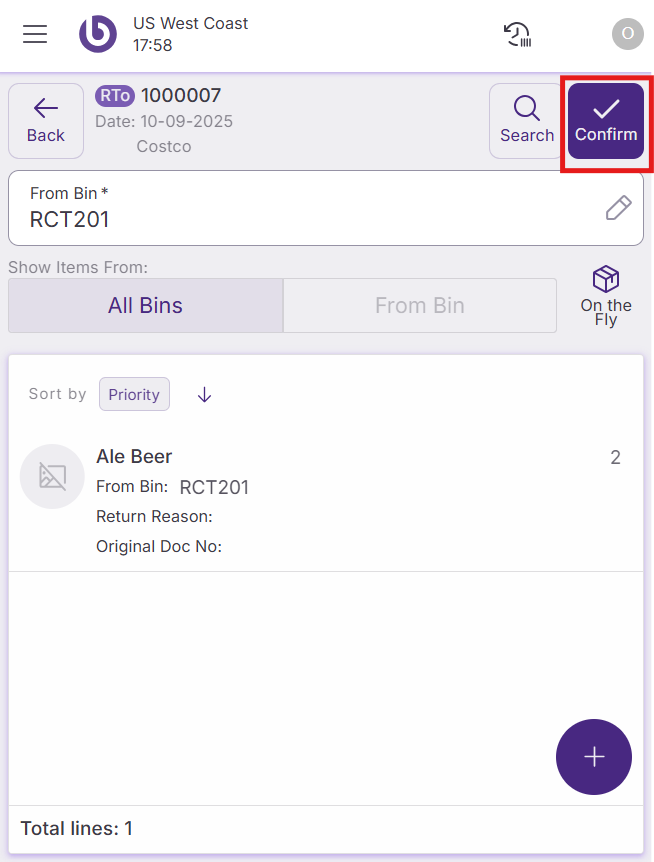
The system will automatically handle the return documentation and update inventory accordingly.
Action availability and access control
The actions and options shown in the ‘New Pick’ dialog are role-dependent. By default, if a user does not have permission for a specific action, it will not appear in the interface.
This behavior can be overridden per warehouse by defining a custom UI configuration in the ‘Warehouse Definition’ window.
For more details on how access is configured, see the Role and User Action Setup in SSMS section.
|
Option |
User Action |
|---|---|
|
From Document |
OpenNewFromDocumentPickDialog |
|
Distribution Order: Assisted |
OpenNewAssistedPickDialog |
|
Distribution Order: On the Fly (OTF) |
OpenNewOTFPickDialog |
|
Pick Return To Vendor: On the Fly (OTF) |
OpenNewPickReturnDialog |