
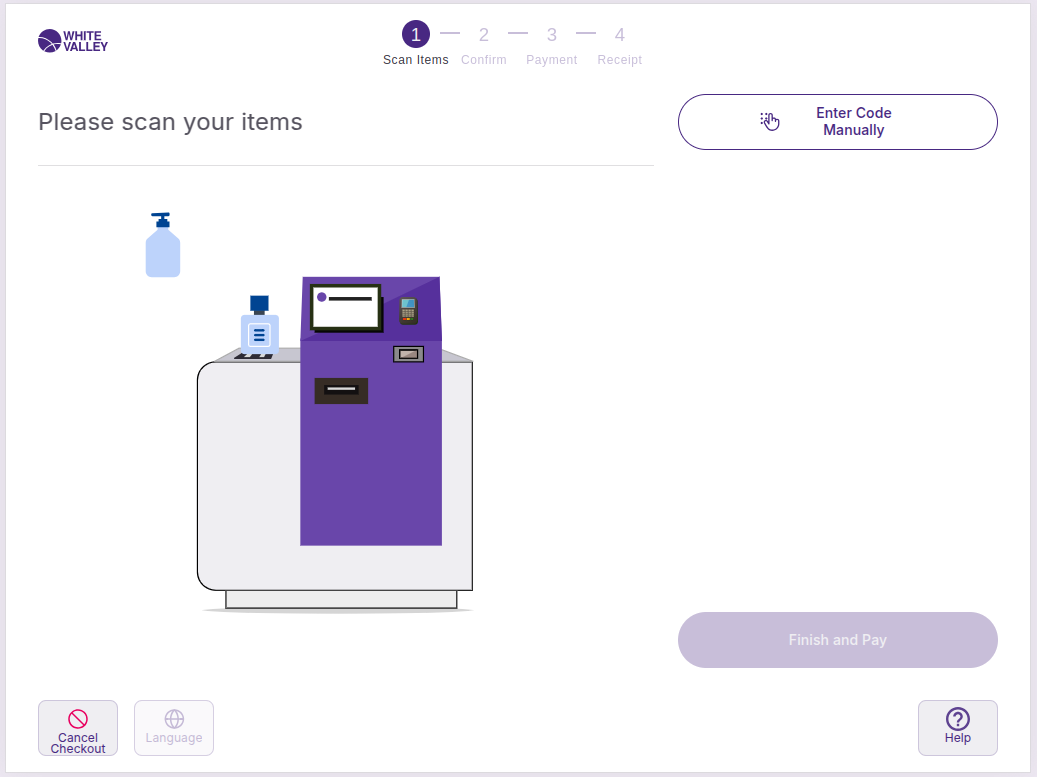
This guide explains how to use the SCO footer in the self-checkout (SCO) system. The SCO footer contains buttons that provide key functionality throughout the checkout process, with availability depending on back office configuration. These buttons remain accessible across different SCO screens to support customer needs when enabled.
SCO footer overview
The SCO footer appears at the bottom of SCO screens and can contain up to two main action buttons based on configuration:
-
Cancel checkout button.
-
Help button.
The visibility and availability of these buttons depend on the back office configuration settings for the specific SCO terminal.
Cancel checkout
When customers click the 'Cancel checkout' button at the bottom left side of the screen, the current ticket is deleted, and the flow returns to the Welcome screen. This button will be displayed if it is marked like that in the SCO configuration.
Customers use this option when they want to start over completely or abandon their current transaction.
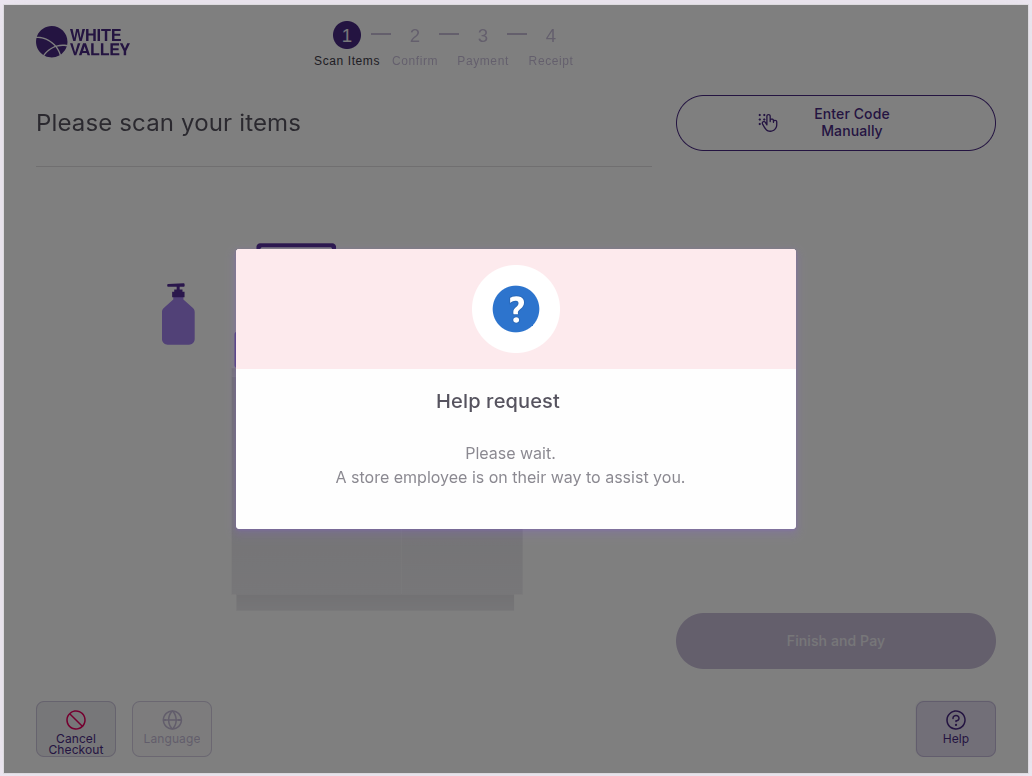
Help assistance
When customers click the 'Help' button in the footer, the system will call for assistance from store staff. This button will be displayed if it is marked like that in the SCO configuration.
Customers use the help button when they need assistance with their transaction, encounter problems with product scanning, have questions about the checkout process, or need support with any SCO functionality.
If the user role requires approval for help requests, additional steps occur after clicking outside the help popup. When configured with approval requirements, an approval popup will appear requesting supervisor credentials to authorize the assistance call.
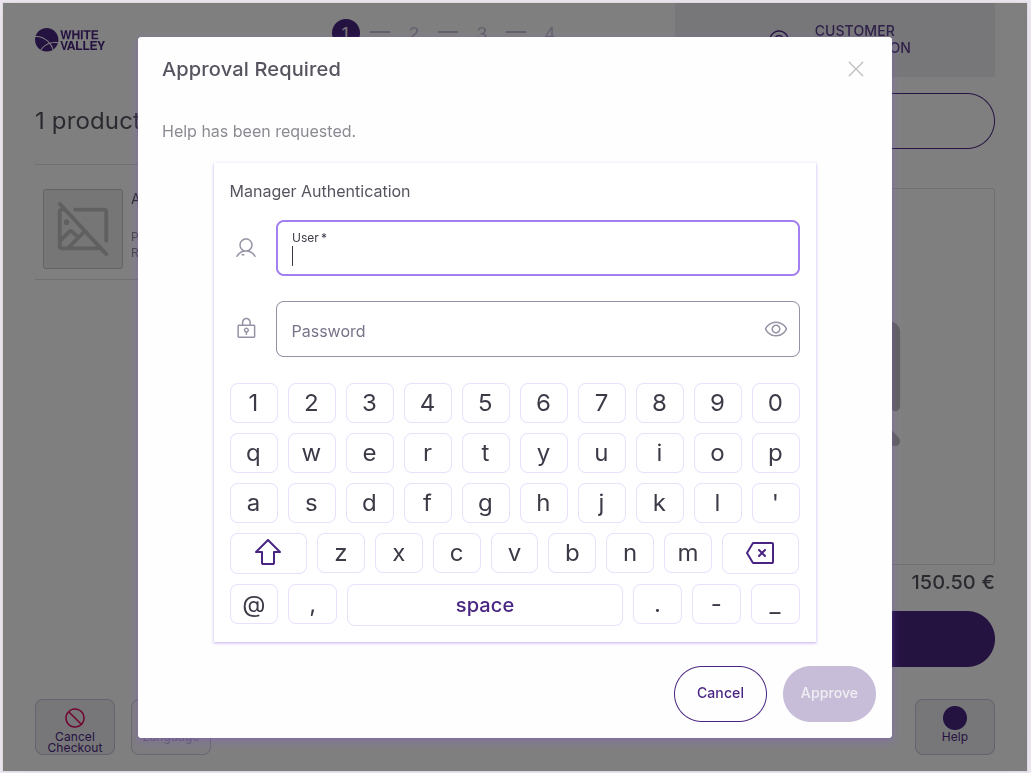
This approval process ensures proper oversight of assistance requests and maintains security protocols for help functionality in the self-checkout system.
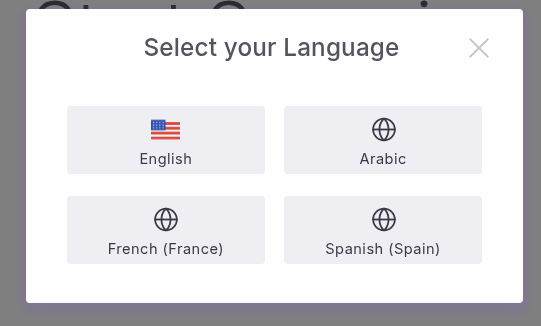
Language Button
When customers click the Language button at the bottom left side of the screen, a dialog is opened allowing the user to select a language from the available terminal languages.
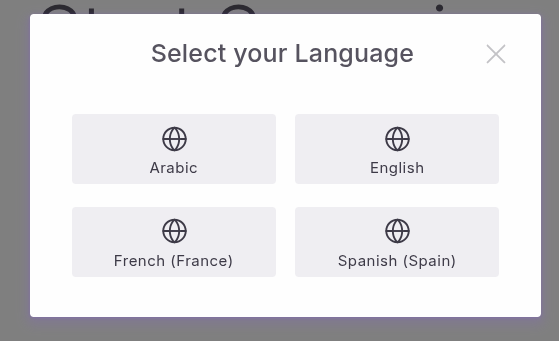
The languages are displayed ordered by a sequence number (defined in the terminal languages tab) and the others, with no sequence number provided, will be displayed ordered alphabetically.
The languages is displayed with an icon, if it's provided in the language window, if not will be displayed with a default world icon. and with their displayed names if not provided there names.
Terminal Languages Source
The list of languages comes from OB.App.TerminalProperty.get('terminalLanguages').
Each language should be an object with at least searchKey, displayName, and optionally image and name and can configured following this config.