This user guide explains how to use the 'My assigned tasks' window in SSMS. This feature allows warehouse operators to view, manage, and complete tasks assigned specifically to them in an organized and efficient manner. The interface offers tools for searching, filtering, and executing tasks, while maintaining a clear view of work progress.
Navigate to the ‘My Assigned Tasks’ window
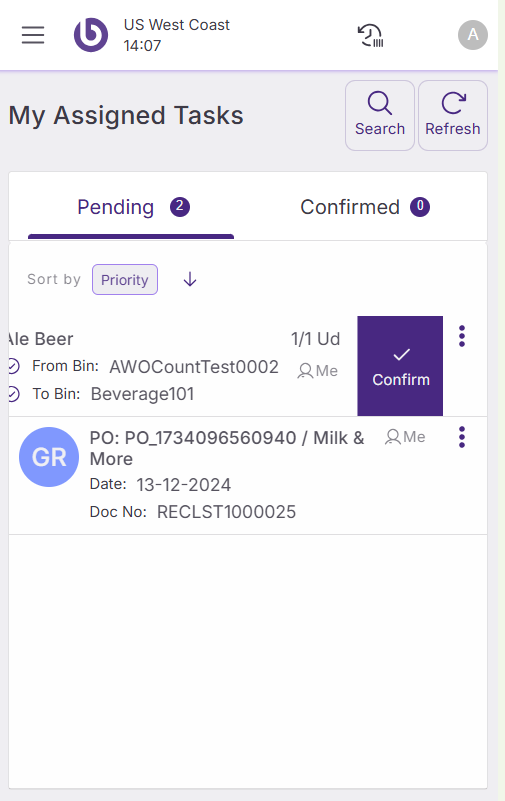
The 'My assigned tasks' window opens with a header containing the window title and two action buttons:
-
Search: Opens a search bar to filter tasks
-
Refresh: Updates the task list with newly assigned tasks
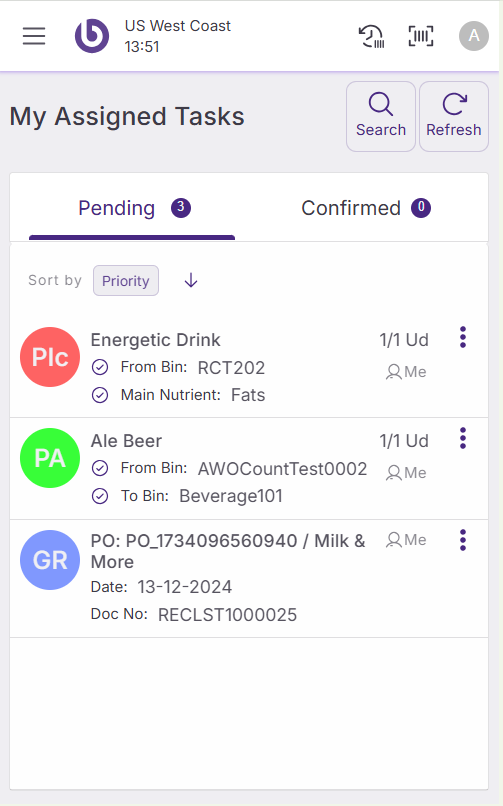
Below the header, you'll find two tabs that organize your tasks:
-
Pending: Shows tasks waiting to be completed
-
Confirmed: Displays recently completed tasks (this list resets each time you enter the window)
Each tab displays a number indicating how many tasks it contains.
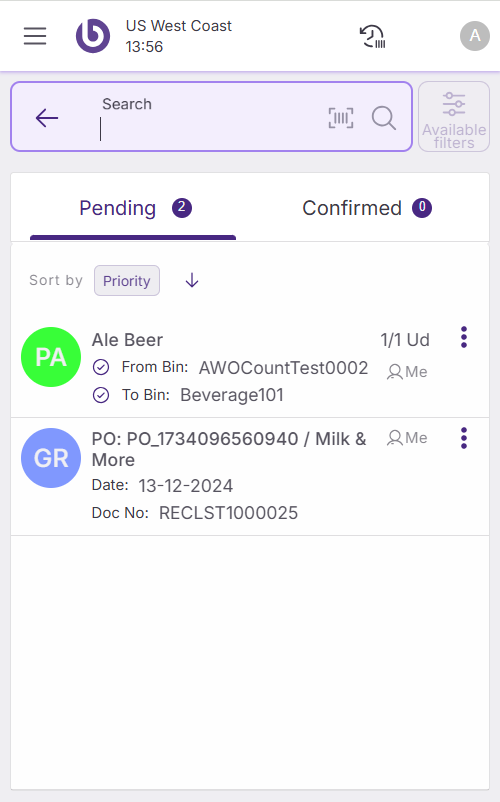
Search and filter tasks
Click the 'Search' button in the header to open the search functionality. The header transforms into a search bar with several options:
-
Search input field: Type to filter tasks in real-time by product name, bin names, product barcode, or bin barcodes.
-
Barcode scanner button: Available only on devices with cameras. Opens a scanning popup where scanned codes appear as text in the search field.
-
Magnifying glass icon: Triggers the search if automatic filtering hasn't occurred.
-
Available filters button: Opens a dialog with additional filtering options for more specific task searches.
-
Back button: Cancels the search and returns to the normal header view.
View and manage pending tasks
The 'Pending' tab displays tasks in a grid list format. Each row represents an individual task or grouped task.
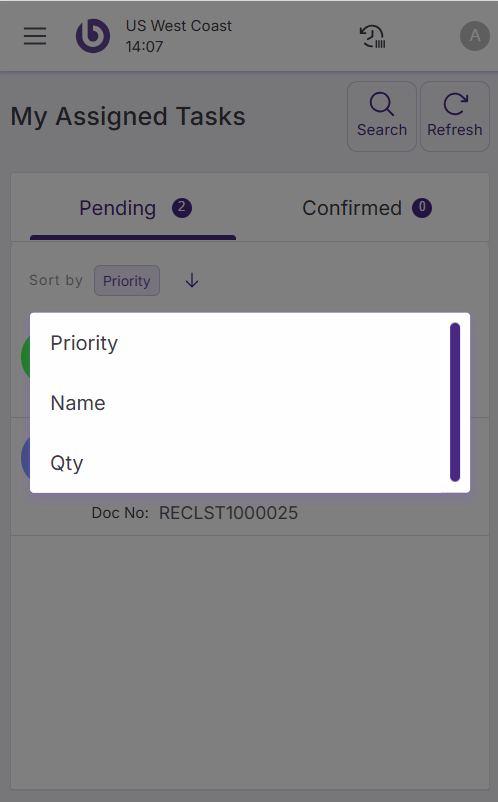
Sort and organize tasks
Use the grid header to sort tasks by different criteria.
Complete tasks quickly
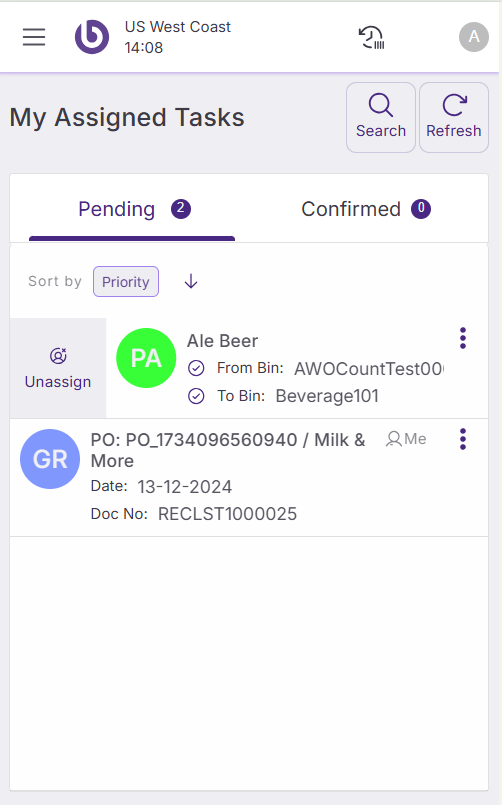
Single task completion
Swipe any task row to the left to confirm that specific task immediately. This gesture provides the fastest way to mark simple tasks as complete.
Assignment management
Swipe any task row to the right to toggle its assignment status:
-
If assigned to you: Moves to unassigned (task disappears from your list)
-
If unassigned: Assigns to you (not applicable in 'My assigned tasks' since unassigned tasks don't appear here)
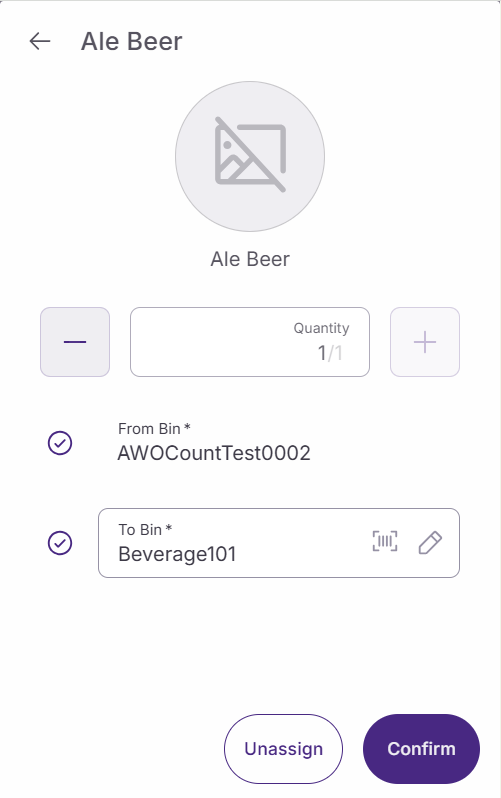
Edit task details
Click any task row to open a full-screen task detail dialog. This detailed view shows:
-
Field information: All task fields with the same status icons described earlier, plus a barcode scanner icon next to the field expecting input.
-
Action buttons: Available actions for the task, including 'Unassign' and 'Confirm' options.
-
Automatic saving: Changes save automatically when you navigate away from a field.
-
Exit options: Use the back button to save changes and return to the task list.
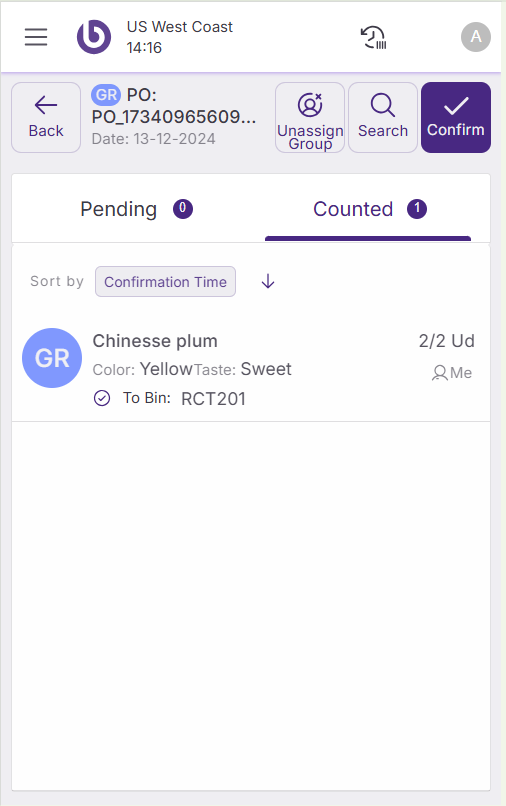
Example of a non-grouped task
Example of a grouped task
Some tasks contain sub-tasks that require systematic completion. When you open a grouped task (like receptions), the interface changes to accommodate the hierarchical structure while maintaining familiar functionality.