
This guide explains how to use the payment screen in the self-checkout (SCO) system. The payment screen appears after customers confirm their basket, allowing them to select their preferred payment method to complete their transaction. This screen displays available payment options based on the store's configuration and processes the final payment.
Payment screen overview
To navigate to the payment window, customers follow the SCO flow by adding products, confirming the basket, and proceeding from the confirmation step. The payment screen shows available payment methods that are configured for SCO use.
The payment filters display only non-rounding payment methods that are eligible for self-checkout transactions.
External discount processing
When transitioning to the payment screen, the system automatically evaluates and applies eligible discounts for identified customers. This process occurs before customers see the payment method options, ensuring they view the final discounted amount.
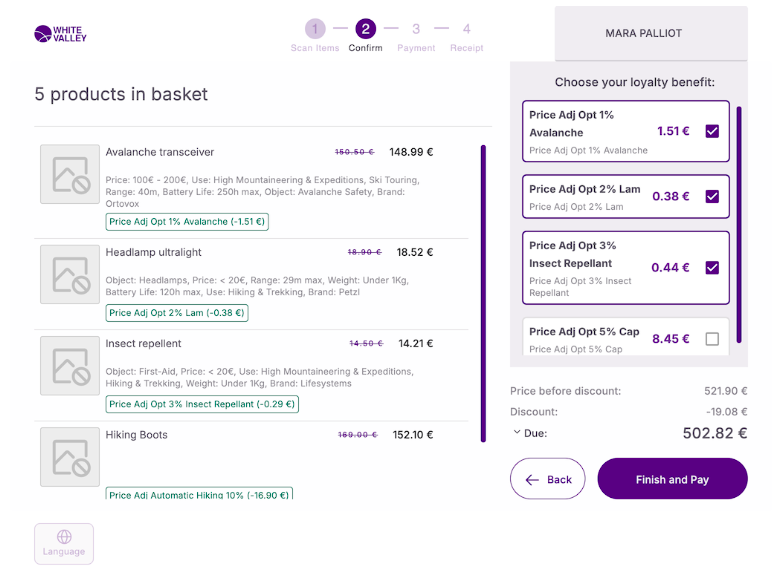
Automatic discounts
If the external discount engine returns only automatic discounts, a popup window will appear presenting these discounts applied to the ticket. Customers can proceed to the payment screen with the 'Finish and pay' button.
Optional discounts
If the external discount engine provides optional discounts, a popup window will appear presenting these discount options to customers. Customers may choose to apply one or more of these optional discounts, but selection is not mandatory. If customers choose not to apply any optional discounts, they can continue to the payment screen.
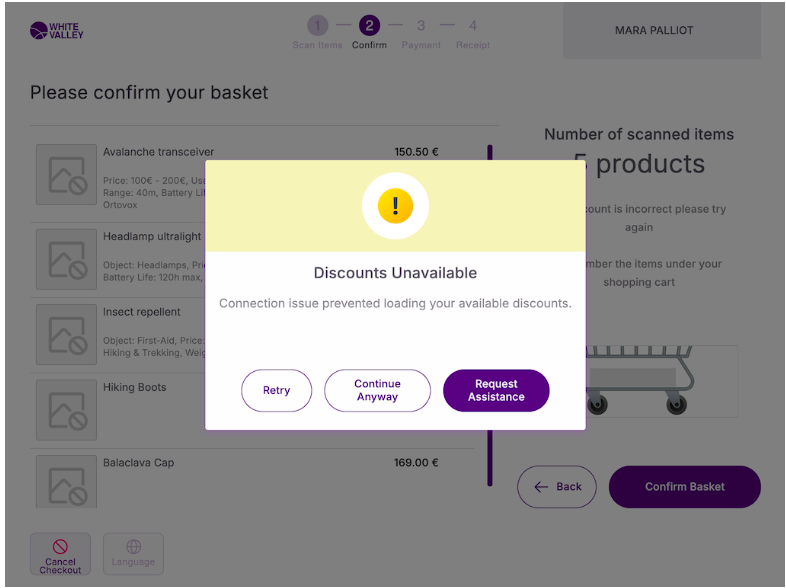
System unavailability
If the external discount engine is unavailable or offline at the time of checkout, the system will display a popup notification to inform customers about the issue. The popup presents the following options:
-
Retry: Attempt to reconnect with the external discount engine and retrieve discounts again
-
Continue anyway: Proceed directly to the payment screen without applying any external discounts
-
Request assistance: Allow customers to seek help from store staff for further guidance
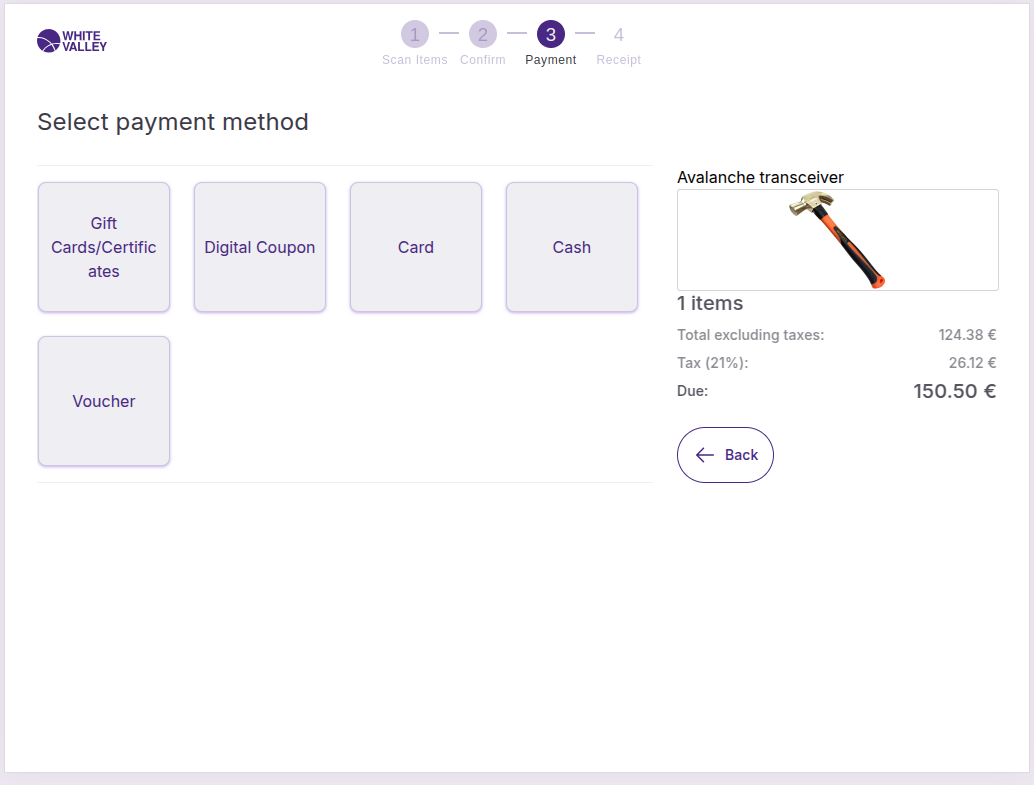
Payment method display
Payment methods without providers
Payment methods that don't have a payment provider configured display only their own image. Each payment type shows its individual logo or icon to help customers identify their preferred payment option.
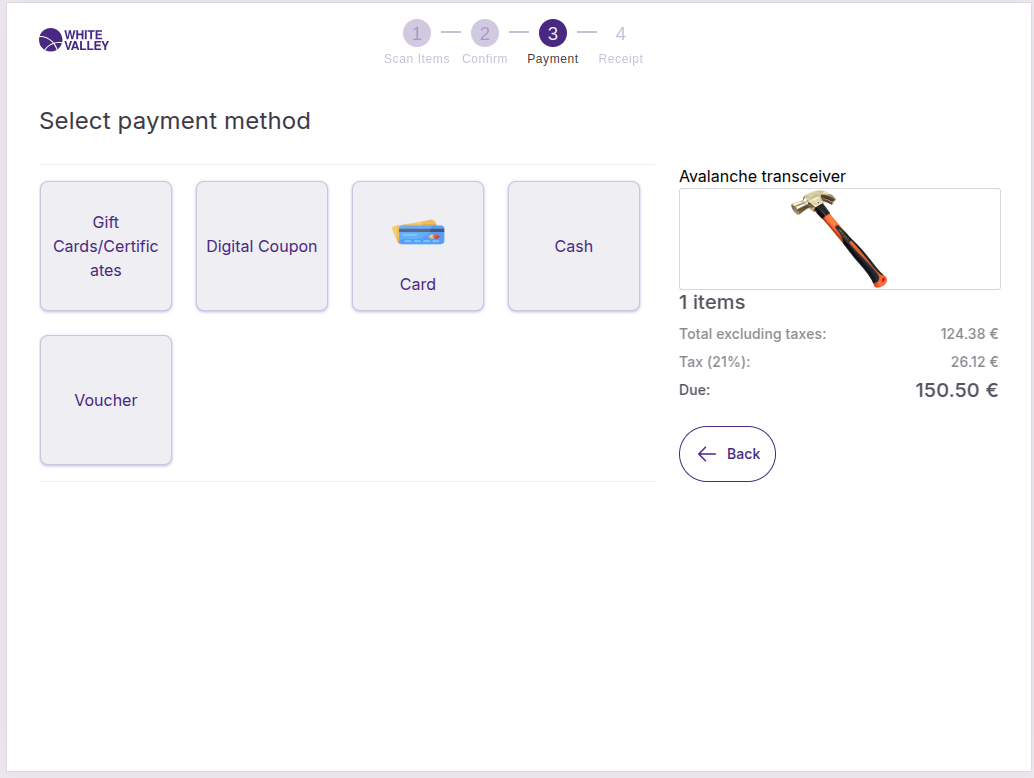
Payment methods with providers
Payment methods that have a payment provider configured are grouped together. The provider image appears in the center of the button, while the payment method icons are included in the top left corner of the button.
This grouping helps organize related payment options while clearly showing both the provider and the specific payment methods available.
Navigation options
Return to previous screen
Customers can return to the previous window using the 'Back' button. This allows them to make changes to their order or review their basket before completing the payment.
Select payment method
Customers choose their preferred payment method by clicking on the corresponding button. The system will process the payment using the selected method.
Zero total handling
In cases where the receipt total is zero (for example, when all articles are promotional with 100% discount), the payment window is automatically dismissed and the receipt is closed without requiring payment method selection.
This automatic handling streamlines the process when no payment is actually required.
Payment processing
Once customers select a payment method, the system processes the transaction and moves to the next step in the checkout flow. The specific processing depends on the type of payment method selected and any additional requirements for that payment type.
The payment screen ensures customers can complete their transaction using their preferred payment method while maintaining a clear and organized interface for easy selection.