
This guide explains how to use the packing and unpacking features in the SSMS front-end application. These features help you create and manage containers like pallets and boxes for efficient warehouse operations. You'll learn how to create nested packages, where smaller containers can be placed inside larger ones, and how to integrate packaging tasks with distribution orders.
Understanding handling units
Handling units are containers used for storing and transporting goods in warehouses. The SSMS application allows you to create standard packages and nested packages (meaning you can place smaller containers (like boxes) inside larger ones (like pallets). This provides better control and accuracy when managing inventory.
The system supports on-the-fly task creation, allowing you to create packaging tasks in real-time as needed during warehouse operations.
Create a new package
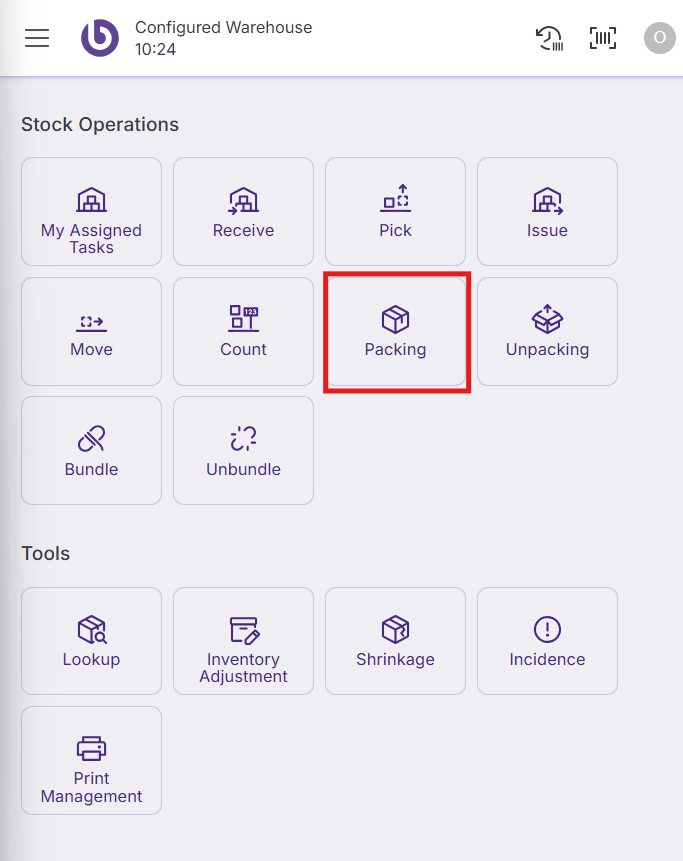
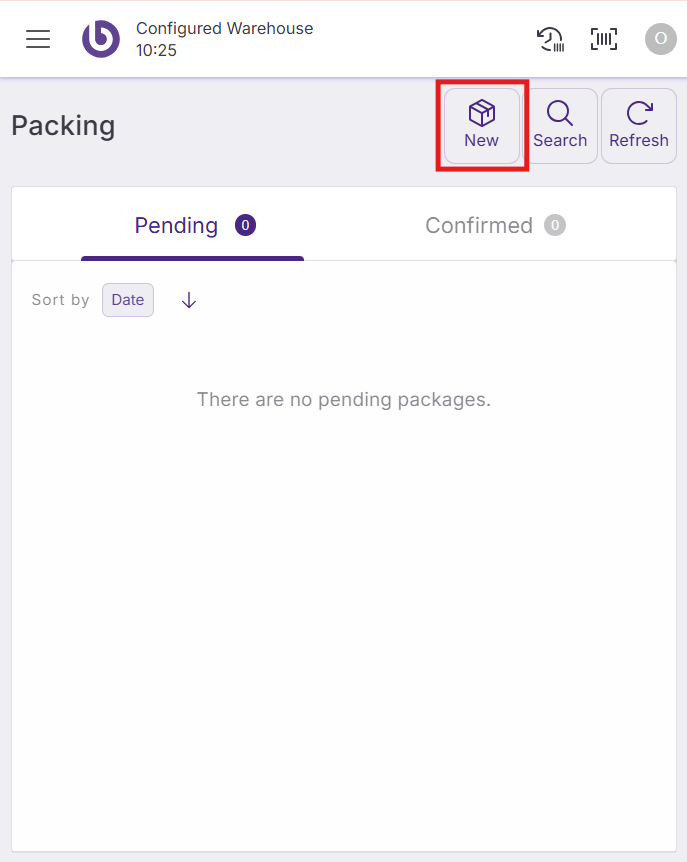
Navigate to the SSMS workspace and select the 'New package' button. A creation form will appear in a pop-up window.
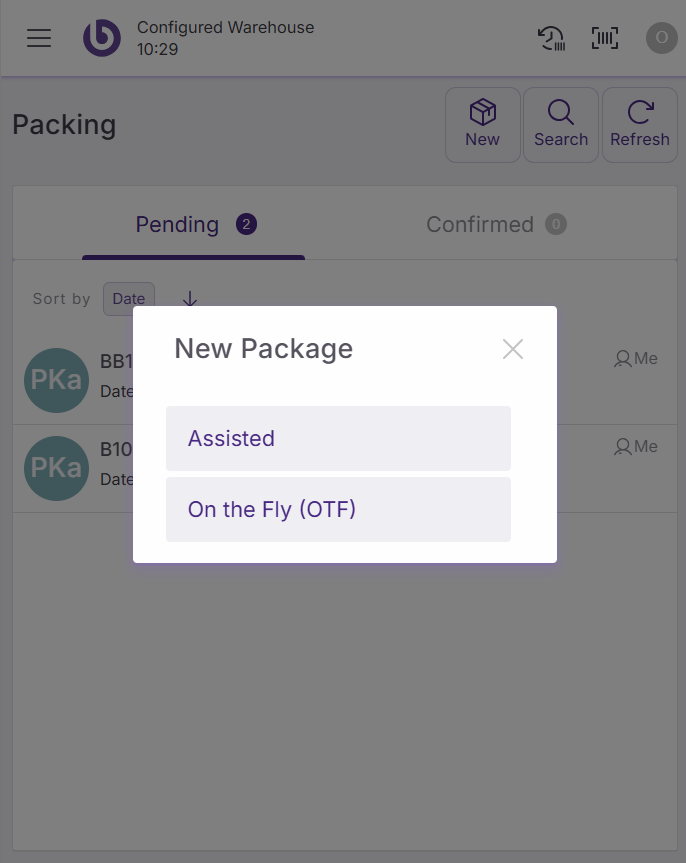
Assisted and on-the-fly options have the same functionality. Configure the following fields in the package creation form:
-
Assign to. Select the users who will handle this task. By default, you will be assigned to the task. You can leave tasks unassigned if needed.
-
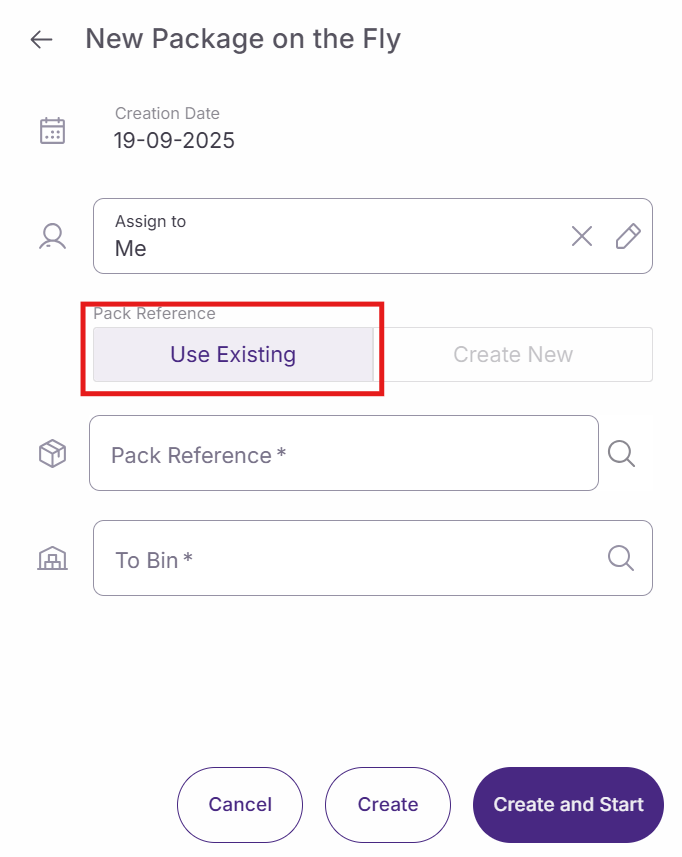
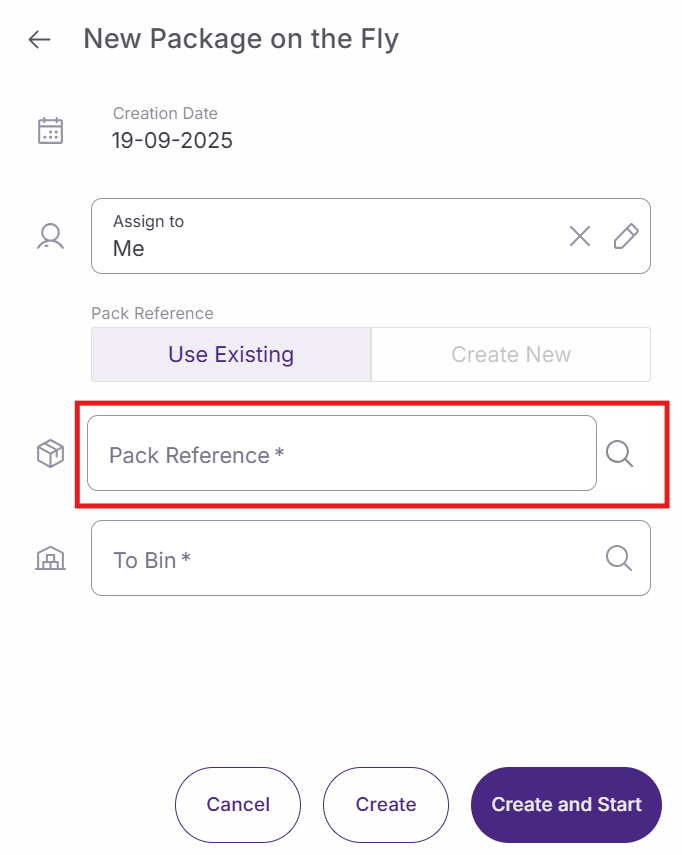
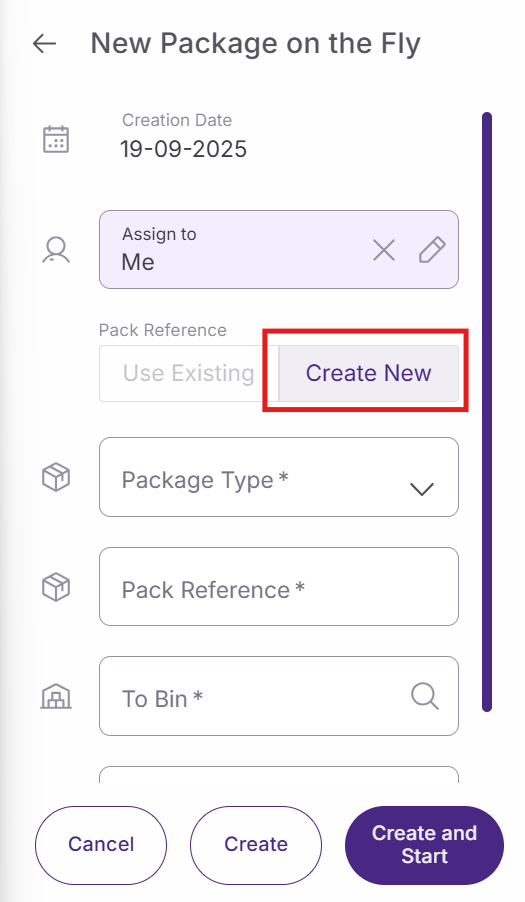
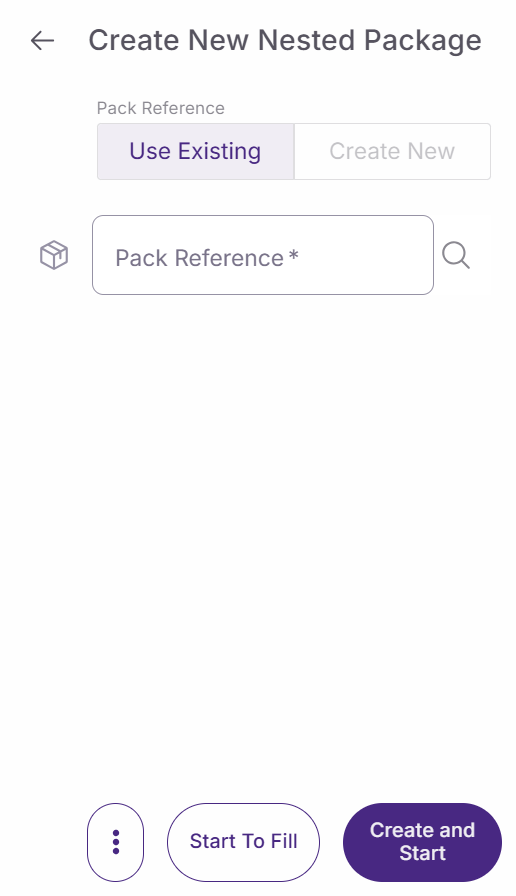
Packing reference. Choose between segmented button options to choose a already existing package or to create a new one. If you choose to create a new one, new fields will appear for the package creation
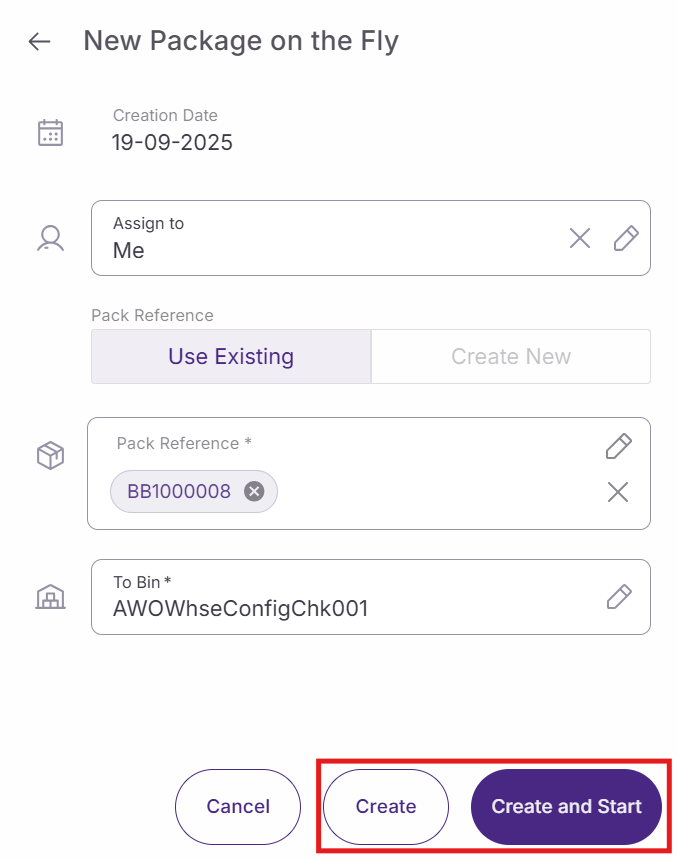
If the option ‘Use existing’ is selected :
-
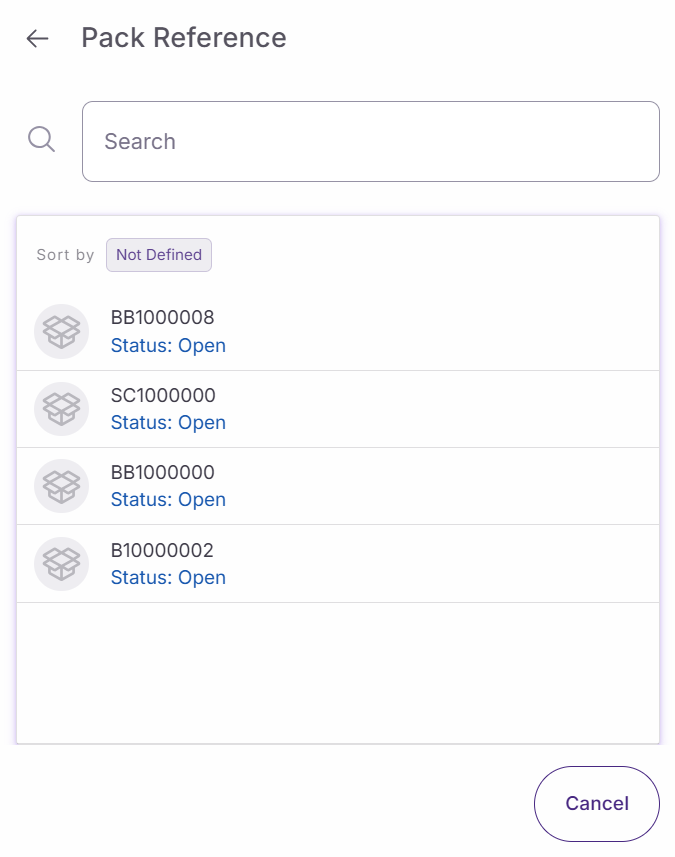
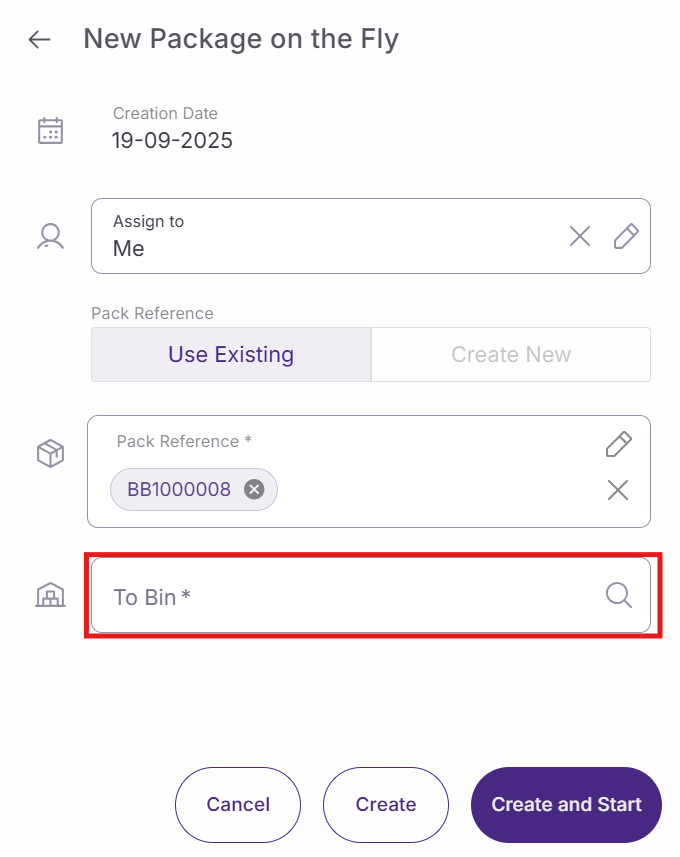
Pack reference. Choose the reference of the package you want to use
-
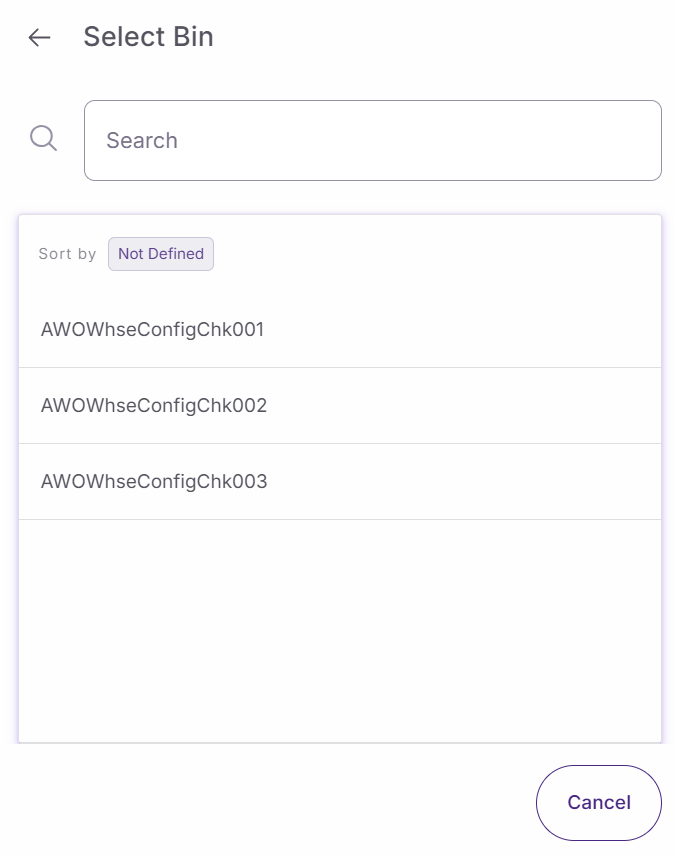
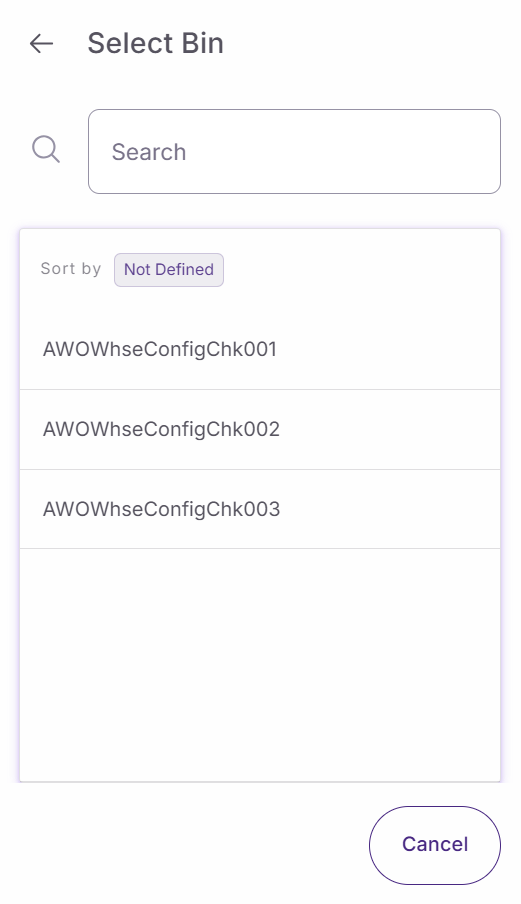
To bin. Select or scan the destination bin where the package will be stored. This field is mandatory
-
Choose one of these options to complete the package creation:
-
Cancel. Returns to the previous screen without creating anything. If you haven't made changes, it returns directly. If you've started filling out the form, the system will ask for confirmation.
-
Create. Creates the package task and returns to the previous screen.
-
Create and start. Creates the task and immediately starts it. This option only appears if you're assigned to the task.
-
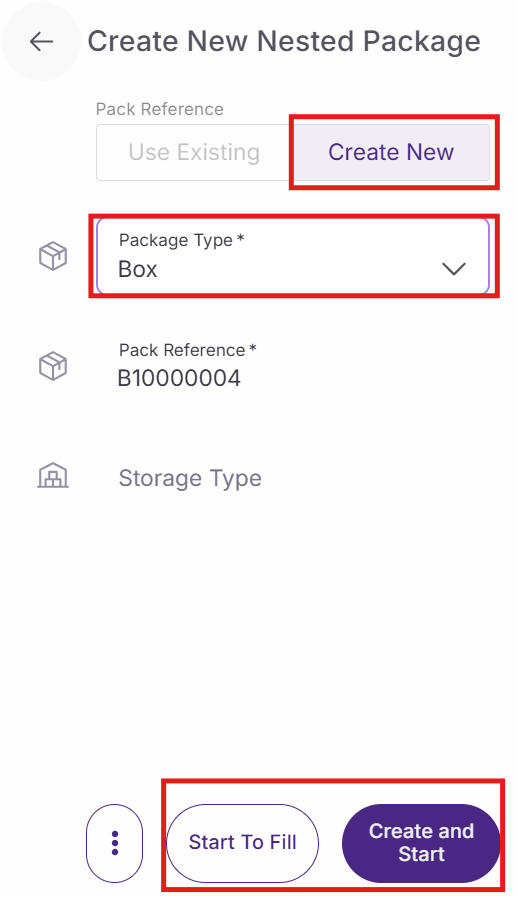
If the option ‘Create New’ is selected :
-
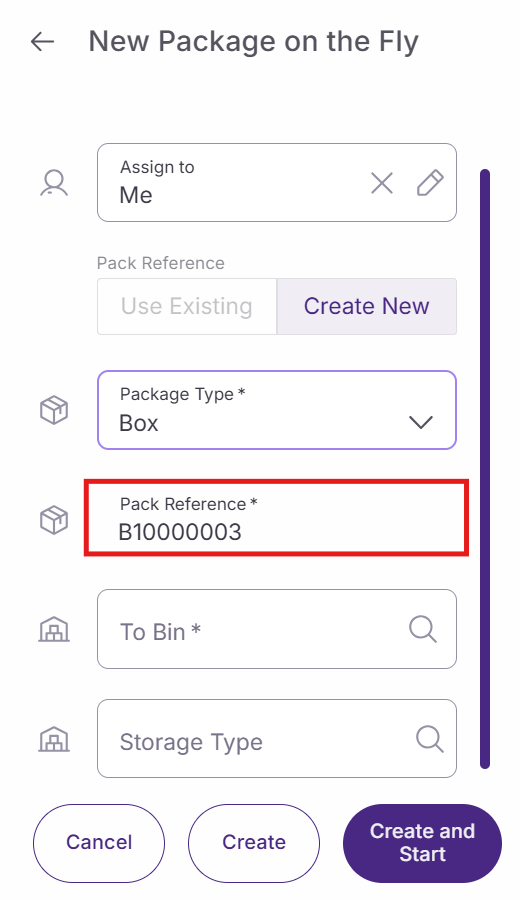
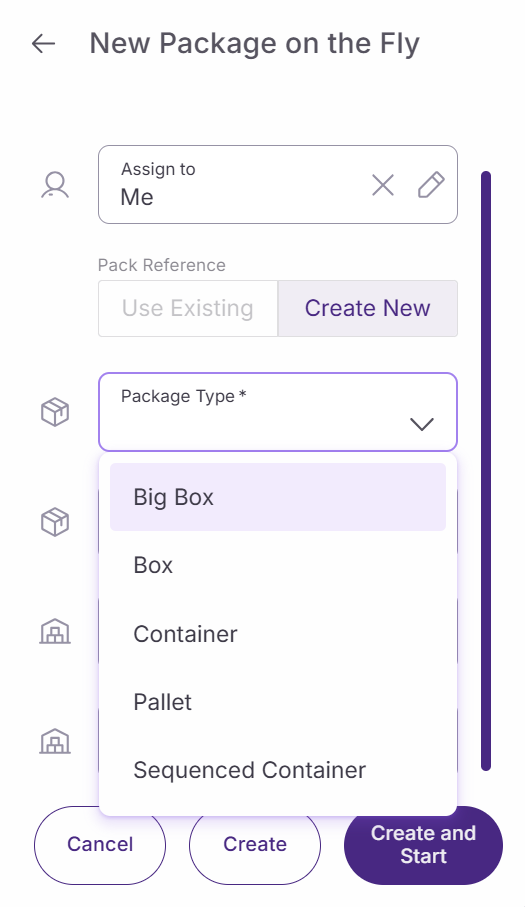
Type. Select the container type you want to create, such as pallets or medium boxes. This field is mandatory for new packages.
-
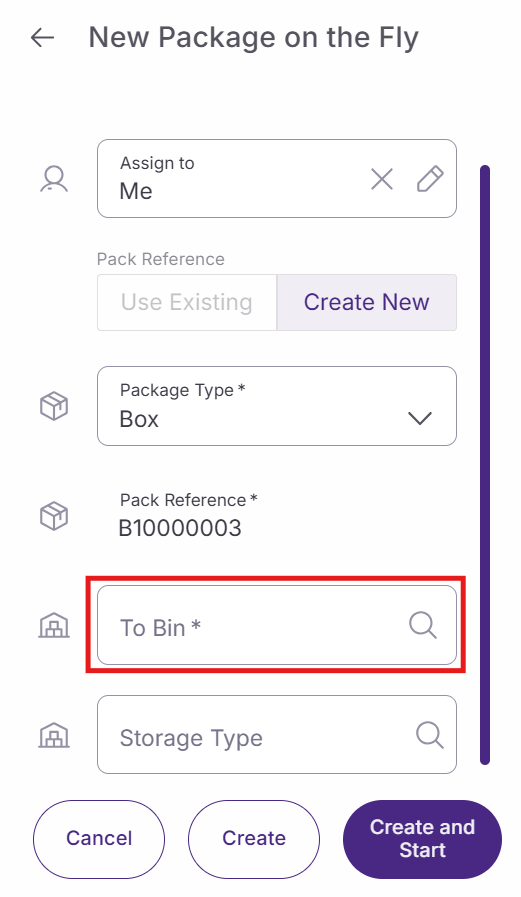
Pack reference. The system automatically generates a reference after you select the container type. You can edit this reference if needed. This field is mandatory.
-
To bin. Select or scan the destination bin where the package will be stored. This field is mandatory and only appears after selecting a container type.
-
Storage type. Select the storage type if required by your system configuration. This field may not be mandatory depending on your setup.
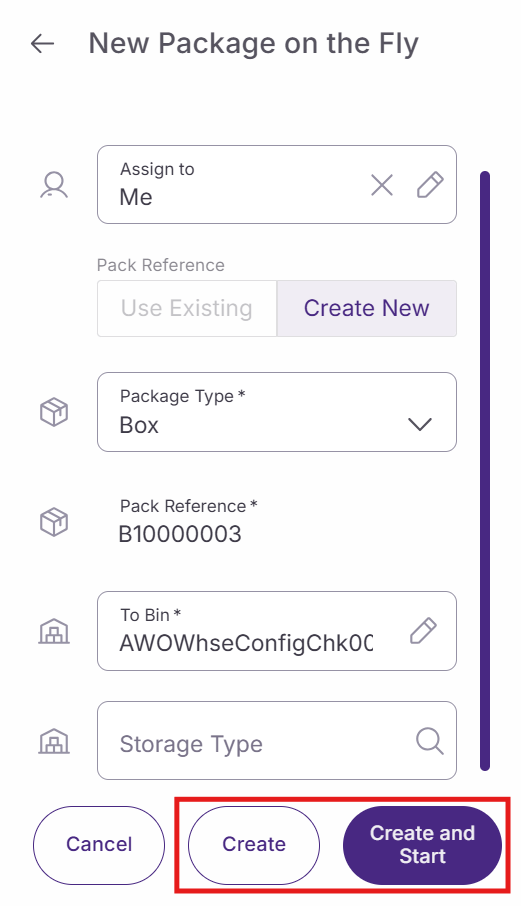
Choose one of these options to complete the package creation:
-
Cancel. Returns to the previous screen without creating anything. If you haven't made changes, it returns directly. If you've started filling out the form, the system will ask for confirmation.
-
Create. Creates the package task and returns to the previous screen.
-
Create and start. Creates the task and immediately starts it. This option only appears if you're assigned to the task.
Add nested packages
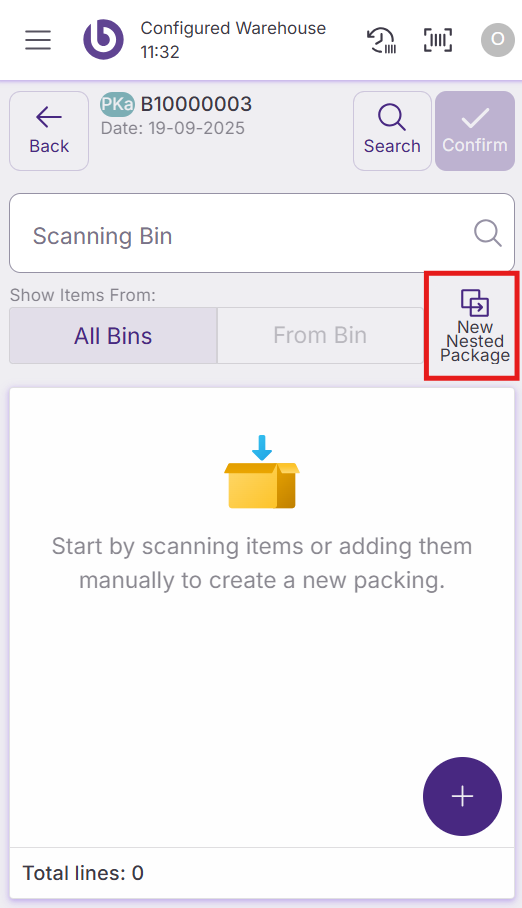
After creating the main package, you arrive on the ‘Packaging’ menu. Here you can add an item, but also smaller containers inside it. This process creates nested packages within your main container.
Select the packing reference option using the segmented buttons:
-
Use existing. Select an existing container to add to your main package.
-
Create new. Create a new container to place inside your main package.
If you choose 'Create new', configure these fields:
-
Type. Select the container type for the nested package. This field is mandatory.
-
Pack reference. The system generates an automatic reference that you can edit. This field is mandatory.
Complete the nested package creation:
-
Cancel. Returns to the previous screen without creating the nested package.
-
Start to fill. Creates the nested package and opens it for adding items.
You can also use an already existing package, then it is the same process as described above.
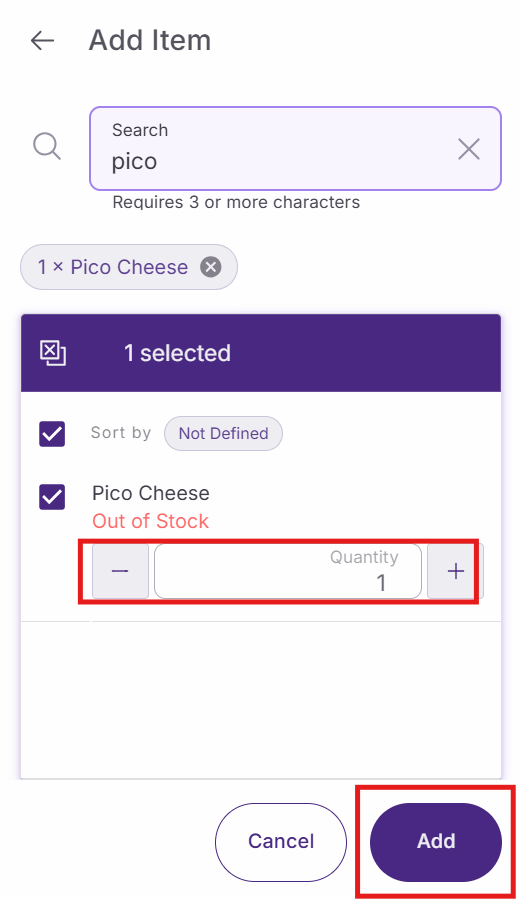
Add items to packages
When you select 'Start to fill' in the nested package, the package window opens, indicating you're working inside a nested package. The interface adapts to show you're in a nested container with animated transitions.
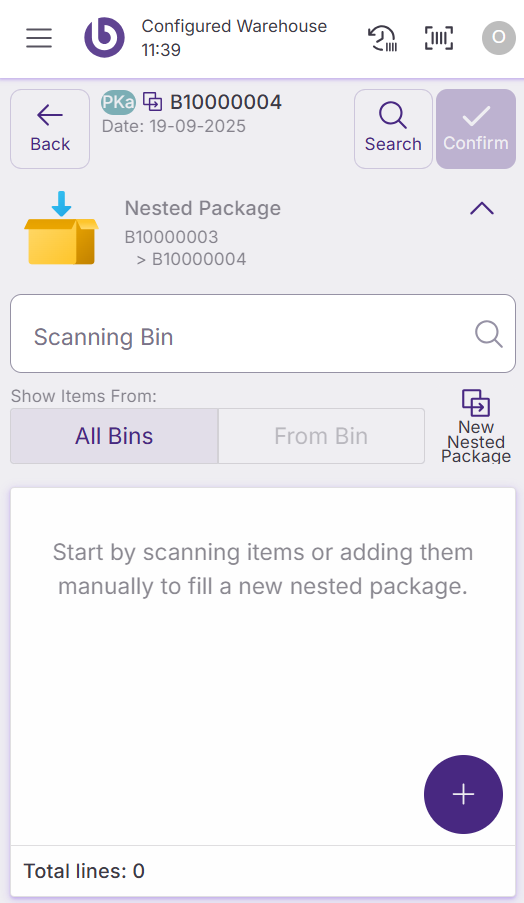
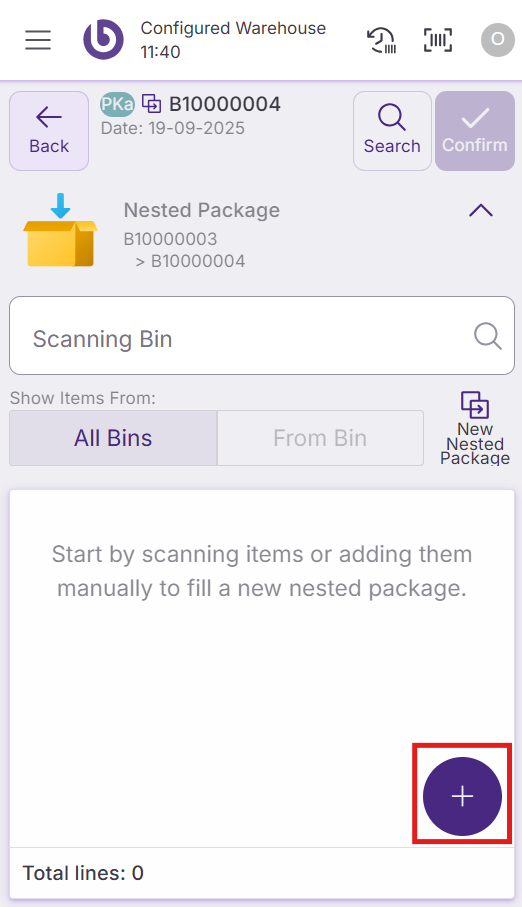
You can add items or already close package to your package by:
-
Scanning product barcodes
-
Manually entering product information

The system allows you to create multiple nested packages within the same main container by repeating the package creation process.
Confirm packaging
After adding all items and nested packages, confirm your packaging work. The system will show your completed package structure, for example, a pallet containing a box with multiple products.
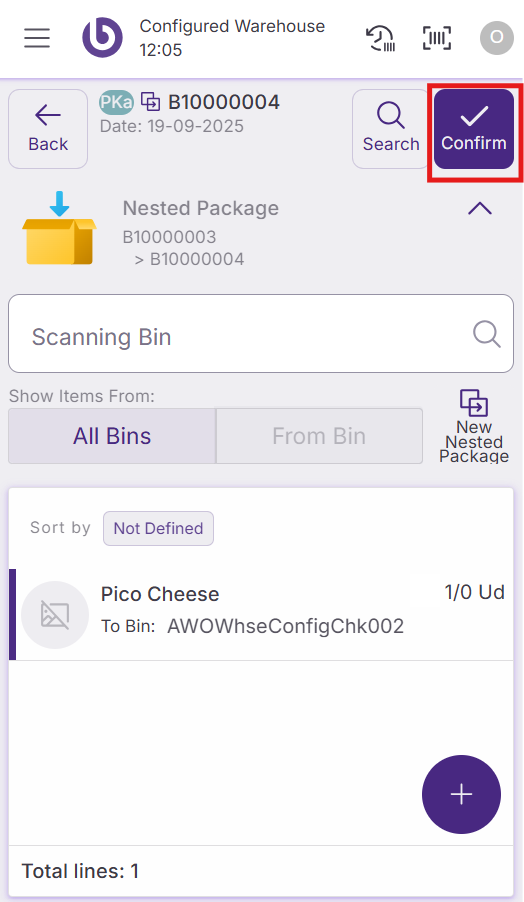
Your package is now ready for transport or storage in the designated bin location.
Use packages in distribution orders
The distribution order screen includes package management functionality. You can create packages directly from the distribution order interface using a shortcut button.
When you create a package from a distribution order:
-
Select the package creation shortcut from the distribution order screen
-
Complete the package creation process as described above
-
The system automatically adds the package as a new line in the distribution order list
-
The package line clearly indicates it contains a package rather than individual items
This integration streamlines the process of creating packages while fulfilling distribution orders, ensuring efficient warehouse operations.
Unpackage
Unpakage is to unpack a box or a pallet, means to have the uti item
Action availability and access control
The actions and options shown in the ‘New Package’ dialog are role-dependent. By default, if a user does not have permission for a specific action, it will not appear in the interface.
This behavior can be overridden per warehouse by defining a custom UI configuration in the ‘Warehouse Definition’ window.
For more details on how access is configured, see the Role and user action setup in SSMS section.
|
Option |
User action |
|---|---|
|
Assisted |
OpenNewAssistedBoxDialog |
|
On The Fly (OTF) |
OpenNewOTFBoxDialog |