
The ‘Blind Receive’ transaction addresses situations where warehouse operators receive incoming goods without prior knowledge or documentation. Operators initiate this process by scanning the final products, even if they are contained within larger packages such as boxes or crates. It's important to note that the system will not recognize these larger packages, necessitating the need to open them to scan the individual items within.
It not only streamlines the reception process but also enhances flexibility, enabling warehouses to adapt to varying operational needs and unforeseen circumstances. This is an advanced functionality that needs to be used in exceptional scenarios. When a blind receipt is completed in SSMS, it creates a new delivery note on the fly in the back office, which a manager must then validate.
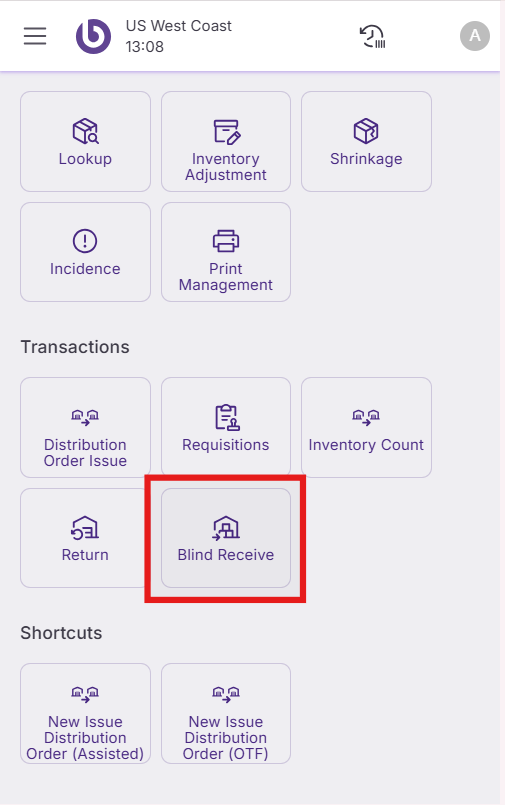
Access to the ‘Blind Receive’ screen
In the ‘Transactions’ section, click on the 'Blind Receive' icon in SSMS to access this functionality.
The ‘Blind Receive’ screen displays two main sections:
-
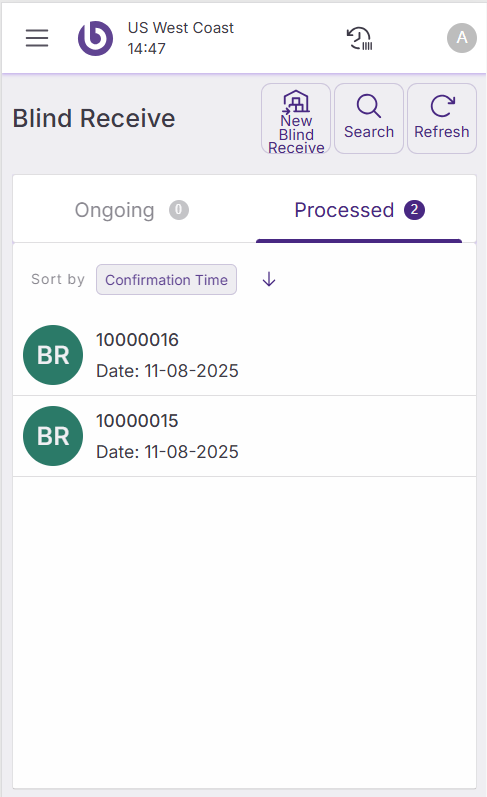
Ongoing: Shows the blind receipt created by the logged user and waiting to be processed.
-
Processed: Shows the blind receipts processed in the current session.
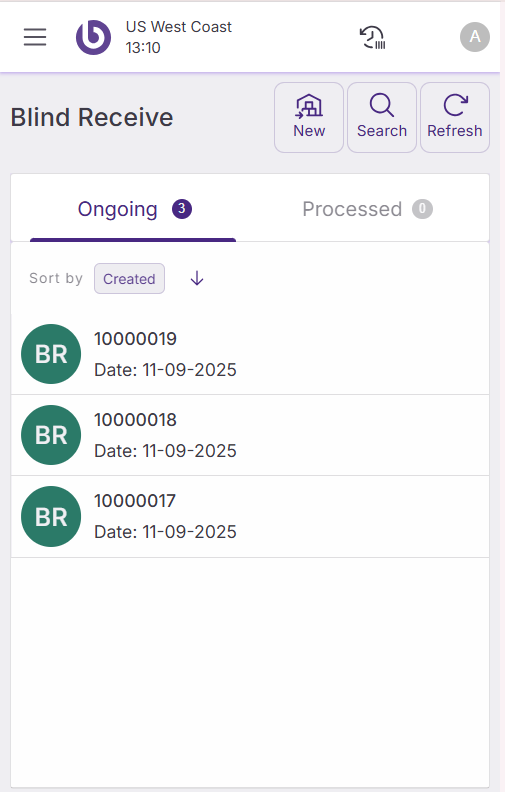
Use the ‘Search’ button to filter ongoing or processed blind receives by document number.
The ‘Refresh’ button updates the list to show recently assigned blind receivings real-time.
The ‘New’ button allows you to create new blind receptions.
Create a new blind receipt
When clicking the ‘New’ button, the screen ‘New Blind Receive’ is displayed with the following fields:
-
Creation Date: This field will be automatically populated.
-
Assign To: This field will be automatically populated.
-
Vendor: In this selector, select the supplier who sent the goods receipt. It is mandatory.
-
Delivery Number: Enter the external delivery number.
-
Description: Set comments and description linked to the delivery.
-
Arrive Truck Date and Arrive Truck Time: Date and time of arrival of the carrier.
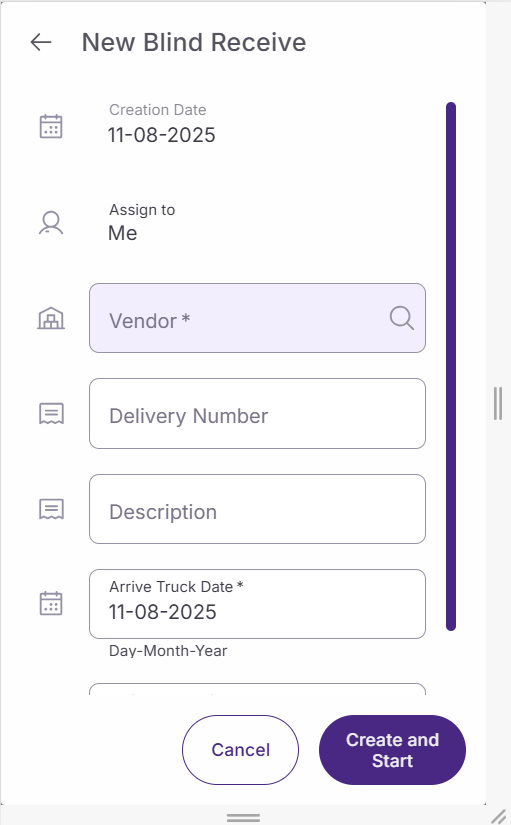
Click the ‘Create and Start' button to create the blind receipt, and start adding the products.
Tap the ‘Cancel’ button to go back to the previous screen.
Process a blind receipt
A new empty window appears to manage the blind receipt. At the top, it shows the internal number, which was created on the fly to permit the receipt.
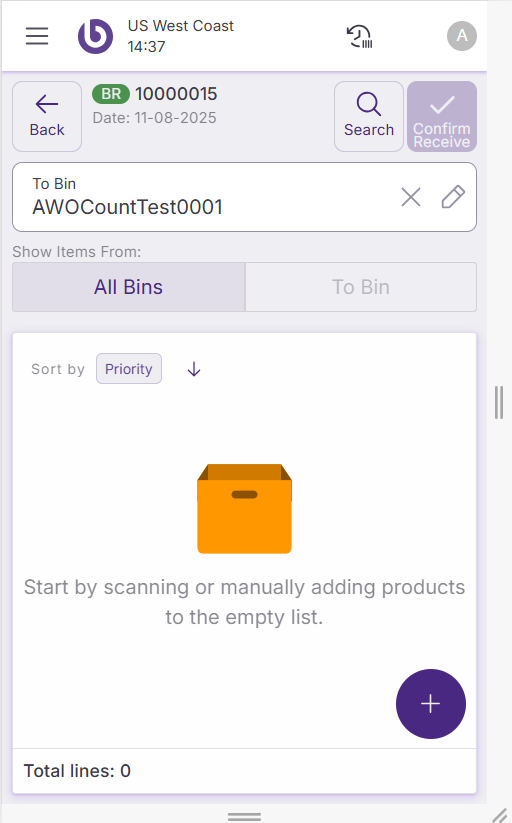
To Bin: Allows you to select the bin to use for the receipt.
To add items to the reception, two methods are available:
-
By scanning
-
Manually by using the green '+' button
Upon clicking the '+' button, a new dialog is displayed. You have the option to add either items or packages.
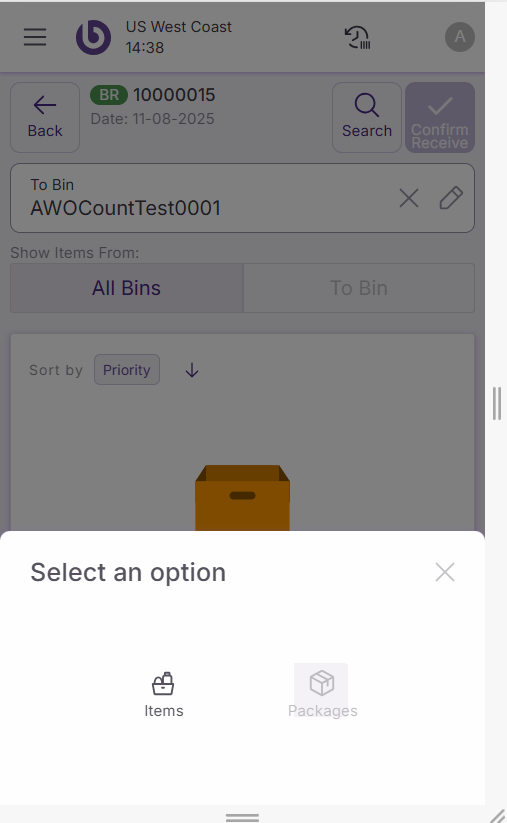
If the option ‘Items’ is selected, a search window appears where you can enter the item reference or name. During the search, you can select items by:
-
Clicking on the checkbox
-
Using the '-' and '+' buttons to modify the item quantity
Selected items display just under the search box. You can search and select several items simultaneously.
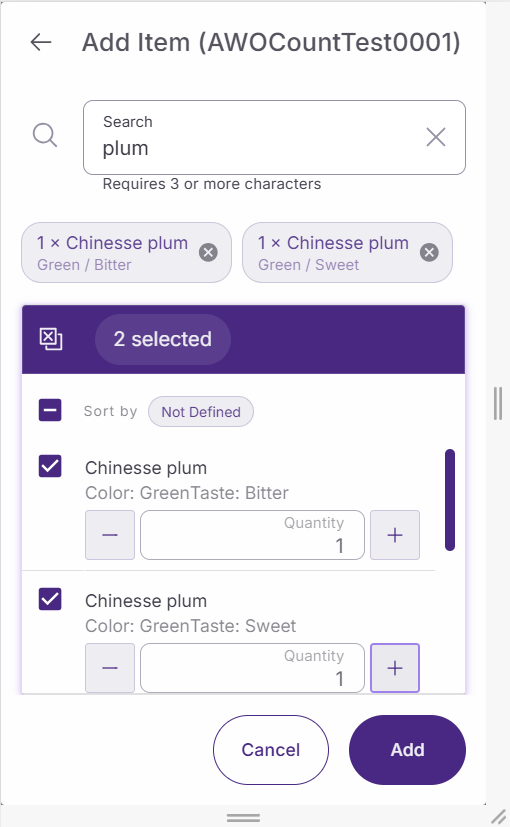
Use the 'Add' button to add selected items to the document and the 'Cancel' button to cancel your search.
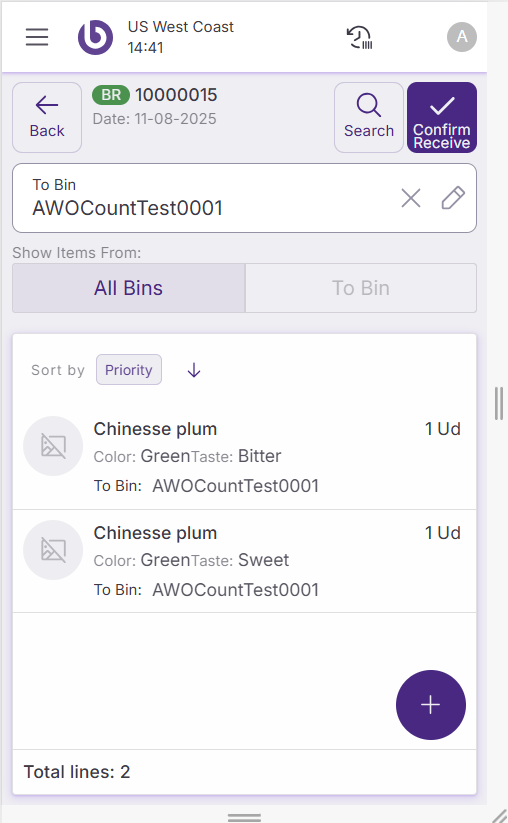
Once items display in the document, you can modify quantities by clicking on the line. Adjust the line quantity using the '+' and '-' buttons, remove the line with the 'Delete' button, and finalize changes with the 'Apply' button.
Complete a blind receipt
Upon completion of document editing, click 'Confirm Receive' to register the receipt.
A prompt will inquire whether any discrepancies require reporting.
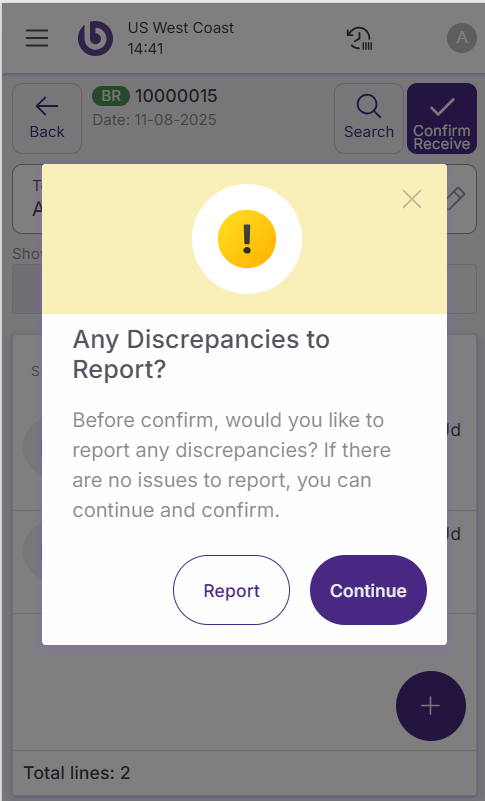
If there are no discrepancies, confirm by clicking the 'Continue' button. If discrepancies exist, select the 'Report' option.
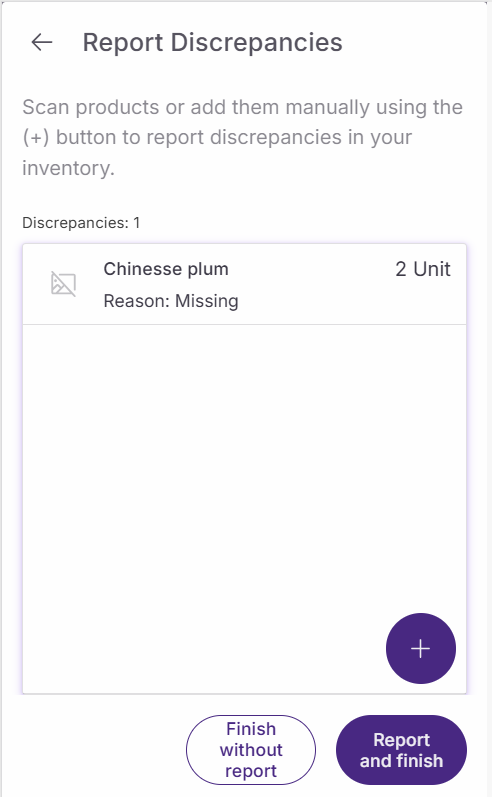
Report discrepancies
A new dialog opens to select items with discrepancies. You can add items by scanning or use the '+' button to add them manually.
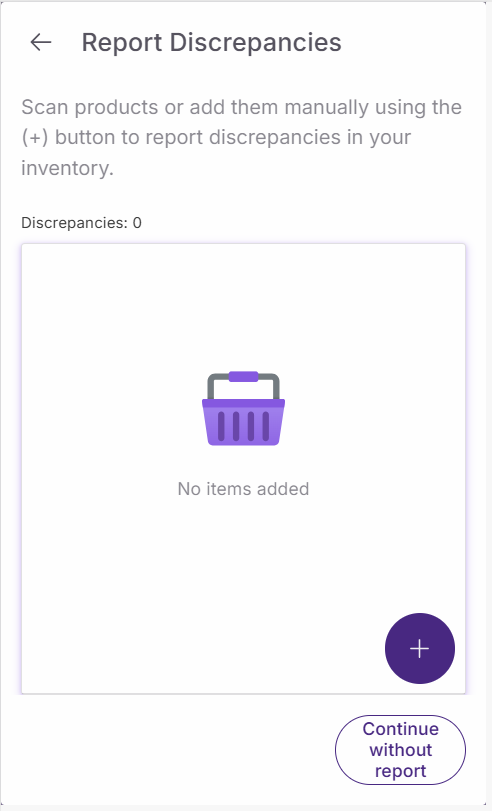
Clicking the '+' button opens a search window where you can search for the item.
Selecting an item opens a new dialog where you can define:
-
Item quantity to report: Using '-' and '+' buttons
-
Reason: Of the discrepancy
-
Additional Comment: To add more detail
-
Select same reason for the following scanned items: Helps apply the same reason to the next scanned items
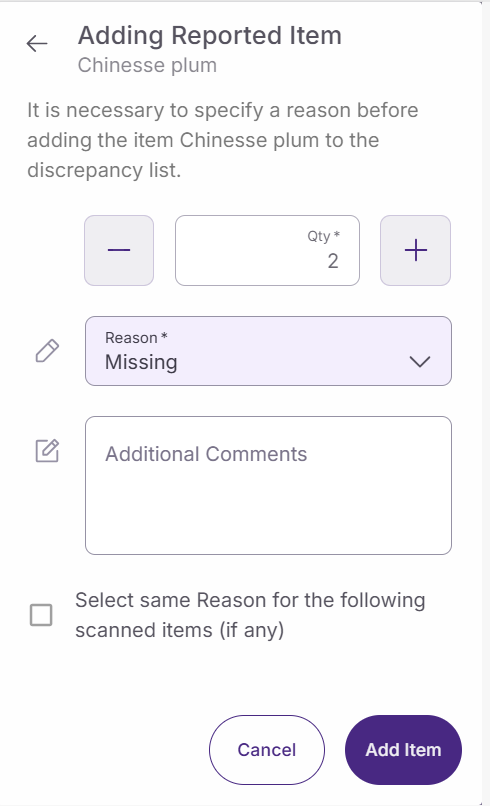
Use the 'Add Item' button to validate the entry and add the item to the report discrepancy list. Use the 'Cancel' button to avoid the process.
In the report discrepancies window, you can use:
-
Finish without Report: Button to avoid the discrepancies declaration
-
Report and Finish: Button to publish the report and finish the blind receipt
When the blind receipt is confirmed, you return to the ‘Blind Receive’ menu. The blind receipt moves from the 'Ongoing' to the 'Processed' tab.
Back office users can check receipt quantities on delivery note documents in the ‘Delivery Note’ window or linked documents, such as ‘Purchase Order’ or ‘Distribution Order Receipt’ windows. In the back office, managers need to validate blind receipts by booking the delivery note created for the receipt and updating expected quantities.