
This guide explains how to issue goods from your warehouse using the SSMS front end interface. The issue functionality allows you to send items to other store warehouses, clients, central warehouses and suppliers. You will learn the basic steps to access and use the different issuing modes available on your mobile device.
Access the issue function
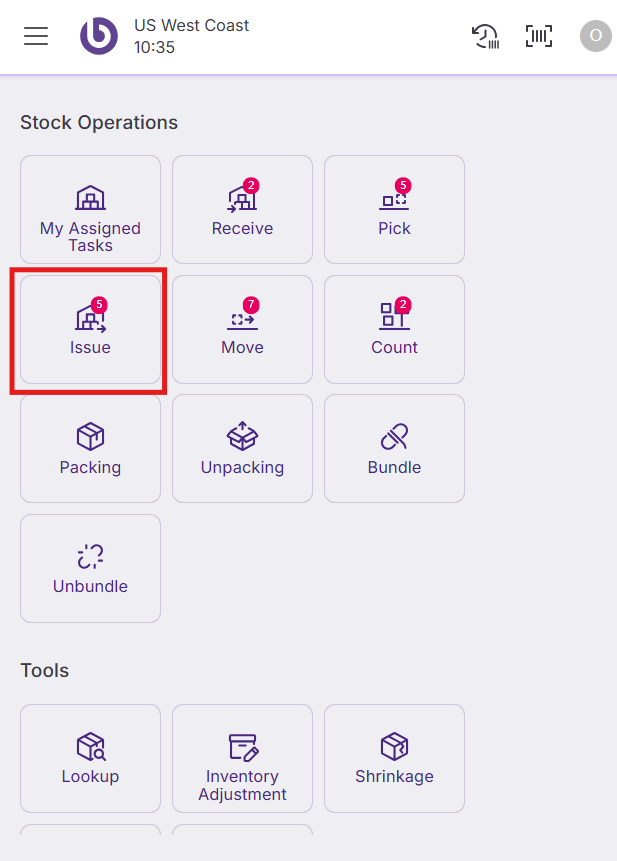
Log in to the SSMS application using your credentials. Once logged in, select 'Issue' from the main menu to open the issue window.
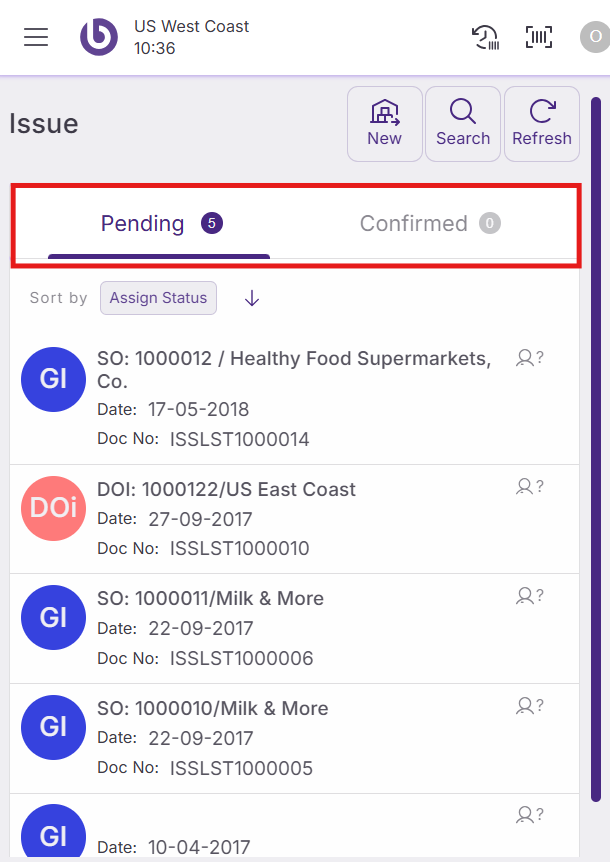
The issue screen displays two main sections:
-
Pending: Shows tasks waiting to be confirmed
-
Confirmed: Shows tasks completed during your current session
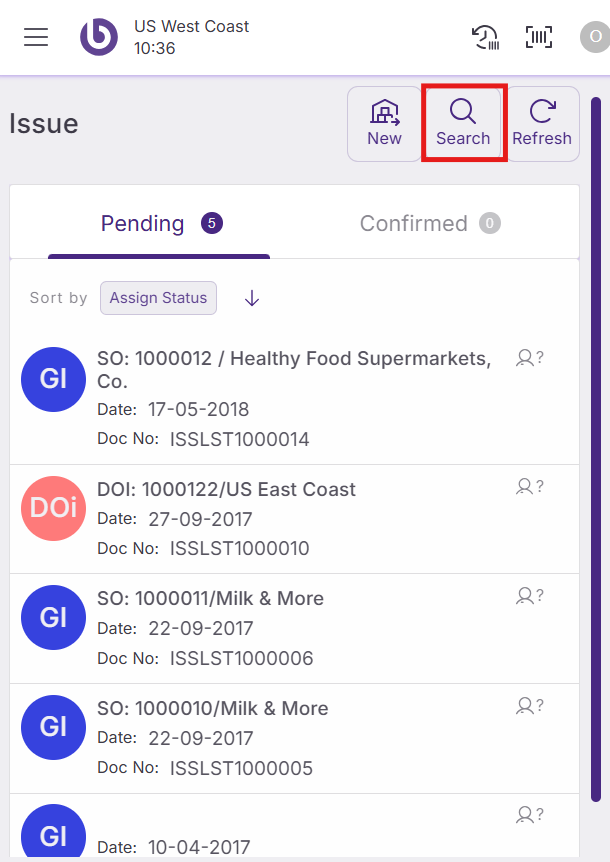
You can use the 'Search' button to filter pending tasks and the 'Refresh' button to update the list and view newly assigned tasks in real-time.
Create new issue tasks
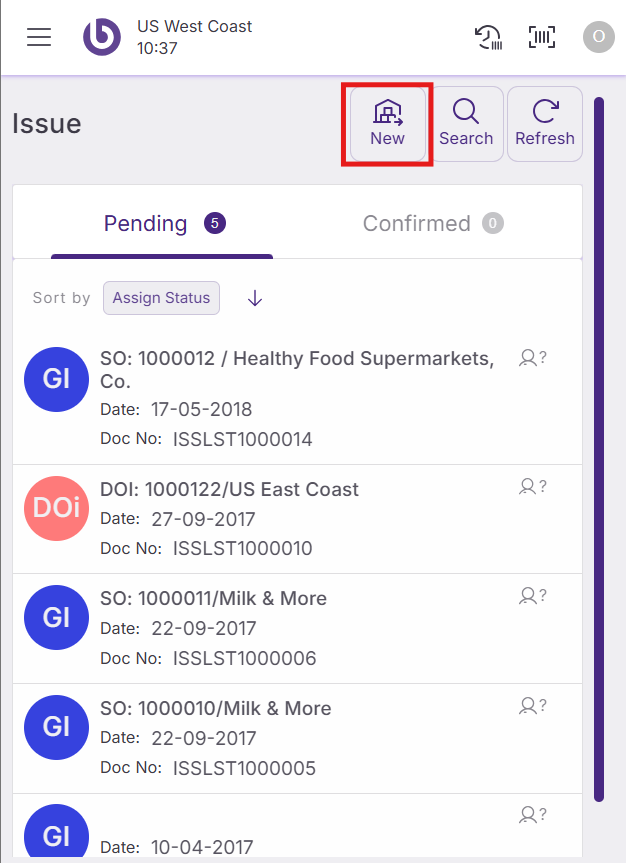
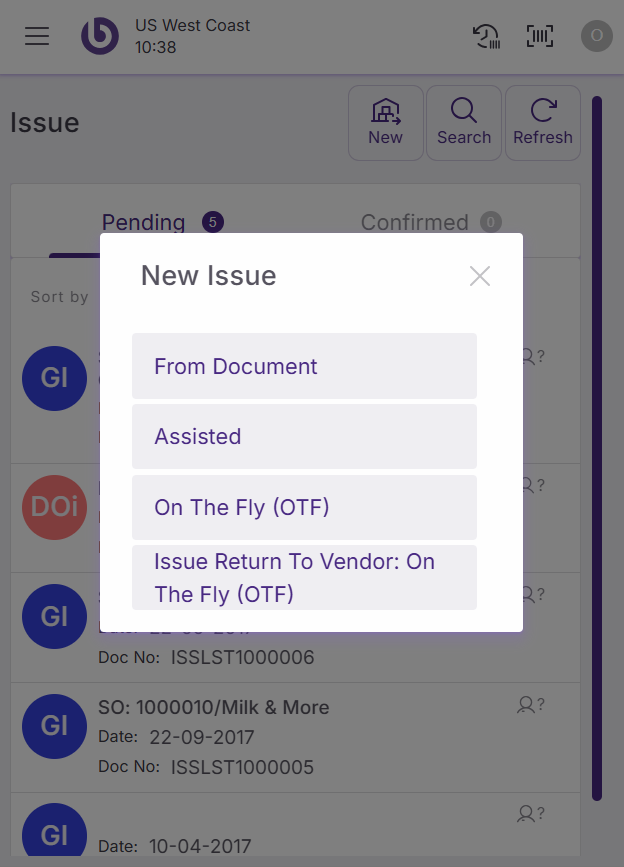
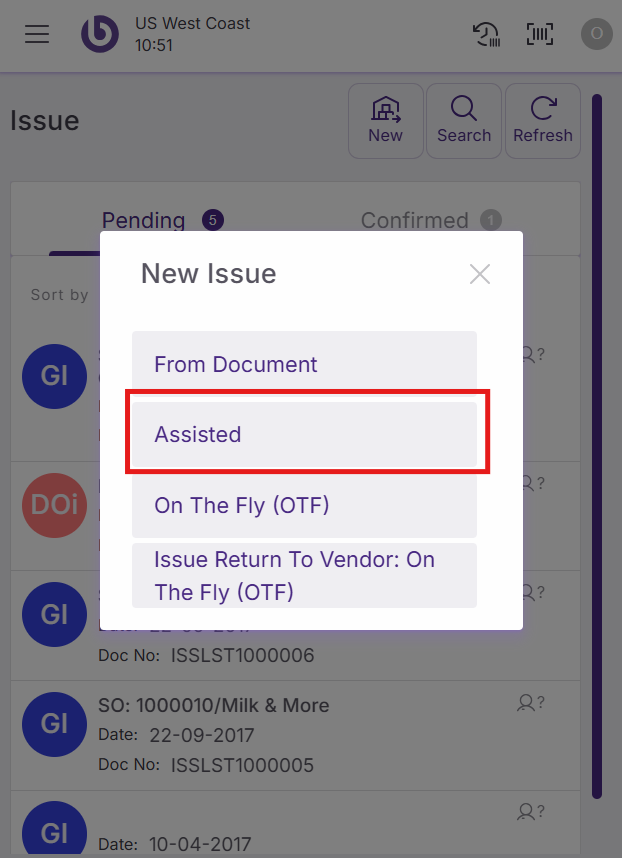
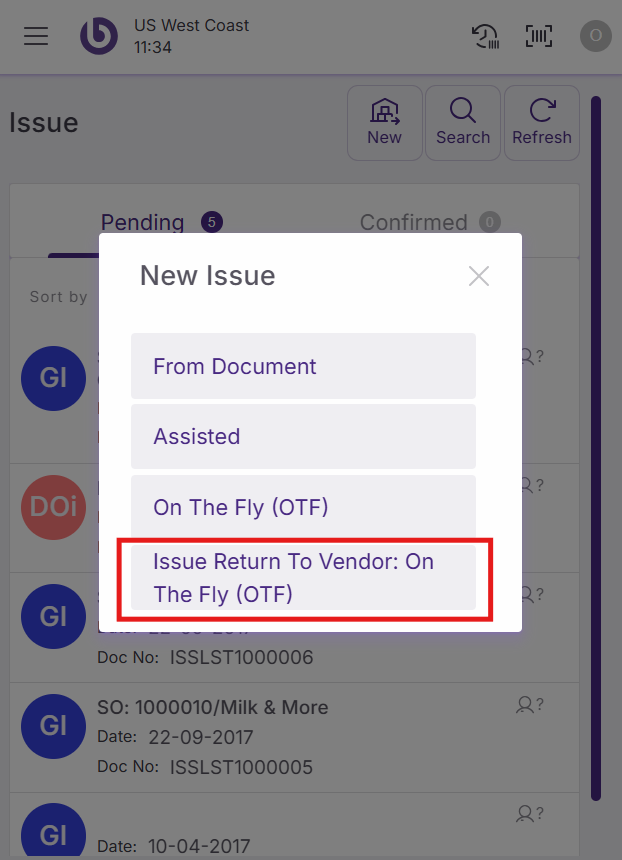
Tap the 'New Issue' button to create new move tasks directly from your device. The system offers four different issuing modes:
-
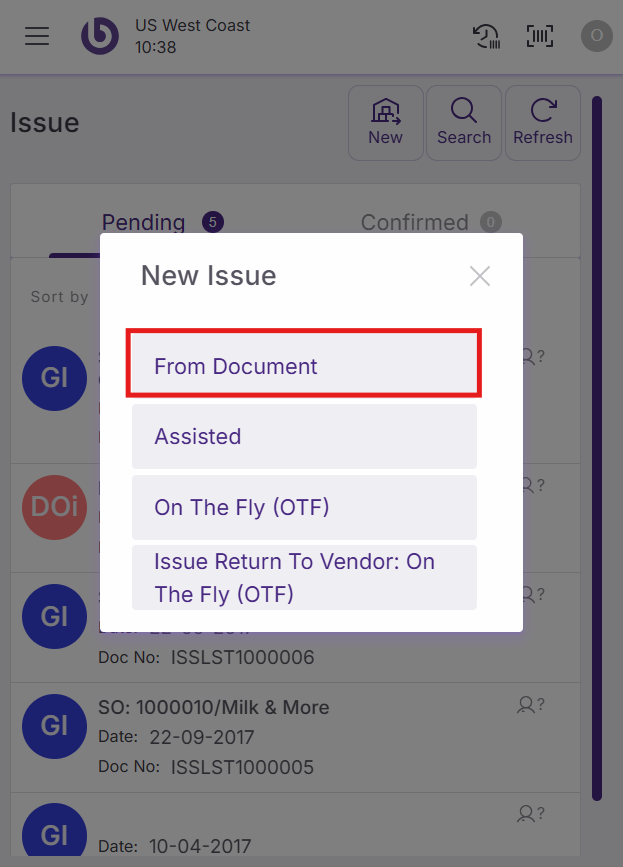
From Document: Generate issue tasks for existing documents like distribution orders, sales orders, or delivery notes
-
Distribution Order (Assisted): Create distribution order tasks with pre-selected products
-
Distribution Order On the Fly: Create distribution order tasks and freely add any products from any bin
-
Returns: Generate return tasks for sending items back to vendors
Issue from existing documents
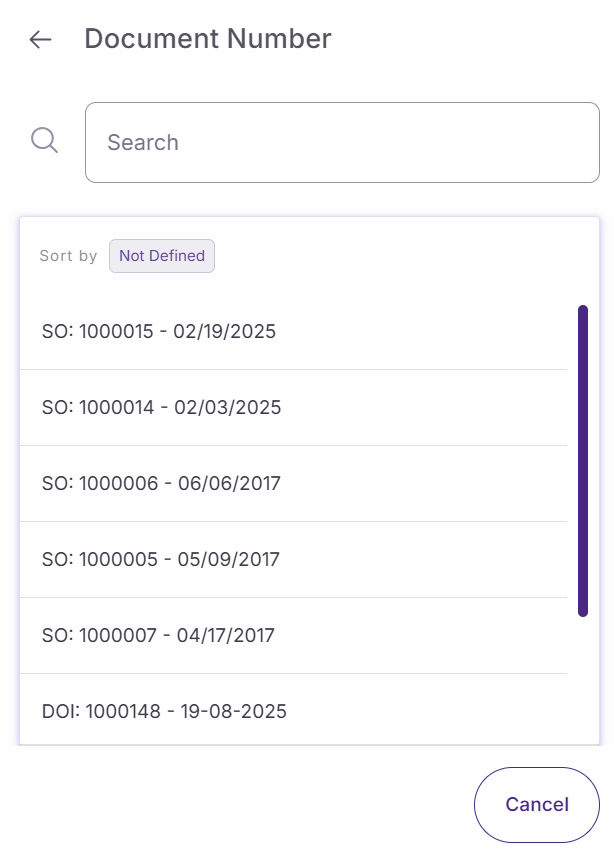
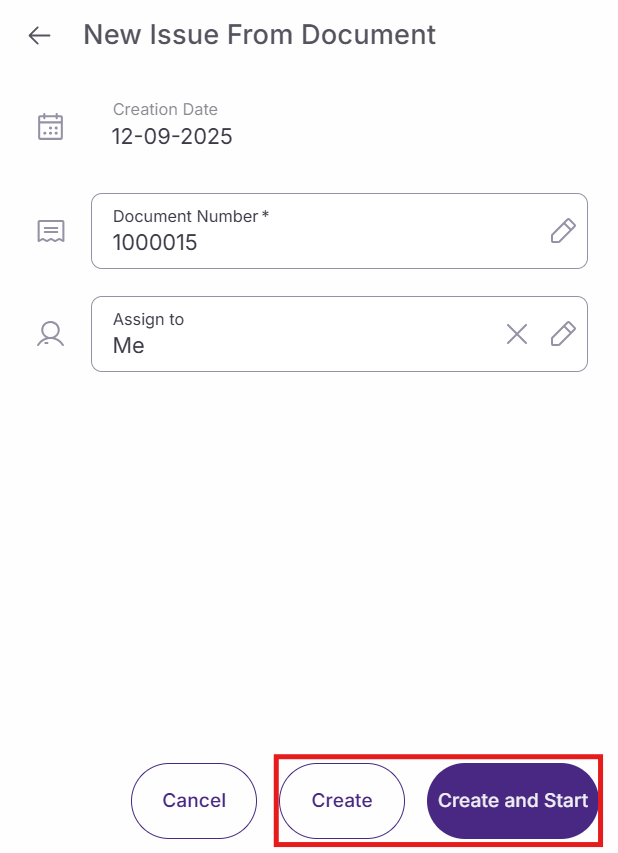
Select 'From Document' when you need to process an existing document. Choose your document by tapping 'Document Number', then tap 'Create and Start' to begin processing.
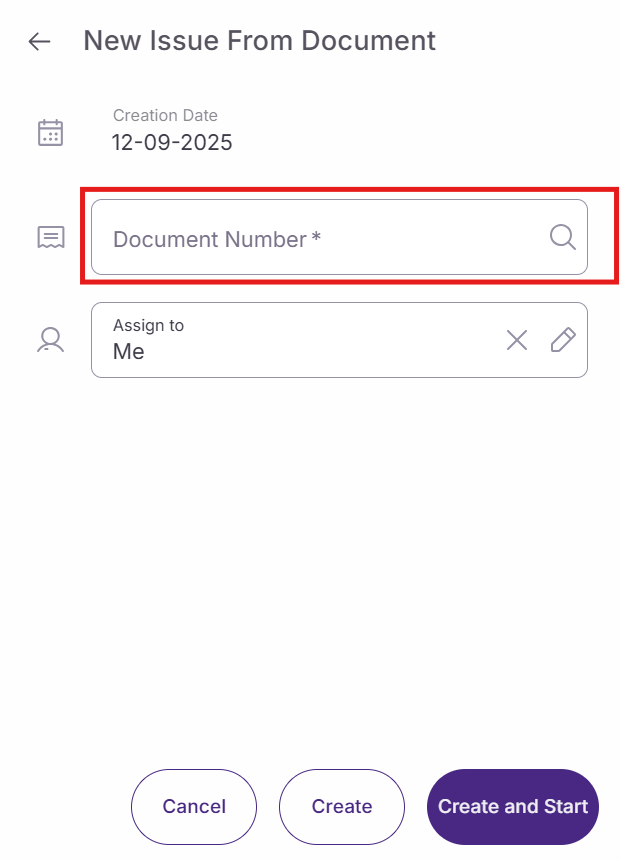
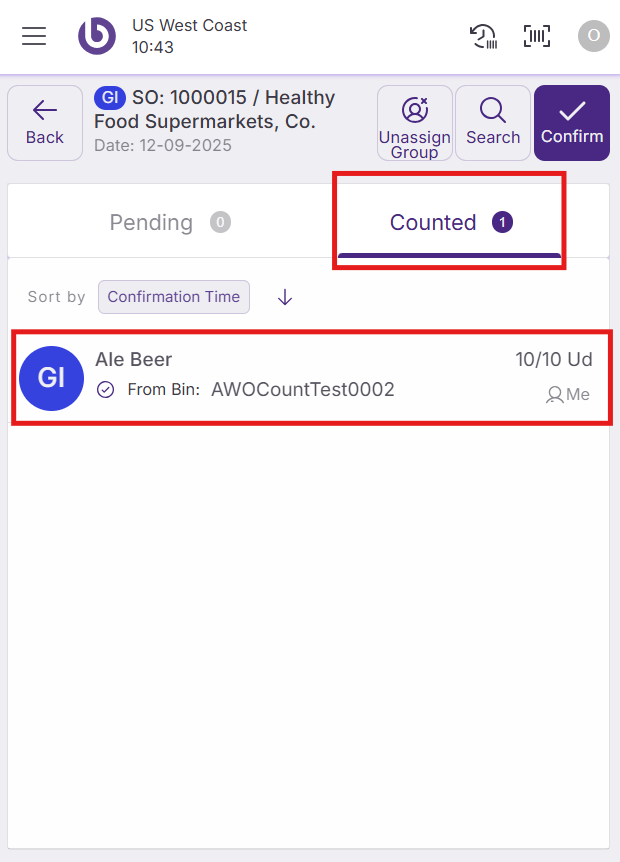
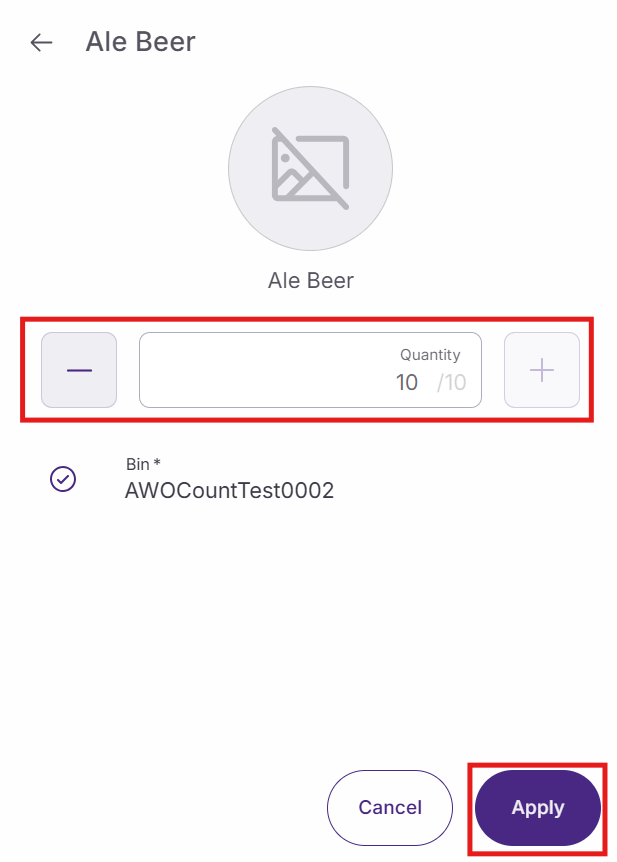
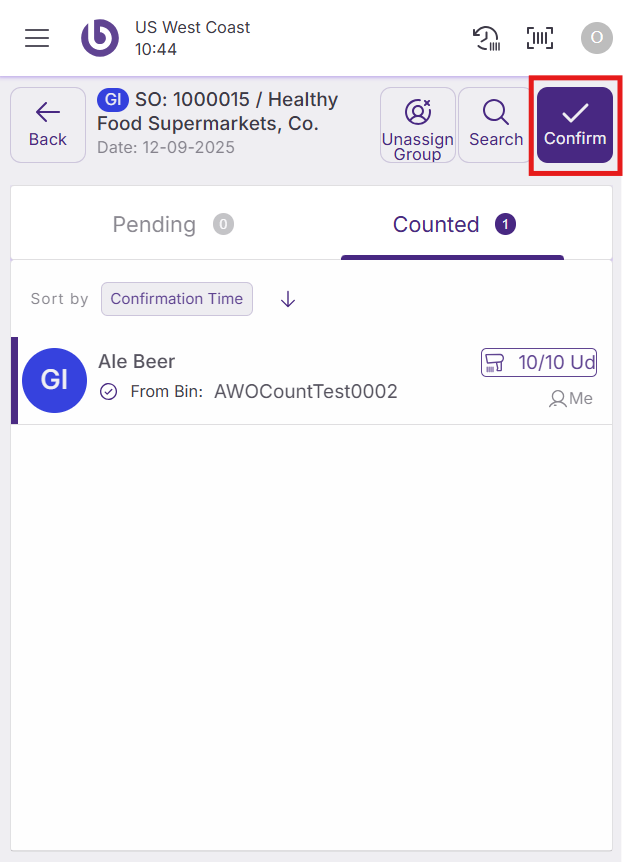
Once the document opens, tap 'Counted' to view the document lines. Select each line, add the correct number of units, and tap 'Apply' to confirm. When all lines are processed, tap 'Confirm Tasks' to complete the issue.
Process distribution orders
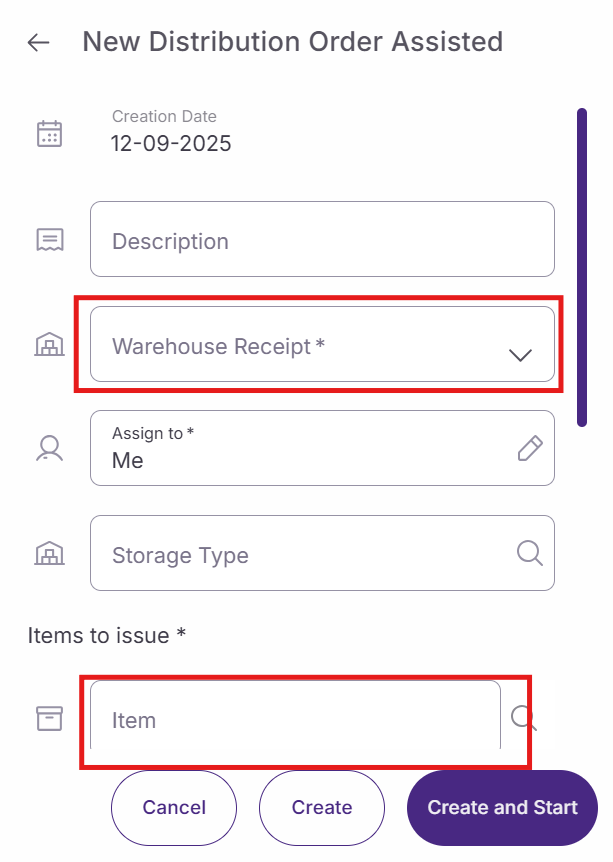
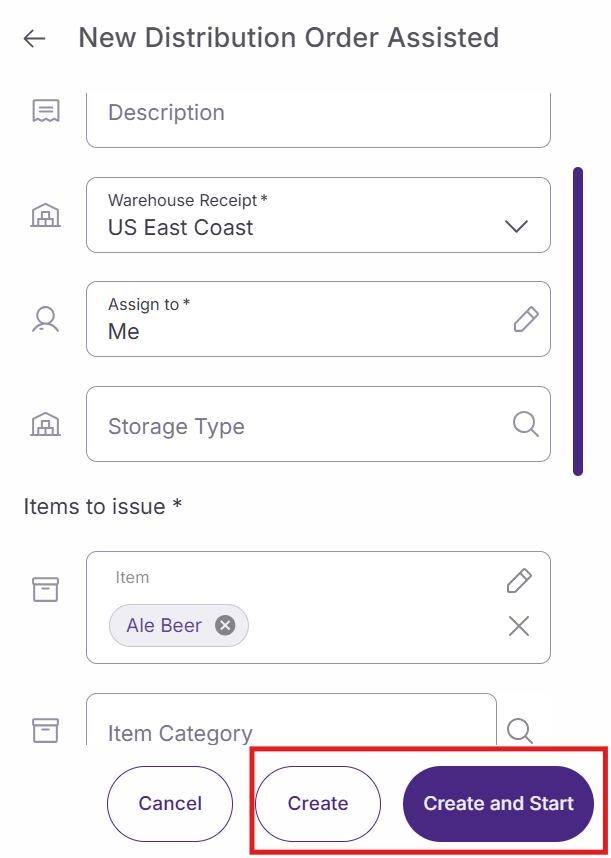
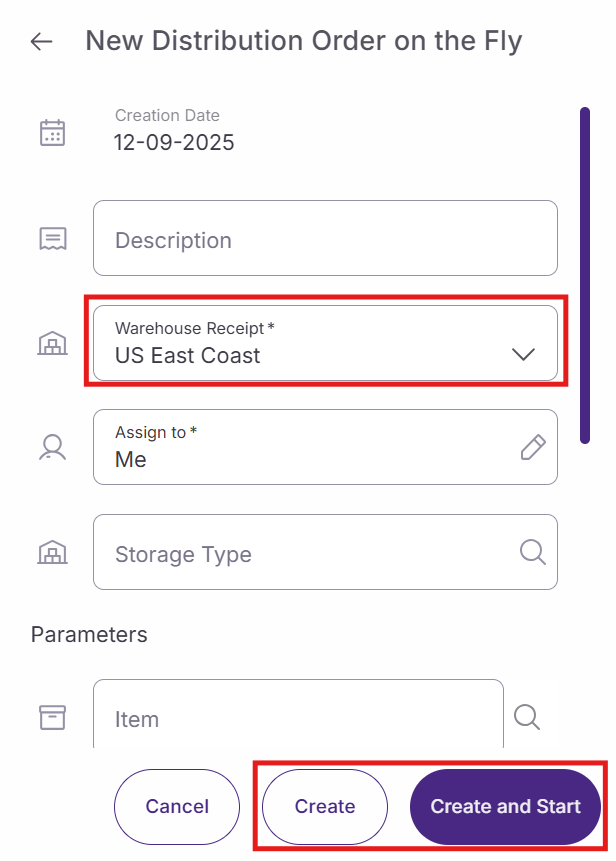
For assisted distribution orders, select 'Distribution Order (Assisted)' and add a description if needed. Choose the receiving warehouse from 'Warehouse Receipt' and add the required items using the search filters. Tap 'Create and Start' to begin processing.
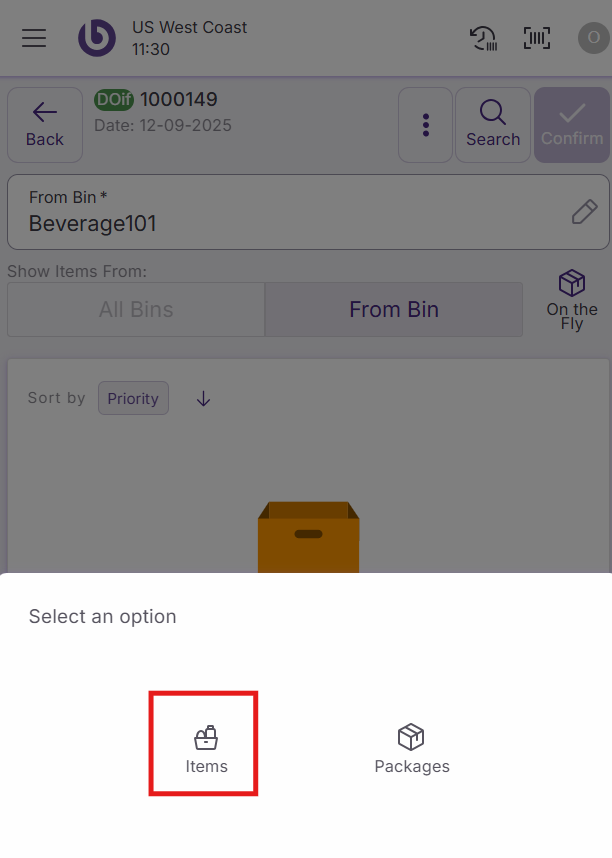
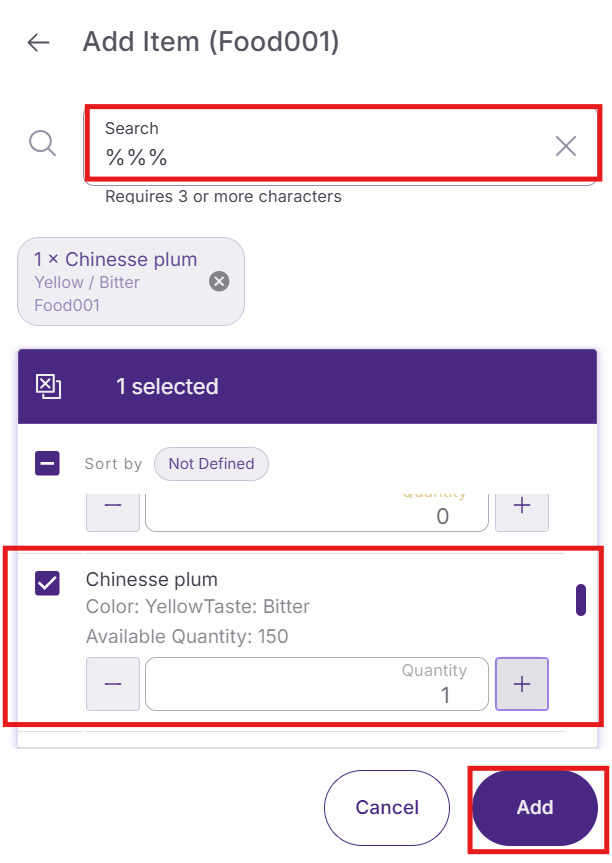
For on-the-fly distribution orders, follow similar steps but you can freely select any bin using 'From Bin' and add products by tapping the '+' sign. Search for products, specify quantities, and tap 'Add' to include them in your order.
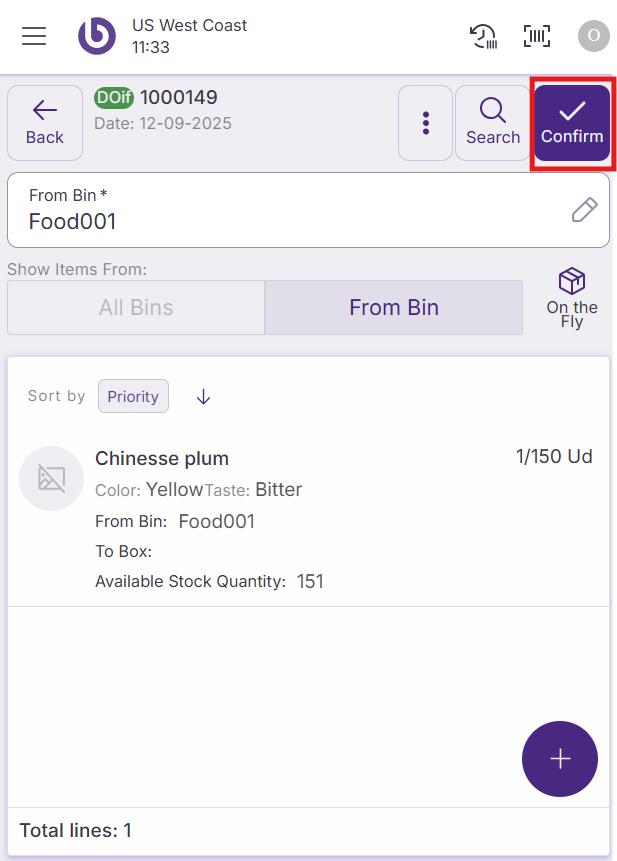
Complete either type of distribution order by tapping 'Confirm DO' after the system synchronizes.


Manage returns
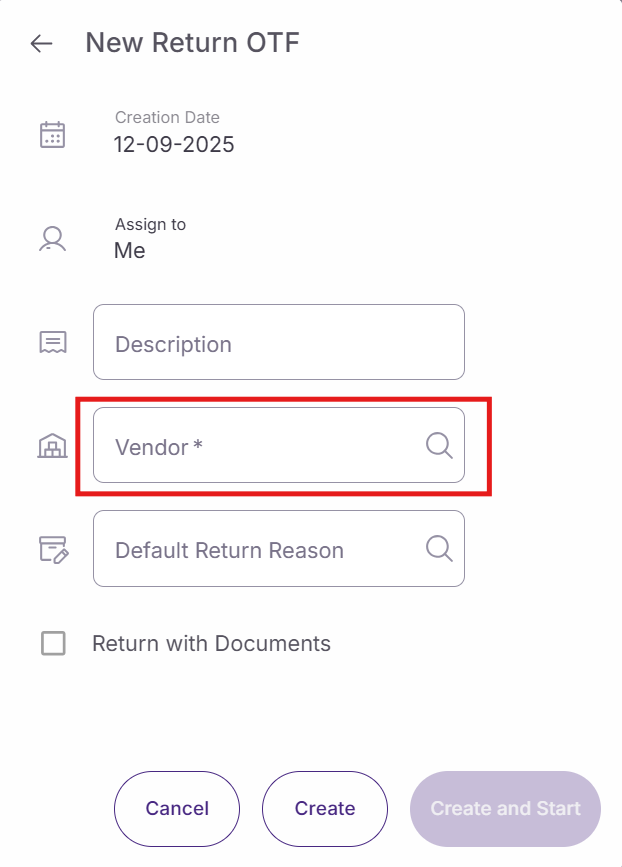
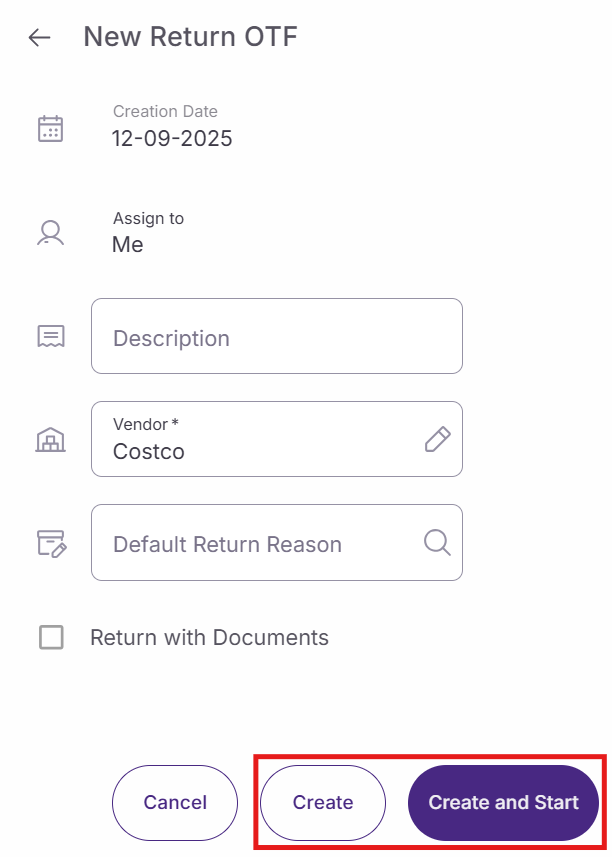
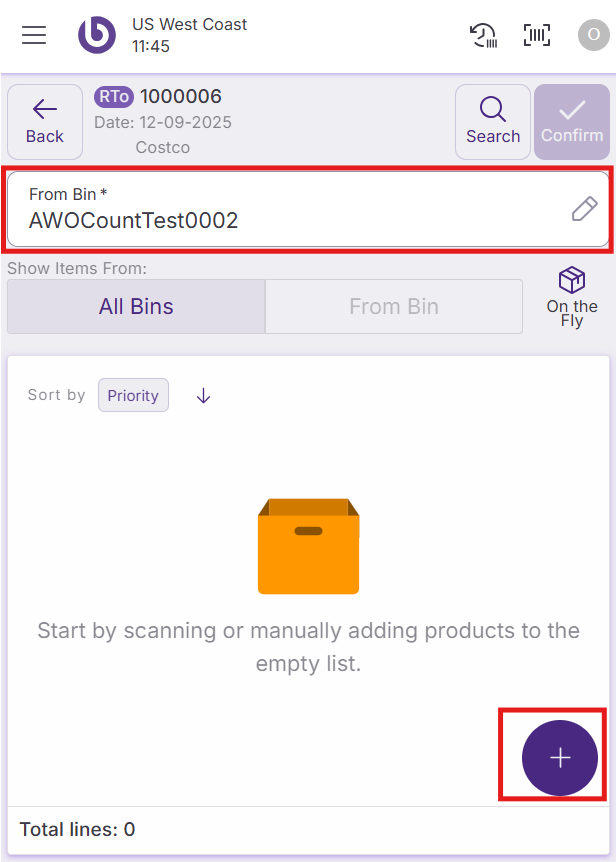
Select 'Returns' to process vendor returns. Add a description, choose the vendor, and tap 'Create and Start'. Select the appropriate bin using 'From Bin', then use the green '+' sign to add products for return.
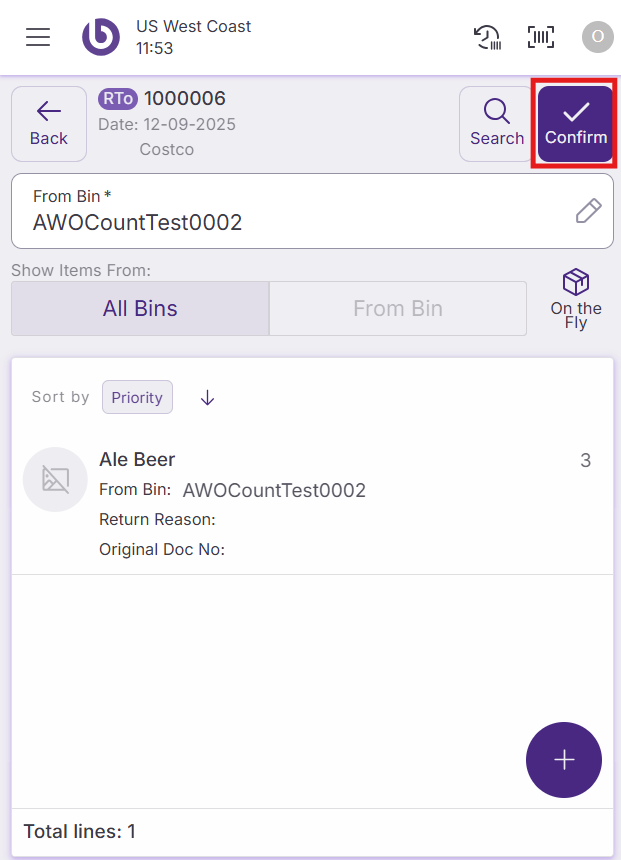
Search for the items to return, it need to be linked to the supplier, specify quantities, and tap 'Add'. Once all items are added and the system synchronizes, tap 'Confirm Return' to complete the process.

Note: For advanced configuration of issue parameters and warehouse settings, contact your back office administrator.
Manage discrepancies
If the counted amount is different (higher or lower) than the expected one, the task will stay in the ‘Pending’ tab with an orange warning icon. If a non-expected item is scanned, it will be added to the ‘Pending’ tab with the orange icon.
When all the received items are counted, the receive tasks can be confirmed using the ‘Confirm Tasks’ button.
If there are discrepancies during the confirmation, the ‘Discrepancies Detected’ screen will be opened, and an action must be selected for each product with discrepancies.


For ‘Missing’ discrepancies, the following options are available:
-
Confirm partially and continue later. To confirm the task with the specified quantity (3/5, for example) and automatically create another task created in available status for the remaining amount (2/2, in this case) so it can be confirmed later once the remaining units arrive.
-
Propose a different option. To confirm the task with the specified quantity and automatically create another task in available status, for the remaining amount, in another bin.
-
Raise Stock Incident. To select a reason for the incident. Different types of actions can be performed based on the selected reason.
The ‘Apply to remaining lines with Missing discrepancies’ checkbox is used to apply the selected action to all the ‘Missing’ discrepancies.
For ‘Exceeding’ discrepancies, only the option ‘Raise Stock Incident’ will be available.
Once the necessary actions and reasons have been selected, click the 'Apply' button to save the changes and close the task. Closed tasks will disappear from the front end but can be checked from the back office, in the ‘Issue List’ window.
When the Distribution order receipt is confirmed, it is moved to the section ‘Confirmed’ in the ‘Issue’ and ‘My Assigned Task’ screens. They can also be checked in the back office, in the ‘Distribution order issue’ window.
If defined, the goods receipt tasks can also consider tolerances to accept variations in the number of counted items.
Action Availability and Access Control
The actions and options shown in the New Issue dialog are role-dependent. By default, if a user does not have permission for a specific action, it will not appear in the interface.
This behavior can be overridden per warehouse by defining a custom UI configuration in the ‘Warehouse Definition’ window.
For more details on how access is configured, see the Role and User Action Setup in SSMS section.
|
Option |
User action |
|---|---|
|
From Document |
OpenNewFromDocumentIssueDialog |
|
Assisted |
OpenNewAssistedDistributionOrderDialog |
|
On the Fly (OTF) |
OpenNewOTFDistributionOrderDialog |
|
Issue Return To Vendor: On the Fly (OTF) |
OpenNewIssueReturnDialog |