
Distribution orders facilitate internal movement of goods between stores or from distribution centers to stores without involving pricing. This guide explains how to receive products from existing distribution order issues (DOI) using SSMS. You'll learn to process incoming shipments and update inventory levels accurately.
Understanding distribution orders
Distribution orders consist of two linked documents that work together to track internal product movements. The distribution order issue (DOI) represents goods being sent from one location, while the distribution order receipt (DOR) documents the receiving process at the destination.
When a distribution order issue (DOI) is created in the back office system, the corresponding distribution order receipt (DOR) is automatically generated for the receiving location. This ensures complete tracking of products throughout the transfer process.
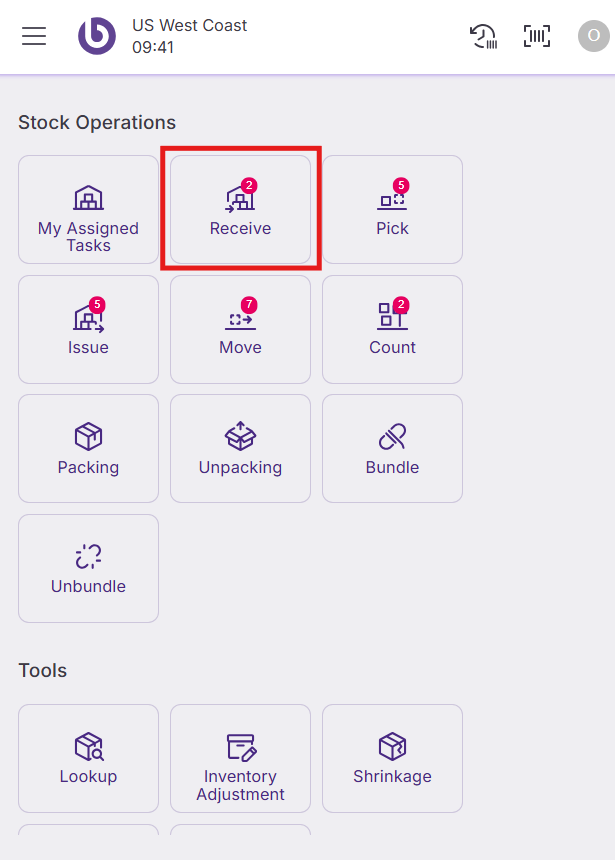
Access receiving functions
Log in to SSMS. The main interface provides access to various warehouse management functions.
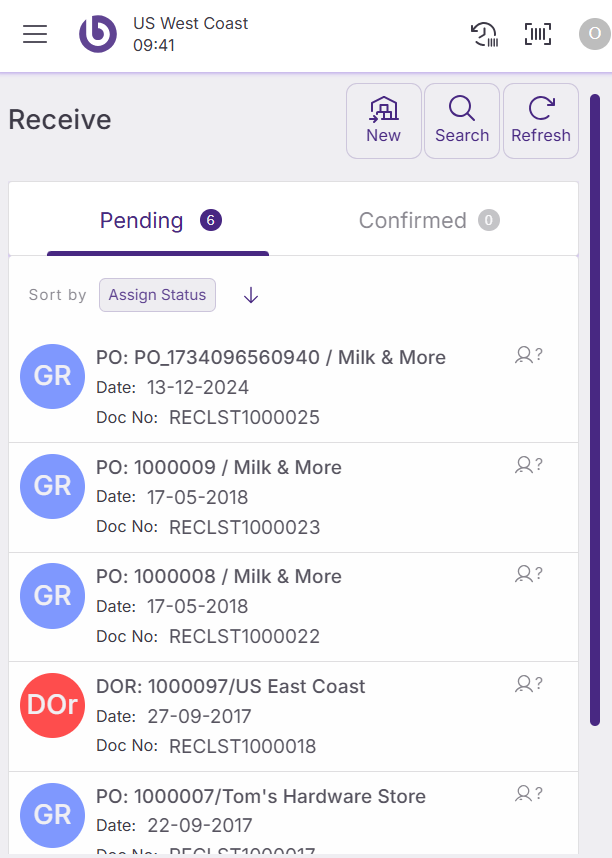
Navigate to the ‘Receive’ section, where pending distribution orders appear for processing. Your location will only display distribution order receipts (DORs) assigned to your specific warehouse or store. You can check here how to receive distribution order receipts in SSMS.
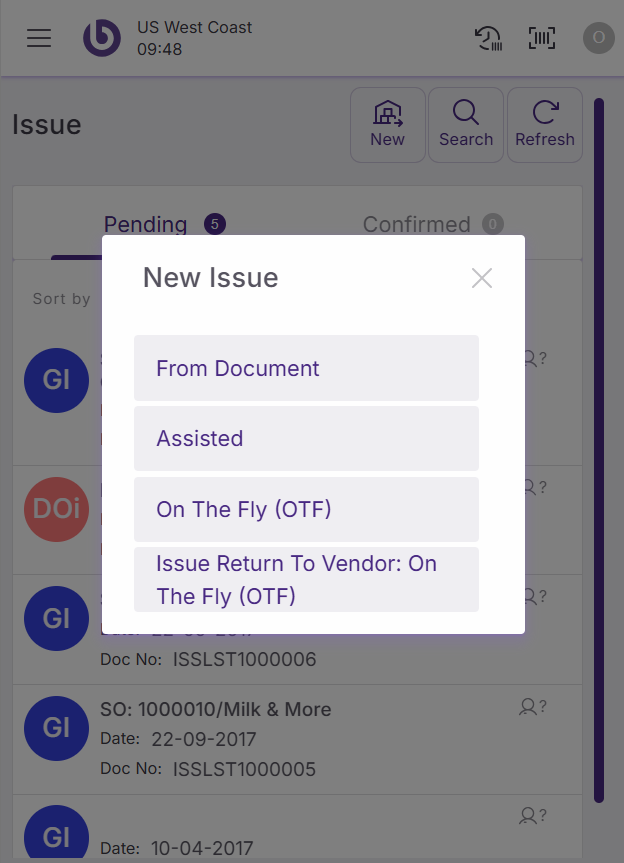
Create distribution orders on the fly
While standard distribution orders originate from the back office, SSMS allows you to create distribution order issues on-the-fly (DOI OTF) for immediate internal transfers.
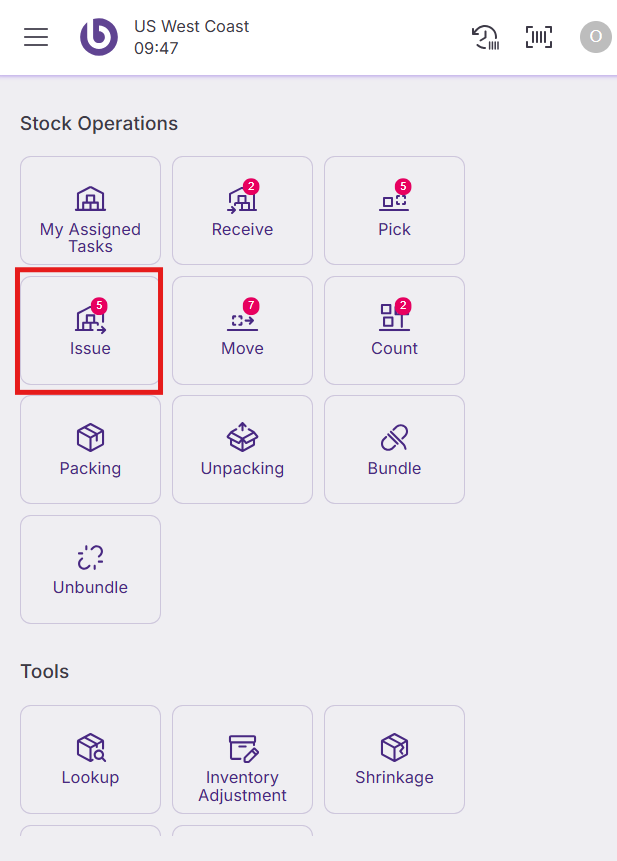
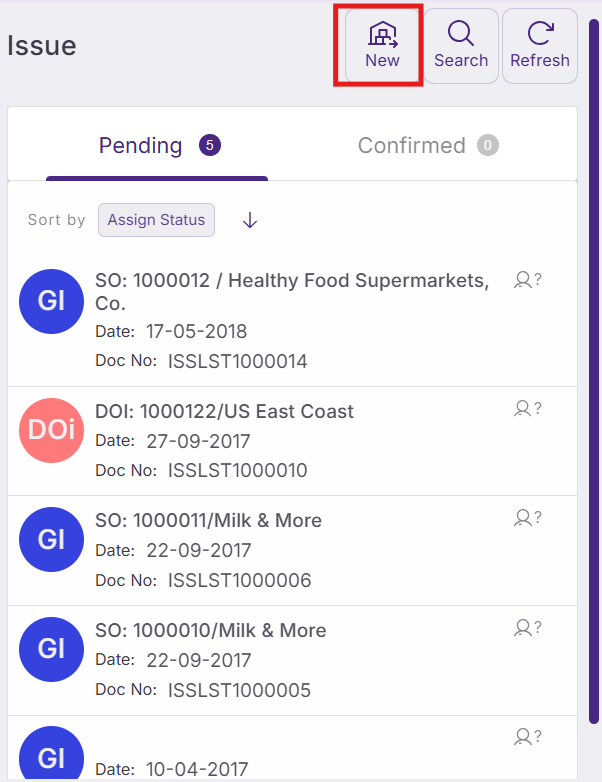
Select ‘New distribution order OTF' from the dropdown menu to begin creating an immediate transfer request. Go to the ‘Issue’ section, click on the ‘New’ button, and the on the 'On The Fly (OTF)’ option.
Configure the distribution order
The 'New distribution order on the fly' dialog opens with fields that define the transfer parameters.
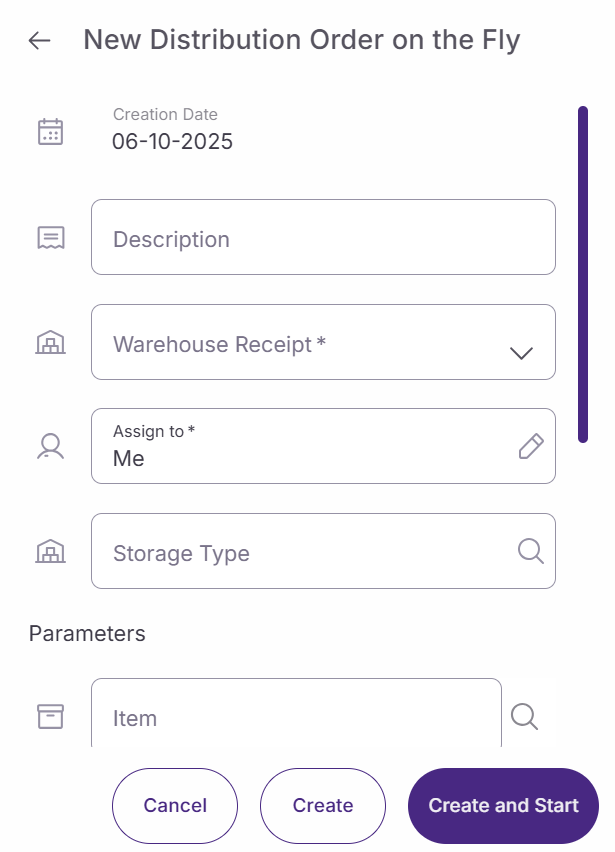
Complete the following settings:
-
Description. Enter a clear description that explains the purpose of this distribution order. Use specific details like "Emergency restock - Dairy products" or "Store transfer - Seasonal items" to help identify the shipment.
-
Warehouse receipt. Click this field to select the destination warehouse that will receive the items. Choose from available locations in your network.
-
Parameter section. These optional filters help narrow product searches when adding items to the distribution order. Leave these empty for broader product selection or use them to focus on specific categories or attributes.
Click 'Create and start' to proceed to the product selection interface.
Add products to the distribution order
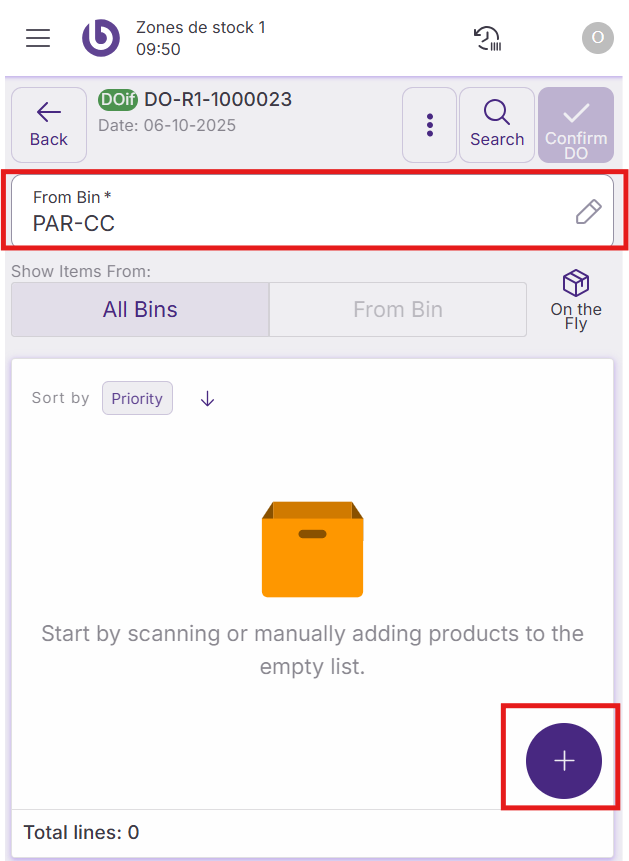
The main distribution order screen allows you to specify which products and quantities to transfer.
Select the source location by clicking 'From bin' and choosing the specific storage area where the products are currently located. This ensures accurate inventory tracking and helps locate items for picking.
Click the green '+' button in the bottom right corner to add products to the distribution order.
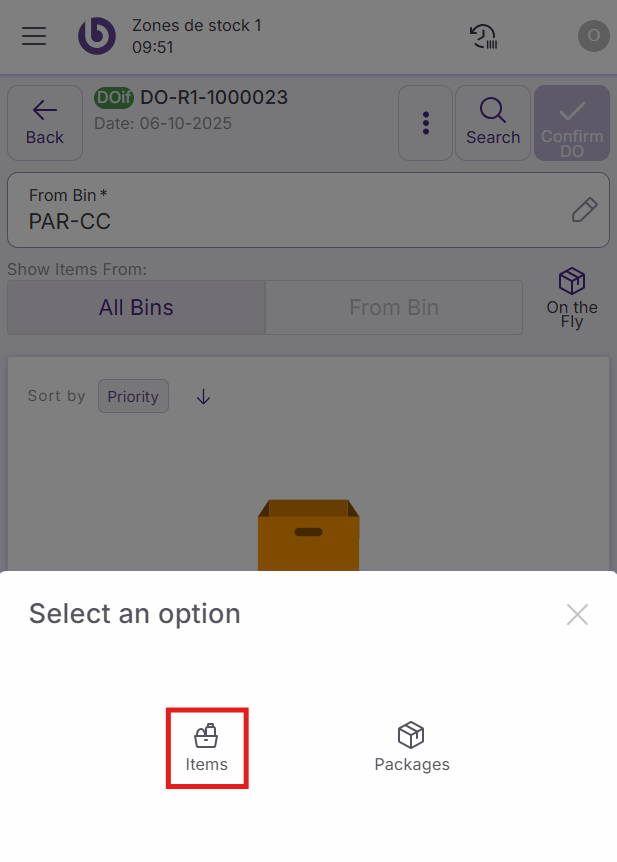
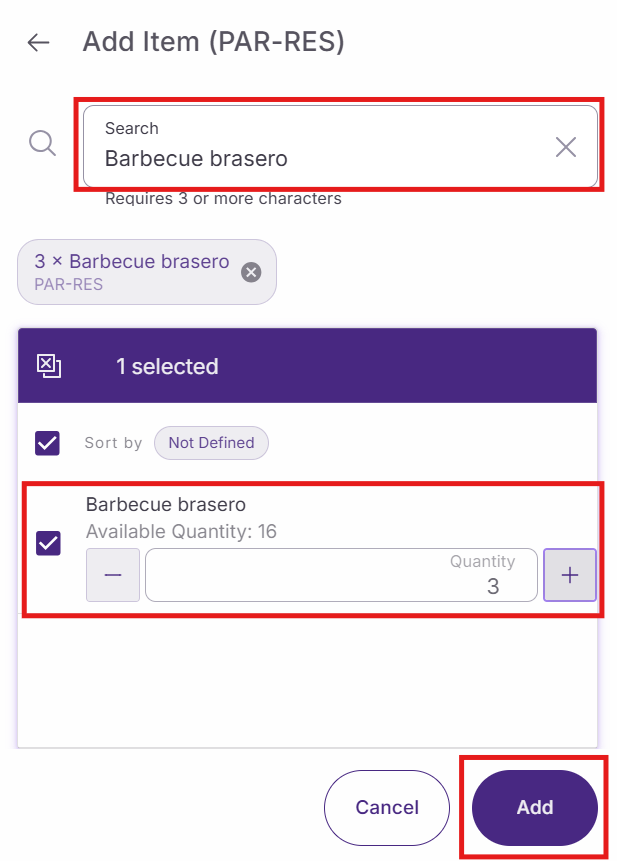
Select products and quantities
The product addition popup opens, allowing you to search for and add specific items to your distribution order. Only products currently available in the selected bin appear in the search results.
Use the search function to locate products by name, SKU, or other identifiers. The system displays matching items from the selected bin's inventory.
Enter the quantity needed for each product. Specify exact numbers based on your transfer requirements and available stock levels.
Click 'Add' to include each product in the distribution order. Repeat this process for all items that need to be transferred.
Finalize the distribution order
Review your complete product list to ensure all necessary items are included with the correct quantities. Verify that the destination warehouse and source bin selections are accurate.
Wait for the system to synchronize all product additions and inventory updates. This ensures that stock levels reflect the pending transfer accurately.
Click 'Confirm DO' to submit the distribution order for processing. The system creates the corresponding documentation and initiates the transfer workflow.
The distribution order moves into the processing queue, where it can be picked, issued, and ultimately received at the destination location according to your warehouse procedures.

Action availability and access control
The actions and options shown in the ‘New DOI’ dialog are role-dependent. By default, if a user does not have permission for a specific action, it will not appear in the interface.
This behavior can be overridden per warehouse by defining a custom UI configuration in the ‘Warehouse Definition’ window.
For more details on how access is configured, see the Role and user action setup in SSMS section.
|
Option |
User action |
|---|---|
|
Assisted |
OpenNewAssistedDistributionOrderDialog |
|
On The Fly (OTF) |
OpenNewOTFDistributionOrderDialog |